Polaris

Functional Artist

Well-known member
Messages
5,654
Reaction score
3,293
Location
Toledo, Ohio
So, I'ma thinkin' I'ma needin' 30mm OD x 13mm ID bearings

Does this sound right?
...& do they make such a thing?
For reference, I looked up to see if 30mm x 13mm bearings were even made or available 🤓
...but, didn't find much :huh:

Then I searched for 29mm x 13mm bearings
...& found a bunch of options, like this: :thumbsup:

PEER 7R8 Radial Ball Bearing 13mm x29mm x 8mm 1/2"id, 1-1/8"od, 5/16"w, SHIELDED
https://www.ebay.com/itm/1662935503...u/UkceHh+acnXZJeiP7iH3NvsQ==|tkp:BFBMzpSJlMhi

They list a size conversion chart

Size (conversions)
  • 13mm x 29mm x 8mm
  • .51 x 1.14 x .315"
  • 1/2" x 1-1/8" x 5/16"
  • Bore: 1/2"
  • OD: 1-1/8"
  • Width: 5/16"
 

Master Hack

Well-known member
Messages
4,330
Reaction score
6,985
Location
Mountain top Labratory
Where l’m from .510 x 1,14 and 1/2 x 1 1/8 are NOT the same size! Must be a china thing?
Will the 1/2 x 1 1/8 (.500 x 1.125) fit your wheel?
if thats the case then an R8 is what ya need.
 
Last edited:

Functional Artist

Well-known member
Messages
5,654
Reaction score
3,293
Location
Toledo, Ohio
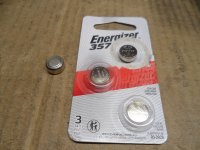
I had to go to (3) stores to find that stupid (LR44) battery :mad2:

They couldn't make that compatibility list any bigger? :huh:
SAM_0127.JPG
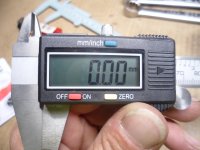
Well, we have power now :thumbsup:
SAM_0130.JPG
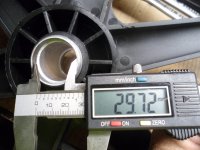
Hub measurement
SAM_0132.JPG
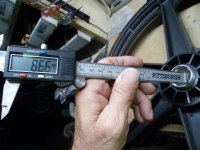
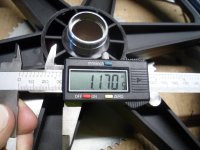
Hub depth measurement
SAM_0133.JPG
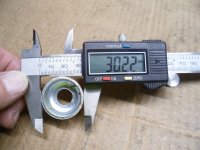
For reference, Bearing Race measurement
SAM_0134.JPG
 

Master Hack

Well-known member
Messages
4,330
Reaction score
6,985
Location
Mountain top Labratory
Decimal please! Yeah l can convert it, but l want to see it. I think we’re dealing with an inch series.
actually all i really need is the ID of the hub socket.
We already established the axle/spindle is a 1/2 bolt, correct?
 

Functional Artist

Well-known member
Messages
5,654
Reaction score
3,293
Location
Toledo, Ohio
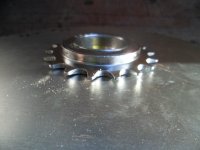
The drive wheel, has a freewheel unit, that threads onto the hub

The outer hub on the freewheel unit has a sprocket for use with bicycle chain (1/2" spacing) & a ~2 1/4" OD
...& we need a bigger sprocket & for use with #35 chain

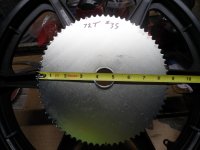
I picked up a 72T - #35 sprocket (~8 1/2" OD)
...but, the center hole is only ~1 1/4" ID
SAM_0094.JPG
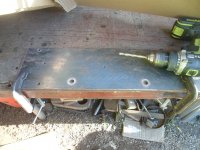
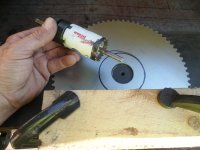
So, I set up a drillin' station (with a 1/4" hole in the middle)
SAM_0097.JPG
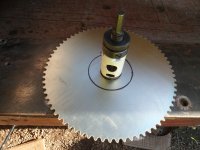
Then, used a 1 1/4" hole saw ta center the sprocket (with the 1/4" center hole) on the drillin' station
SAM_0099.JPG
After centering, I, clamped the sprocket "in place", on the drillin' station
...& removed the hole saw
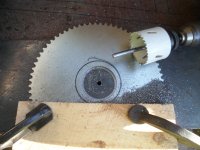
SAM_0103.JPG
Then, I used a 2 1/4" hole saw, ta drill/saw, a bigger center hole :thumbsup:
SAM_0106.JPG
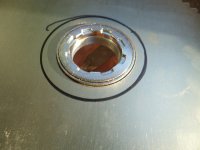
After a bit of clean up & deburrin', it fit pretty nicely, over the freewheel hub :wai:
SAM_0109.JPG
Here's the other side :sifone:
SAM_0108.JPG
 

Functional Artist

Well-known member
Messages
5,654
Reaction score
3,293
Location
Toledo, Ohio
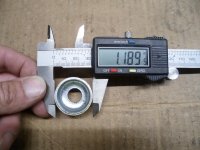
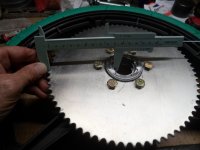
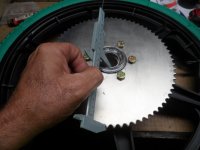
I used a caliper ta help "fine tune" the centering of the sprocket (on/with the freewheel unit) :thumbsup:
SAM_0138.JPG
From every direction (a couple of times) just ta be sure :cheers2:
SAM_0141.JPG
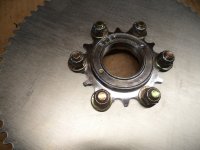
Then, drilled bolt holes, in the sprocket, to align with every (3rd) tooth) on the freewheel unit
SAM_0113.JPG
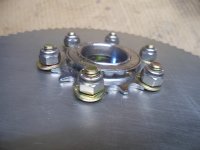
Then, used (6) 5/16" x 1" bolts (with loc-nuts)
...& bolted 'er together good-n-tight :2guns:
SAM_0114.JPG
 

Functional Artist

Well-known member
Messages
5,654
Reaction score
3,293
Location
Toledo, Ohio
We already established the axle/spindle is a 1/2 bolt, correct?
Yup, :thumbsup:

I would rather have the front wheels mounted standard go kart style (only supported on one end)
...which calls for a minimum axle diameter of 1/2" in the Electrathon America rule book ;)

6. Axles supported at both ends must have a diameter of at least 3/8"(10mm).
7. Axles supported only on one end must have a diameter at least ½"(12mm)
 

Functional Artist

Well-known member
Messages
5,654
Reaction score
3,293
Location
Toledo, Ohio
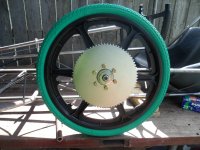
Here is our drive wheel (with tire mounted) :thumbsup:
SAM_0123.JPG
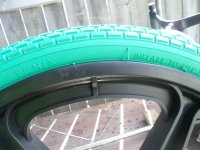
I'doubt these Fenix (China-cheap) tires are gonna last very long (especially under racing conditions)
...but, we'll see ;)
SAM_0125.JPG
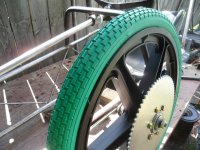
The green tire on the black rim, looks pretty kool :2guns:
SAM_0124.JPG
 

Functional Artist

Well-known member
Messages
5,654
Reaction score
3,293
Location
Toledo, Ohio
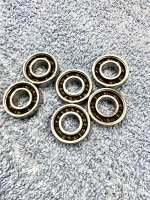
With Master Hack's assistance, it looks like I'ma B needin' some R8 bearings
...so, got 'em on order & they should be here, next week :popcorn:

Now, lets move on to another delima :huh:

I need to add brakes to both front wheels (as per the rule book)
...& I'd like to use disc brakes
...but, how do you install brake rotors onto bicycle wheels?

Well, the rear wheel that I'm gonna use, has 34mm fine threads, on the outside of the hub, for mounting the freewheel unit
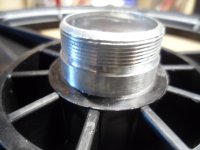
SAM_0115.JPG
...& now, upon looking around, noticed that many mountain bikes use this same method for mounting rotors like this:
https://www.ebay.com/itm/175716099348?var=475102205451
...using a threaded on adapter, like this:
https://www.ebay.com/itm/194966693368

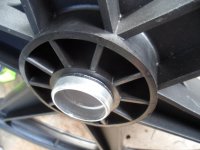
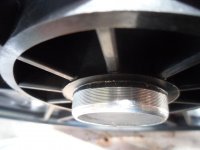
OK so, the front wheels, that I'm gonna use, have some fine groves
...but, don't have any threads on the outside of the hub, for mounting an adapter
...but, it looks like I could, maybe, put some there ;)
SAM_0145.JPGAnother view
SAM_0147.JPG
The threaded hub measures out to be 34.95mm
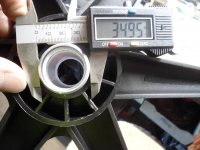
SAM_0150.JPG
From doing some research, it seem that the threads for these freewheels & disc brake adapters are 34mm
...but, not sure exactly what pitch :unsure:

Then, looking at available Threading Dies, it seems like they are available in 34mm x 1mm pitch, 1.5mm pitch & 2mm pitch o_O

Whadda you'alls think?
...does there seem like there is enough "meat" on that hub, ta add some threads to?
 

Functional Artist

Well-known member
Messages
5,654
Reaction score
3,293
Location
Toledo, Ohio
Takes a LOT of torque to turn a 34 mm threading die. You need to look at thread depth also. What material thickness will remain? Theres charts out there…
Ya need to be sure to get the die started straight. Thats a tough job without some mechanical assistance.
Discouraging reply
...but, honest :thumbsup: thanks :cheers2:

May be better & easier to get a couple more of the rear wheels (with the outside threaded hubs)

Thinking it thru, this concept should work, for adding a brake disc to the left front wheel
...but, not for the right front one :huh:

Because when the brakes were applied the left front would tighten the adapted, on to the threads :wai:
...but, the right one would just unthread itself from the hub :furious2:

So, the right side would need left handed threads (another $30.00 tap) :mad2:
...but, I havent seen LH threaded brake disc adapters

More thinkin' required
...we'll get back to it ;)
 

ezcome-ezgo

G'me sumthin to write on
Messages
5,983
Reaction score
2,980
Location
Atlanta, GA
Fortunately aluminum is pretty soft. You might be able to turn a new thread, really you're just trying to get a more depth in it right
 

Master Hack

Well-known member
Messages
4,330
Reaction score
6,985
Location
Mountain top Labratory
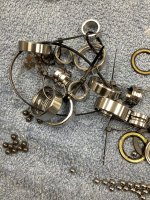
Egor has been busy polishing R8s. They were REMed then he tossed em in the vibe with walnut shells. I told him this was a clasified project. He’s thinkin Mars rover or sumpthing. He doesn’t need to know….
anyway looking good! I hope you negotiated a good deal….
3928F8FF-DA27-4613-9361-F42BD31A4AF7.jpeg
 

Functional Artist

Well-known member
Messages
5,654
Reaction score
3,293
Location
Toledo, Ohio
Red loctite would work for that. You’re not stopping a truck. A machine shop could cut some threads on there without the agony of hand threading, possibly.
IDK about Loc-tighting a brake rotor on o_O

I've always been kinda leery about adhesive bonds
...& have way more faith, in mechanical bonds :thumbsup:

My local machine shop raised their minimum fee from $40.00 up to $75.00 about a year ago (like everything else) :huh::furious2::mad2:

Did them bearings come as a DIY kit? :roflol:
 

Functional Artist

Well-known member
Messages
5,654
Reaction score
3,293
Location
Toledo, Ohio
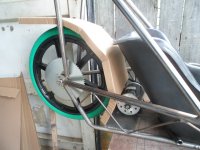
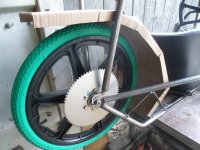
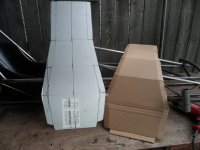
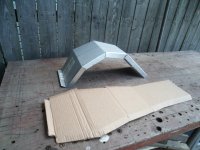
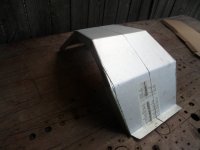
Workin' on a CAD rear fender :thumbsup:
SAM_0156.JPG
Another view
SAM_0157.JPG
I designed it to cover the entire area (inside of the frame) which should help protect the motor & electronics from any moisture (wet track or puddles)
...&/or road debris

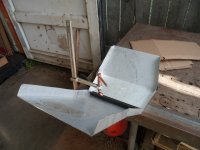
I made 'er out of some 20g steel (from a metal box, that was the housing of an old dishwasher)
SAM_0161.JPG
Bended the sides up first
SAM_0164.JPG
Then, worked on the shape
SAM_0169.JPG
Turned out kinda like this
SAM_0171.JPG
Another view
SAM_0173.JPG
That front "lip" will tuck under & bolt to, the motor mounting plate :thumbsup:
 
Top