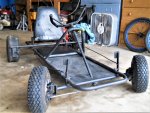
I'm a Pro Scrapper now!
I was walking my dogs past Darrell's house today(the guy who sold me the rototiller), and I stopped to look at some electric motors/generators/alternators(most notable was a free turning Coleman motor, but it had something like a 1/2" PTO and I don't have a use for it).
As I was looking through some crates of miscellaneous junk, I found a bunch of 3 HP Briggs flathead parts!!!

Darrell picks this stuff up on trash day BTW, so who knows where it came from.
I found a piston/con rod, but the piston rings were rusted in place.

I also found some rusty 3 HP valves and tappets, but again, rust had beaten me to it.(I guess I can call it the tetanus crate now

)
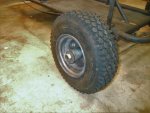
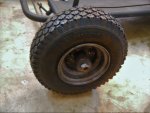
However, I did find a pretty clean 3 HP flywheel, a points type ignition coil, and a spare starter rope assembly!!!

So I made a mental note and came back riding the Hothead, and I ended up paying him only
$1!!! for the parts!!

I don't know what condition the coil is in, but it probably would've been trashed anyways, and it is probably good since it's pre-Magnetron, which means less complicated construction. The starter rope is a bit handy to have around, especially with the handle assembly.
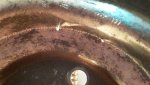
The flywheel was in amazingly good condition!! It has been painted silver on the front, so no rust there, and the only other rust was some VERY light rust on the back and the taper bore.
No cracks or chips of any kind!!
I think the coil and 'wheel came off a silver small-block, as the spark plug wire and the 'wheel are silver. The rust on the 'wheel came off with about 5 seconds of a wire brush! Plus the magnet is still quite strong.
And of course now you're wondering what my plans for the flywheel are? Simple, put it on the Hothead and go
FAST!! 
It's actually in better condition than the original flywheel on the HiPo, plus the engine will rev a little faster! I also plan to go with an adjustable timing coil bracket that I can now use with a 3 HP flywheel.
I just need to get the stuck HiPo flywheel off now....
On the same kart trip today, I also got some scrap wood for a seat bottom!
I actually strapped a plastic crate to the Hothead to carry some tools and the parts today, so what happened is I carried a right angle ruler and a saw to these two big sheets of plywood someone put on the curb and just cut out a big enough chunk!
Since the pillow is a bit ugly and I don't want to wait until I relocate the seat back to make a seat bottom, so I'll just make 2! One for the current setup, and one with original dimensions later!
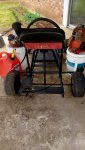
Today was actually the first time I used the Hothead for a utility purpose, despite that it's still got a vacuum leak.
When I left Darrell's place, I had spilled oil when I was oiling the clutch all over the drive tire, and I was starting in decaying leaf litter, so when I hit the gas, the Hothead peeled out for about a solid 5 seconds!!!

It took a while to get going, but it was SO EPIC!!

 s-l1600.jpg428.1 KB · Views: 13
 s-l16002.jpg442.9 KB · Views: 19
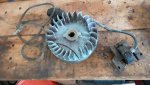


 )
)