My first build

Status
Not open for further replies.

souperman000

New member
Messages
2,466
Reaction score
10
Location
Westlake Village, CA
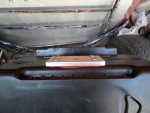
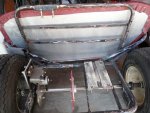
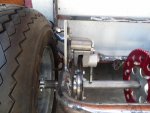
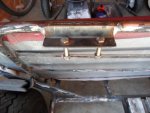
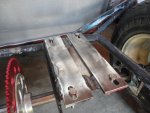
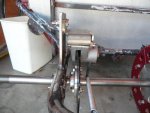
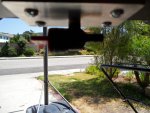
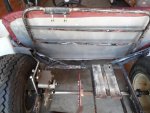
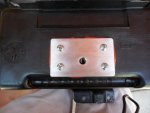
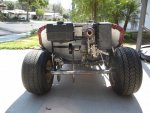
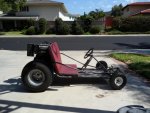
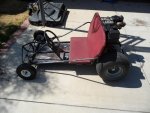
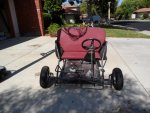
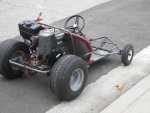
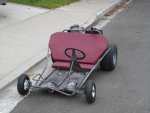
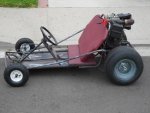
here are the pictures. Its actually starting to look like a kart lol. Note that nothing is secured on the kart do that is why it looks a little weird. Probably working on it more next week, going backpacking for the weekend.

EDIT - I know about the HF tires, they are just there until I can figure something else out.
 

Attachments

  • SAM_1057.jpg
    SAM_1057.jpg
    104.6 KB · Views: 57
  • SAM_1058.jpg
    SAM_1058.jpg
    95.6 KB · Views: 49
  • SAM_1059.jpg
    SAM_1059.jpg
    100.5 KB · Views: 54

souperman000

New member
Messages
2,466
Reaction score
10
Location
Westlake Village, CA
Ok, got with Roger (hes been helping me) friday night and saturday afternoon. We made TONS of progress. From now on I just have to put everything together.

I'll give you a quick rundown of all the pictures -

- 1. We cut the previous motor mount holes so that they were open (off the plate) on one end. Then we milled these two pieces of steel and welded them on. Motor fits like a charm with 1/2" of adjustment available

- 2. Welded a piece of angle iron on the seatback for the gas tank to sit.

- 3. The plate I talked about many pages back has finally come into reality! We drilled the bolt holes and welded it on. The caliper bracket bolts to it.

- 4. A view of the back with the new attachments :D

- 5. If you go back a page or two, you will see that the piece on the bottom of the gas tank where the stop valve screws into was cracked and got repaired. Well, it broke again so we decided to cut it off. We made that little plate, tapped and threaded the middle hole, used silicone sealent, then screwed it on.

- 6. Top view of gas tank plate

- 7. Another pic of the rear

- 8 and 9. The shut off valve in place.

- 10. Caliper bolted up and mounted in place.


:oops: long post :D Well, I am getting there slow and steady. :roflol:
 

Attachments

  • SAM_1080.jpg
    SAM_1080.jpg
    81 KB · Views: 16
  • SAM_1078.jpg
    SAM_1078.jpg
    96.1 KB · Views: 22
  • SAM_1077.jpg
    SAM_1077.jpg
    79.9 KB · Views: 22
  • SAM_1076.jpg
    SAM_1076.jpg
    71.8 KB · Views: 15
  • SAM_1075.jpg
    SAM_1075.jpg
    84.1 KB · Views: 17
  • SAM_1085.jpg
    SAM_1085.jpg
    79.8 KB · Views: 24
  • SAM_1084.jpg
    SAM_1084.jpg
    70.2 KB · Views: 16
  • SAM_1083.jpg
    SAM_1083.jpg
    122.8 KB · Views: 14
  • SAM_1082.jpg
    SAM_1082.jpg
    94.6 KB · Views: 19
  • SAM_1081.jpg
    SAM_1081.jpg
    75.8 KB · Views: 16

OzFab

Well-known member
Messages
15,615
Reaction score
66
Location
Warwick Qld, Australia
Thanks! :thumbsup:Yea, roger pretty much has an entire machine sop in his garage. Lathe, mill, Drill press, welder, etc. And a specific tool for every job you can think of. :drool5:

Awesome, sound a bit like my mate Pete but, ATM, the only things that actually work are the lathe & the TIG/ARC welder :roflol:
 

souperman000

New member
Messages
2,466
Reaction score
10
Location
Westlake Village, CA
I am having a bit of trouble with the brake cable. When I pull on the other end of the cable, the conduit moves to the brake lever instead of the other way around.

I'm thinking it would be easier to run to the hardware store and get a specific length of cable. (used kinda like a rod). Would that be the best idea?

EDIT - I goofed :oops: I just have to secure the conduit....duh
 

landuse

Moderator
Staff member
Messages
18,740
Reaction score
506
Location
Pietermaritzburg, South Africa
Yup, securing the conduit is the only way you get brakes working. Otherwise the whole darn thing moves and nothing happens. Only the cable inside the conduit should be able to move
 

souperman000

New member
Messages
2,466
Reaction score
10
Location
Westlake Village, CA
Connected brake cable (total pain in the @ss) and changed engine oil. If I have time then its throttle cable, chain (have to research how to attach master link), engine/gas tank mount.

Im leaving the state for a wedding on thursday, and I start school a week from tomorrow........hopefully I can get it done before sumer ends, but you know how my self proclaimed deadlines are :ack2:
 

landuse

Moderator
Staff member
Messages
18,740
Reaction score
506
Location
Pietermaritzburg, South Africa
Connected brake cable (total pain in the @ss) and changed engine oil. If I have time then its throttle cable, chain (have to research how to attach master link), engine/gas tank mount.

Im leaving the state for a wedding on thursday, and I start school a week from tomorrow........hopefully I can get it done before sumer ends, but you know how my self proclaimed deadlines are :ack2:

With regards to the masterlink (which is dead easy to just slide on), make sure that the closed side of the masterlink clip is facing the direction of chain travel. This makes it really hard for it to snag on something, be pushed off by mistake and have the chain come loose.

If you look at the pics below, you will see how the masterlink is attached, and also a pic showing the clip and how the closed end must face the direction of chain travel
 

Attachments

  • how-to-repair-a-bicycle-3.jpg
    how-to-repair-a-bicycle-3.jpg
    17 KB · Views: 8
  • large_1206_530-series-chain-master-link-photo-1.jpg
    large_1206_530-series-chain-master-link-photo-1.jpg
    34.6 KB · Views: 2

souperman000

New member
Messages
2,466
Reaction score
10
Location
Westlake Village, CA
Did some more work on the kart this afternoon. All that is left to do is the throttle cable and the kill switch.

The kart will have to wait to be finished until after I get back, but I have a nice, freshly paved road awaiting my first test ride :devil2:

Oh, and now I get why everyone says that live axles have crappy steering...I didn't think it would be this bad. I think it will steer better with me sitting in the kart though.

EDIT - if the kart looks crooked, its not. Its sitting on my driveway so its slanted a little.
 

Attachments

  • SAM_1086.jpg
    SAM_1086.jpg
    104.1 KB · Views: 21
  • SAM_1087.jpg
    SAM_1087.jpg
    98.6 KB · Views: 23
  • SAM_1088.jpg
    SAM_1088.jpg
    102.4 KB · Views: 18
  • SAM_1089.jpg
    SAM_1089.jpg
    89.4 KB · Views: 19
  • SAM_1090.jpg
    SAM_1090.jpg
    101.4 KB · Views: 23

JCB003

New member
Messages
66
Reaction score
0
I just read through this thread. That thing is a beast. I see tons of potential with a some paint and a little work on the seat...sort of reminds me of a 1930's hot rod. Your road looks like a drag strip!
 
Status
Not open for further replies.
Top