2019 - Ultimate Yard Kart

JTSpeedDemon

2019 Build Off Winner!
Messages
4,026
Reaction score
162
Location
Texas
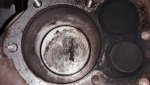
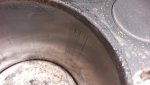
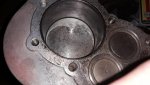
Darn, just noticed this morning that I've got some scoring in the cylinder wall. One deeper scratch that lightly catches my nail, and a patch of light ones just enough to feel rough to my fingernail.
I can see a little bit of factory crosshatch near the top, but everywhere else in the cylinder looks a bit worn.
I think it's from me removing/installing the piston, but IDK.
Should I be concerned? Or should I hone it just to make sure?
Since it is a steel bore, I think I'd be ok with honing it, but first I want to know if it's necessary.
Main pic is just a general pic of the cylinder, and the 2 close ups are the areas of concern. 3rd pic is the one I'm most worried about.
:(
EDIT - I was reading on the web that the rings do a small degree of self machining, and the reason why honing is important is to soften the metal so the rings can polish everything to be "just right".
So I'm just gonna put it back together once I check everything and cross my fingers. since it's a steel bore it might be OK.
 

Attachments

  • 20191017_085915.jpg
    20191017_085915.jpg
    328.9 KB · Views: 11
  • 20191017_085922.jpg
    20191017_085922.jpg
    202.1 KB · Views: 9
  • 20191017_085947.jpg
    20191017_085947.jpg
    195.5 KB · Views: 10

Randy H

New member
Messages
892
Reaction score
27
If you have a hone, I would use it. Ideally you would put on new rings.

Even more ideally you would measure the bore with a dial bore gauge.

I know it gets costly to do things right. Sometimes you must make due.

I wouldn't put it back together like that. If you don't have a hone, I'd at least clean up the scratches with some 400 grit wet/dry sandpaper. Followed by a scotchbrite pad.

At least try to prevent more ring damage. If you don't replace the rings at least clean the up as well.

You can get a redneck idea of bore wear by placing a ring in the bottom of the cylinder, there is no wear there. Measure ring end gap with a feeler gauge. Then place the ring near the top of the cylinder before the ridge, maximum wear. Measure there. Compare the difference.

There are many better ways.

https://www.hastingspistonrings.com/tech-tips-faqs/checking-compression-ring-gaps
 
Last edited:

JTSpeedDemon

2019 Build Off Winner!
Messages
4,026
Reaction score
162
Location
Texas
I think it may be from carbon deposits I knocked loose while cleaning it, or there was some time when I was still getting it to run, and it ran without and air filter for a bit.
I'll try the fine grit sandpaper.

---------- Post added at 02:33 PM ---------- Previous post was at 02:13 PM ----------

Oh yah, should note:
I'm not gonna go hog wild on the fine grit sandpaper! It would be worse if I made the cylinder out of round!
I'll try the fine grit sandpaper, and if all else fails, I'll buy a hone.


---------- Post added at 3:40 PM ---------- Previous post was at 02:33 PM ----------

Ok, yeah. After reading about how to hone a cylinder PROPERLY, I'm only going to do it as a last resort.
And even then, I have a pro hot rodder friend who I'd see if he could do it for me.
So, fine grit sandpaper it is!
 

J.S.@SMS

Road Hazard
Messages
866
Reaction score
17
Location
Weeki Wachee Fl.
The way honing works isn't that the rings polish the bore, what happens is that the honed bore files down the rings so that they seal properly.
 

JTSpeedDemon

2019 Build Off Winner!
Messages
4,026
Reaction score
162
Location
Texas
Well, since I still need to get to the hardware store and my starter clutch wrench isn't here, I figured I'd clean it up a bit.
Partially for the glam factor, and partially to make sure there's no loose bits of carbon bouncing around, scoring things. It acts just like dirt when it's in there! :ack2:
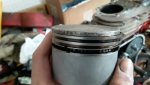
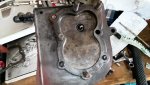
Anyway, here's the pic, I also took out and cleaned the piston, as well as the cylinder head. Brass wire brushes work great for that!
There's also some scoring on the side of the piston, above the first compression ring, but I don't think that's a worry. Rings look good.
And there's a pic of that special hi comp head! I still have yet to index the plug.....
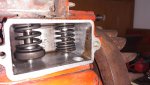
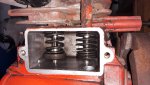
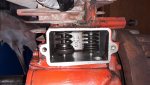
Also, for some reason, it feels like the exhaust valve spring is heavier than the intake??? Explanation please?
 

Attachments

  • 20191017_155438.jpg
    20191017_155438.jpg
    229.4 KB · Views: 11
  • 20191017_160253.jpg
    20191017_160253.jpg
    196.8 KB · Views: 9
  • 20191017_160314.jpg
    20191017_160314.jpg
    250 KB · Views: 10

JTSpeedDemon

2019 Build Off Winner!
Messages
4,026
Reaction score
162
Location
Texas
Flywheel ain't comin' off, so I'm gonna hit with the PB Blaster for a few days and try again.
I also transferred the starter clutch's components to the good, clean, 4 bolt casing Randy H sent (thanks!), so that way I can secure the shroud with 4 bolts, which I feel is a good idea, since these parts were never designed to spin at ungoverned speeds.
EDIT - Oh yeah, this flywheel doesn't have puller holes, so I'm just gonna have to stick with the good ol' BFH and PB Blaster.
 

Attachments

  • 20191018_122001.jpg
    20191018_122001.jpg
    190.5 KB · Views: 4

JTSpeedDemon

2019 Build Off Winner!
Messages
4,026
Reaction score
162
Location
Texas
Unbelievable.
What a wretchedly bad turn of events.
I was trying to extract the broken shroud bolt, but it didn't budge, so I tried drilling it out.
Tap broke in the hole. :mad2:
Tried using a screwdriver and pin punch to turn it out a little bit, but instead broke the casting a little bit. Luckily it didn't break the fins themselves, but it's still a real head smacker.
And then! TO TOP IT OFF!! NOW I NEED A NEW SIDECOVER BEARING!!!!!:mad2::mad2::mad2::mad::ack2:
I think a metal shaving fell in there, and now it makes sounds it didn't before and feels a way it didn't before.

This is a seriously deep bummer for me, since this is my precious baby. And it's not just that I'm kicking myself, on top of it, I have to buy a new bearing, the broken hole is nasty looking, and it just STINKS!!
:mad:
 

JTSpeedDemon

2019 Build Off Winner!
Messages
4,026
Reaction score
162
Location
Texas
Yeah, that's what I'm doing.
I think when my head clears, I'll JB Weld a stud in there, so I can use the shroud to cover up the ugly.
And sometime later I'll get a fresh sidecover bearing, and I'll keep working PB Blaster into the flywheel taper.
On hold.(elevator music):(
EDIT - I also think I'll stick some chrome rings in it(part# 299742), but that depends on how well the 400 grit sandpaper works, and if I can afford the rings and expander.
 

JTSpeedDemon

2019 Build Off Winner!
Messages
4,026
Reaction score
162
Location
Texas
Well, maybe the sidecover bearing can be salvaged...
After working a bunch of PB Blaster into it, it's not trying to seize any more. At one point it was so bad that the crank would turn before the bearing would. :(
I'll try working a bunch of oil into it to see if it can be saved. My Haynes manual said not to turn a dry bearing, so now I know why!
If it can't be saved, there's a guy at my church that works for an automotive machine shop, and he said he could press the bearing off, which is good because the local machine shop isn't responding.
I've been reviving the RC10 lately, so I need to get back to this. Probably this week.
 

JTSpeedDemon

2019 Build Off Winner!
Messages
4,026
Reaction score
162
Location
Texas
Went and got a 555207 standard Raptor rod for $20.
A good backup in case it has better oil clearance than the other one, plus the rod bolts won't be stretched at all(the other ones are getting very slightly stretched, I can tell because the threads aren't as smooth anymore).
So in total I've got bout $60ish in this rod install, and I'll come out of it with spare parts and tools. All for about the price of a single ARC rod. Plus standard 555207 Raptor rods are getting scarcer, so I can nab it while I can. Pretty good deal.
If I keep the oddball 555208 for another flathead, it'd be good for a slightly more worn crankpin.
Now I just need to get out there soon to save that bearing by pumping oil into it, clean up the cylinder, and put it all back together. Right now I'm focusing on getting the RC10 on the track, since my dad will be taking me to the track this month.

-SELF MERGED-

Oh yeah, I just noticed that the spark plug is already pointing towards the exhaust valve, so I don't have to index it!
Why is it harder to turn on the exhaust stroke than the intake stroke? Is the exhaust valve spring heavier or something? Or does that mean I have something binding?
 

JTSpeedDemon

2019 Build Off Winner!
Messages
4,026
Reaction score
162
Location
Texas
Woot! Pumped a little 5W-30 synthetic oil into the bearing, and it was instantly buttery smooth again!
Phew.
I also took the 400 grit sandpaper to the cylinder, so now the little patch of scratches is totally smooth, and the single scratch is a bit better. I'll probably smooth it out a bit more.

Now I have another problem.
So with the sidecover on, turning the crankshaft by hand CCW(the way it turns when running), it locks right after the intake valve closes. I don't dare apply force since I might break something, but turning it the other way, it's fine until it hits the same point.
It's only with the sidecover on that it happens, and the governor gears look ok to me.
Help!
Sidecover on, piston and con rod not installed. Any idea why it would do this? I'm 90% sure it's the governor gear since it only happens with the sidecover on(just another excuse to remove it:D:D).
But I want y'all's input in case it's something else.
 

landuse

Moderator
Staff member
Messages
18,772
Reaction score
555
Location
Pietermaritzburg, South Africa
Woot! Pumped a little 5W-30 synthetic oil into the bearing, and it was instantly buttery smooth again!
Phew.
I also took the 400 grit sandpaper to the cylinder, so now the little patch of scratches is totally smooth, and the single scratch is a bit better. I'll probably smooth it out a bit more.

Now I have another problem.
So with the sidecover on, turning the crankshaft by hand CCW(the way it turns when running), it locks right after the intake valve closes. I don't dare apply force since I might break something, but turning it the other way, it's fine until it hits the same point.
It's only with the sidecover on that it happens, and the governor gears look ok to me.
Help!
Sidecover on, piston and con rod not installed. Any idea why it would do this? I'm 90% sure it's the governor gear since it only happens with the sidecover on(just another excuse to remove it:D:D).
But I want y'all's input in case it's something else.

I hope you didn't just go to town any old way with that sandpaper in the bore. You are supposed to have a cross hatched pattern on the bore walls. That is why you use a hone
 

JTSpeedDemon

2019 Build Off Winner!
Messages
4,026
Reaction score
162
Location
Texas
Yeah, I've been working on making it a crosshatch pattern, and not making it out of round either.
Since the locking is only with the sidecover on, I'm almost certain it's the governor. But oh well, just another excuse to remove it!:D:D
 

JTSpeedDemon

2019 Build Off Winner!
Messages
4,026
Reaction score
162
Location
Texas
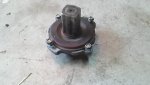
Finally took the breather cover off, this is what I found. That's one beefy exhaust spring!:drool5:
 

Attachments

  • 20191104_092346.jpg
    20191104_092346.jpg
    269.1 KB · Views: 5
  • 20191104_092340.jpg
    20191104_092340.jpg
    319.7 KB · Views: 5
  • 20191104_092331.jpg
    20191104_092331.jpg
    302.4 KB · Views: 5

JTSpeedDemon

2019 Build Off Winner!
Messages
4,026
Reaction score
162
Location
Texas
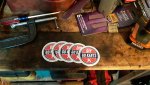
The EASIEST mod for 10 extra horsepower!

Woot! Thanks Robert! These are gonna look awesome along with the Bird engineering stickers!:popcorn::cool:
 

Attachments

  • 20191104_174151.jpg
    20191104_174151.jpg
    325.6 KB · Views: 4

JTSpeedDemon

2019 Build Off Winner!
Messages
4,026
Reaction score
162
Location
Texas
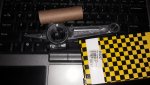
The standard 555207 Raptor rod also came in today!:cheers2:
I'm gonna make sure it has more favorable oil clearance than the 555208 before I go through the trouble of installing it in the piston(I'll put masking tape on the end so I don't nick the cylinder wall).
 

Attachments

  • Raptor Rod No 2.jpg
    Raptor Rod No 2.jpg
    285.1 KB · Views: 3

JTSpeedDemon

2019 Build Off Winner!
Messages
4,026
Reaction score
162
Location
Texas
Woot!
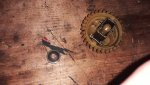
Governor is OUT!!!:wai::cheers2:
All I had to do was pull gently with my fingers and it came right off! And I remembered to remove the washer.:p
The Raptor rod oil clearance checked out at 0.002"!! Perfect!:2guns:
Time to put it all back together! :stir:
EDIT - :oops:, my finger was photobombing!:roflol:
 

Attachments

  • 20191105_150727.jpg
    20191105_150727.jpg
    357.6 KB · Views: 4
  • 20191105_150733.jpg
    20191105_150733.jpg
    316.6 KB · Views: 4

JTSpeedDemon

2019 Build Off Winner!
Messages
4,026
Reaction score
162
Location
Texas
Neat! Through a bunch of researching and calculating, I managed to determine that the compression ratio of this engine is ~8/1, give or take some.
That's a pretty hefty increase compared to the usual 6.5/1.
After closely comparing pics of my cylinder head and standard heads off standard 5 horses, I have concluded that the only real difference is that this head basically has a smaller valve area, but otherwise looks very similar to the standard head.
So it may or may not compromise flow, I'll find out when I put a tach on it and rev it all the way out once it's all put back together. If it revs to valve float, it's fairly safe to assume that it does not affect flow too badly.
 
Top