2017 - !Arriba!

Status
Not open for further replies.

Functional Artist

Well-known member
Messages
4,427
Reaction score
1,718
Location
Toledo, Ohio
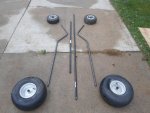
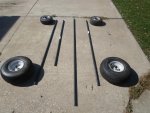
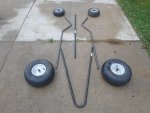
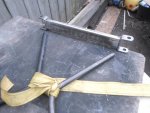
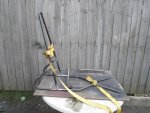
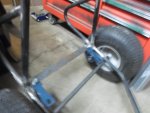
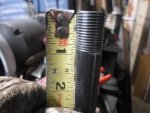
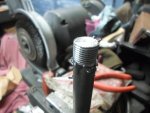
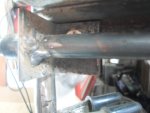
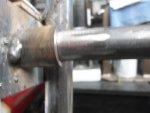
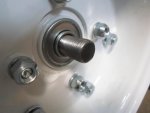
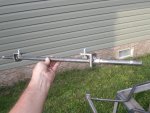
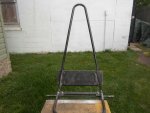
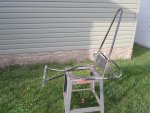
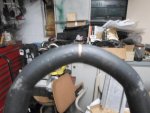
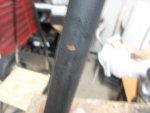
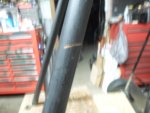
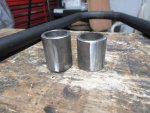
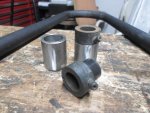
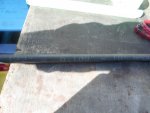
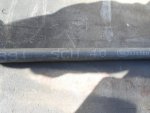
Picked up some 1/2" schedule 40 water pipe from Home Depot
 

Attachments

  • SAM_6065.jpg
    SAM_6065.jpg
    274.6 KB · Views: 5
  • SAM_6069.jpg
    SAM_6069.jpg
    263.8 KB · Views: 4
  • SAM_6072.jpg
    SAM_6072.jpg
    250.6 KB · Views: 8
  • SAM_6038.jpg
    SAM_6038.jpg
    404.3 KB · Views: 5
  • SAM_6041.jpg
    SAM_6041.jpg
    460.2 KB · Views: 3

Functional Artist

Well-known member
Messages
4,427
Reaction score
1,718
Location
Toledo, Ohio
So

...here's the plan :thumbsup:


Cut it up into several pieces

...(2) side rails

...(1) rollbar/seatback

...(1) steering support


Next

...dig out the pipe bender
 

Attachments

  • SAM_6048.jpg
    SAM_6048.jpg
    192 KB · Views: 5

Functional Artist

Well-known member
Messages
4,427
Reaction score
1,718
Location
Toledo, Ohio
Side rails (2 @ 56" ea.)

Left Rail

measure 12" - mark
measure 10" - mark
measure 20" - mark


put in bender
1. @ 12" do - 35 pumps

2. @ 22"do - 20 pumps
(inverted 180* from 1st bend)

3. @ 42" do - 75 pumps
(leaning inwards, toward 1st bend ~20*)


Right Rail

Do everything the exact same but, exactly opposite :thumbsup:
 

Attachments

  • SAM_6059.jpg
    SAM_6059.jpg
    412.5 KB · Views: 5
  • SAM_6051.jpg
    SAM_6051.jpg
    342.6 KB · Views: 3
  • SAM_6043.jpg
    SAM_6043.jpg
    510.7 KB · Views: 2

Functional Artist

Well-known member
Messages
4,427
Reaction score
1,718
Location
Toledo, Ohio
Bends came out pretty good :thumbsup:

Welded the rollbar/seat back down to the (2) side rails

& welded the curled up parts to the back side of the rollbar/seat back
 

Attachments

  • SAM_6063.jpg
    SAM_6063.jpg
    422.9 KB · Views: 3
  • SAM_6085.jpg
    SAM_6085.jpg
    366.4 KB · Views: 4
  • SAM_6083.jpg
    SAM_6083.jpg
    358.8 KB · Views: 4
  • SAM_6088.jpg
    SAM_6088.jpg
    521.3 KB · Views: 6

Functional Artist

Well-known member
Messages
4,427
Reaction score
1,718
Location
Toledo, Ohio
Used a ratchet strap to precisely draw the sides together

Tack welded the ends of the sides to the front axle bar

That'll hold it together for now

Next, we'll square up the rear end :thumbsup:
 

Attachments

  • SAM_6097.jpg
    SAM_6097.jpg
    304.2 KB · Views: 3
  • SAM_6094.jpg
    SAM_6094.jpg
    292.4 KB · Views: 3
  • SAM_6093.jpg
    SAM_6093.jpg
    320.6 KB · Views: 2
  • SAM_6092.jpg
    SAM_6092.jpg
    356.1 KB · Views: 2

Functional Artist

Well-known member
Messages
4,427
Reaction score
1,718
Location
Toledo, Ohio
Welded a ~16" piece of 1 1/4" angle steel across & between the side rails right where the rollbar/seatback come together

This is where the rear axle will mount & will also be the front support for the battery box :thumbsup:


The rear axle-

The original plan was to use (2) axles & (4) pillow block bearings


* RE-EVALUATE

Unnecessary & too heavy


* Exploring options :cool:
 

Attachments

  • SAM_6099.jpg
    SAM_6099.jpg
    222.6 KB · Views: 3
  • SAM_6102.jpg
    SAM_6102.jpg
    219.8 KB · Views: 5
  • SAM_6105.jpg
    SAM_6105.jpg
    239.3 KB · Views: 6
  • SAM_6103.jpg
    SAM_6103.jpg
    244 KB · Views: 7

Functional Artist

Well-known member
Messages
4,427
Reaction score
1,718
Location
Toledo, Ohio
Huh. I figured the rear axle would be hanging off the back loops.

That's where the power pack & propulsion unit(s) go :thumbsup:

Goin'

...for little & big @ the same time

small foot print with lots of room

& lots of power


But, also


...lightweight & heavy duty @ the same time

I am using a minimalistic approach

& trying to make it strong by design


Goals- :2guns:

easy to enter & exit

comfortable to drive

powerful - torquey & speedy (over 20 mph)

strong but, don't over build it (keep her ~100 lbs.)
 

Functional Artist

Well-known member
Messages
4,427
Reaction score
1,718
Location
Toledo, Ohio
Picked up some stuff :thumbsup:

dual flanged hubs w/ 5/8" sealed bearings

6" drive wheels

72T #35 sprocket(s)


So, goin' with

15 x 6.00 - 6 rear tires & a 7.2:1 gear ratio :2guns:
 

Attachments

  • SAM_6129.jpg
    SAM_6129.jpg
    166.5 KB · Views: 6
  • SAM_6133.jpg
    SAM_6133.jpg
    234.1 KB · Views: 6
  • SAM_6126.jpg
    SAM_6126.jpg
    172.8 KB · Views: 5
  • SAM_6128.jpg
    SAM_6128.jpg
    182.3 KB · Views: 3
  • SAM_6124.jpg
    SAM_6124.jpg
    287.3 KB · Views: 3
Last edited:

Functional Artist

Well-known member
Messages
4,427
Reaction score
1,718
Location
Toledo, Ohio
Next on the agenda

Motor mount plate 3/16" x 5 1/2" x 18"

used handy dandy cut off tool to whack off the excess material :thumbsup:


WOW! 5 lbs. just for the motor mount plate :ack2:


trim the corners & clean 'er up a bit

layout a grid pattern to help keep everything square

mark & drill (2) holes for each slot

(16) holes for (8) slots

used a Dremel to connect the holes

& a 5 1/16" drill bit to smooth 'em out :2guns:
 

Attachments

  • SAM_6182.jpg
    SAM_6182.jpg
    239.5 KB · Views: 3
  • SAM_6172.jpg
    SAM_6172.jpg
    494.2 KB · Views: 3
  • SAM_6169.jpg
    SAM_6169.jpg
    361 KB · Views: 5
  • SAM_6166.jpg
    SAM_6166.jpg
    432.6 KB · Views: 4
  • SAM_6162.jpg
    SAM_6162.jpg
    360.8 KB · Views: 4
  • SAM_6186.jpg
    SAM_6186.jpg
    215.6 KB · Views: 3
  • SAM_6190.jpg
    SAM_6190.jpg
    287.7 KB · Views: 3
  • SAM_6191.jpg
    SAM_6191.jpg
    254.3 KB · Views: 3
  • SAM_6203.jpg
    SAM_6203.jpg
    223.2 KB · Views: 2

Functional Artist

Well-known member
Messages
4,427
Reaction score
1,718
Location
Toledo, Ohio
Made up a solid axle to mount the dual flanged hubs to

1 - 30" piece of 5/8" rod
2 - ~2" pieces of 3/16" angle steel (mounting brackets)
2 - ~1" pieces of 7/8" pipe (mount to hub spacer)

started by threading ~1" of each end of the rod

cleaned up a bit on wire wheel

drilled 5/8" holes in each mounting bracket to run the axle thru & 1/2" holes for mounting it to the kart


bolted the mounting brackets to the frame

run the axle thru (roughly centered)

slide a spacer on each end

slide a hub on each side

snug up with a fine threaded nut on each end


Now that everything is where it's supposed to be we can weld 'er up

just spot welds to tack everything in place

disassembled & welded 'er up good :2guns:

(don't want to get our new hubs all discolored from welding)
 

Attachments

  • SAM_6218.jpg
    SAM_6218.jpg
    269.1 KB · Views: 2
  • SAM_6214.jpg
    SAM_6214.jpg
    242 KB · Views: 3
  • SAM_6207.jpg
    SAM_6207.jpg
    213 KB · Views: 4
  • SAM_6206.jpg
    SAM_6206.jpg
    235.3 KB · Views: 3
  • SAM_6226.jpg
    SAM_6226.jpg
    209.6 KB · Views: 6
  • SAM_6224.jpg
    SAM_6224.jpg
    191.2 KB · Views: 4
  • SAM_6222.jpg
    SAM_6222.jpg
    197.7 KB · Views: 4
  • SAM_6219.jpg
    SAM_6219.jpg
    174.6 KB · Views: 3
  • SAM_6240.jpg
    SAM_6240.jpg
    360.3 KB · Views: 6

Functional Artist

Well-known member
Messages
4,427
Reaction score
1,718
Location
Toledo, Ohio
Now

that we know where the rear wheels go

we can get the motor mount mounted

drilled (2) 1/8" holes to tack the plate in place

to be sure nothing moves while welding


after welding

I removed the screws

& welded them holes up too :2guns:
 

Attachments

  • SAM_6249.jpg
    SAM_6249.jpg
    368.2 KB · Views: 6
  • SAM_6241.jpg
    SAM_6241.jpg
    459.8 KB · Views: 8
  • SAM_6236.jpg
    SAM_6236.jpg
    297.9 KB · Views: 3
  • SAM_6234.jpg
    SAM_6234.jpg
    296.7 KB · Views: 3
  • SAM_6237.jpg
    SAM_6237.jpg
    266 KB · Views: 4

Functional Artist

Well-known member
Messages
4,427
Reaction score
1,718
Location
Toledo, Ohio
Next up is the steering support


think were gonna go a little different direction

...than our original drawing/concept :cornut:


using the same piece we bent

...just not

a big looping nose piece

...more of just a simple support


~12" seems to be about the right height

made a couple of marks

then lined up the angle, & marked

gonna split it in half

round em' up a bit

& weld a piece of pipe between

* got some pipe that will hold these grease able bushings
they are (originally) for riding lawn mower front wheels
should work good & never squeak :thumbsup:
 

Attachments

  • SAM_6253.jpg
    SAM_6253.jpg
    230.4 KB · Views: 2
  • SAM_6254.jpg
    SAM_6254.jpg
    156.9 KB · Views: 2
  • SAM_6257.jpg
    SAM_6257.jpg
    194.1 KB · Views: 2
  • SAM_6259.jpg
    SAM_6259.jpg
    269.3 KB · Views: 2
  • SAM_6260.jpg
    SAM_6260.jpg
    283.9 KB · Views: 4
Status
Not open for further replies.
Top