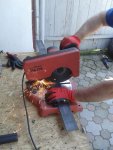
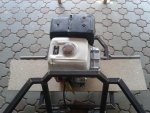
2016 - Arachnid

Status
Not open for further replies.

firemanjim

Just kartin' around....
Messages
5,228
Reaction score
1
Location
Houston Texas
You HAVE to have back brakes too. If not, you back end will swing around and be the leading end, if you have to stomp on the brake.

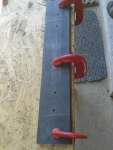
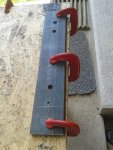
Use the drums up front. Since you're adding more braking power than the plans called for, you could safely assume you could down grade the rear brakes safely (within reason) User a big 5.5" drum brake like I have. Mine is from the old days of karting, but they still make them. It's by bendix......
If the front brakes are cable activated, that's to your favorites as well.... It's easier to set up and adjust front/back brake bias.
 

Denny

Canned Monster
Messages
8,224
Reaction score
4,449
Location
Mayberry, Indiana
Please do me a favor and drill those bolts in your rear pivot points for cotterpins to retain the nuts so they don't work loose. Looks good so far. I work with some people that are from Transylvania and their last name it Tepes.

Denny
:feedtroll:
 

alexV

New member
Messages
89
Reaction score
0
Location
Romania
Looks like the competition is delayed until Monday. Good thing I didn't plan work this weekend ;)

OK, will order a matching brake hub for my axle, then source a used hydraulic brake system later (as well as figure out how to link 2 brake systems to 1 pedal)

Denny, instead of cotter pins I'm thinking self locking nuts, the ones which have a nylon inner ring.
 

Attachments

  • self-locking-nut3.jpg
    self-locking-nut3.jpg
    42.1 KB · Views: 7

alexV

New member
Messages
89
Reaction score
0
Location
Romania
A reminder about safety: this was in my local news this morning.

Homemade buggy cost the life of the passenger, whom was not wearing a seat belt nor helmet
 

Attachments

  • cIopkFt.jpg
    cIopkFt.jpg
    187.1 KB · Views: 62

alexV

New member
Messages
89
Reaction score
0
Location
Romania
Awesome Arachnid

Hi,

Here's my project log, ready for the DIY Go Karts competition. I'm building the Spidercarts Arachnid: 1-seat, full suspension go kart.

As a first time builder, all help and comments are appreciated: project name, paint color, tech advice. :thumbsup:
 

Attachments

  • f8K16d6.jpg
    f8K16d6.jpg
    97.1 KB · Views: 49

alexV

New member
Messages
89
Reaction score
0
Location
Romania
Thanks landuse for merging the threads.

Day 6:
Purchased used suspension component: front are ok, rear need to be reconditioned. That's a home-made device to remove springs, Thanks Bogdan for help:idea2:
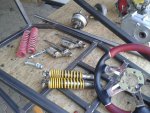
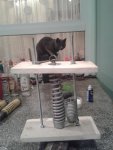
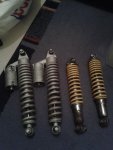
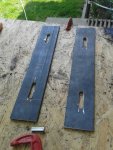
. I restored them to original paint. The cat was suspicious at first...

The shocks have no oil in them. I need to refill, and I cannot unscrew the aluminium part from the golden component...
 

Attachments

  • Oyi3TNM.jpg
    Oyi3TNM.jpg
    132.6 KB · Views: 32
  • WNXU8CE.jpg
    WNXU8CE.jpg
    151.8 KB · Views: 26
  • UzHdYxd.jpg
    UzHdYxd.jpg
    143 KB · Views: 27
  • ZmXbqao.jpg
    ZmXbqao.jpg
    81.6 KB · Views: 28
  • e4QvjlB.jpg
    e4QvjlB.jpg
    75.5 KB · Views: 24

alexV

New member
Messages
89
Reaction score
0
Location
Romania
Day 6 cont'd.
Installing automatic clutch to the engine. Pic two is the key on the shaft, trimmed down from 7x7 mm to 7x5 mm. Pic 3 is the outer clutch case. Next is the 1:2 reduction unit, the left wheel is part of the centrifugal clutch.

Good guy Honda has the engine and clutch maintenance manual available online.
 

Attachments

  • A3R8wb2.jpg
    A3R8wb2.jpg
    85.3 KB · Views: 24
  • nHifwVE.jpg
    nHifwVE.jpg
    97.4 KB · Views: 26
  • nF7FCBe.jpg
    nF7FCBe.jpg
    114.5 KB · Views: 26
  • IzW64kM.jpg
    IzW64kM.jpg
    102.1 KB · Views: 27
  • 2STf0Oq.jpg
    2STf0Oq.jpg
    105.2 KB · Views: 25

alexV

New member
Messages
89
Reaction score
0
Location
Romania
Are you sure that they unscrew there?

No, I am not :)

The extra chambers you see are not connected to anything, they just look fancy. So if this end doesn't unscrew... maybe i'll drill the shocks (as seen on youtube)
 
Last edited:

alexV

New member
Messages
89
Reaction score
0
Location
Romania
Made engine mounting plates.

When mocking the engine, observed the gas tank hits the frame. Now we're debating a solution. I would remove the gas tank and refit elsewhere, dad says to redo the frame (he used some unorthodox words towards the designer :lolgoku:

That's it for today
 

Attachments

  • ZM5diqd.jpg
    ZM5diqd.jpg
    109.3 KB · Views: 16
  • sPzrnhB.jpg
    sPzrnhB.jpg
    128 KB · Views: 20
  • EbLzlEM.jpg
    EbLzlEM.jpg
    135.4 KB · Views: 21
  • pZJMArH.jpg
    pZJMArH.jpg
    145.1 KB · Views: 22
  • 0NgoL10.jpg
    0NgoL10.jpg
    99 KB · Views: 29
  • rW3MViV.jpg
    rW3MViV.jpg
    105.9 KB · Views: 23

alexV

New member
Messages
89
Reaction score
0
Location
Romania
Then the fuel tank will move independently from the engine, because the suspension is between. Isn't this an issue for the fuel line or something?
 

alexV

New member
Messages
89
Reaction score
0
Location
Romania
chancer, that tank looks great :) but not within budget. I'll remove the gas tank for now, and maybe look for something similar in the flea market.
 

chancer

ɔ ɥ ɐ u ɔ ǝ ɹ
Messages
9,358
Reaction score
8
Location
COMFORT, TEXAS
Cool. flea markets rock.
Funny thing. Guess what? I am having the exact same problem today!:mad2:
 
Status
Not open for further replies.
Top