OzFab
Well-known member
Dilemma!
I apologise in advance for the "novel" you're about to read...
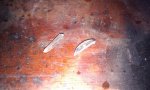
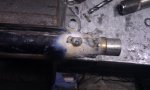
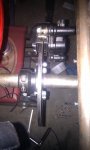
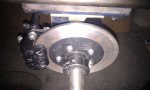
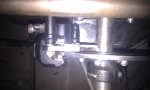
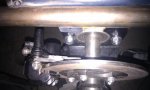
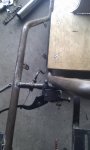
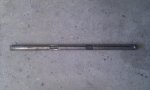
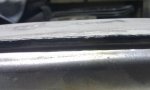
Just in case some of you don't know, when metal is chrome plated, it tends to "build up" the size of the metal, much the same as paint does. As a result, threads become slightly oversized. Easy enough to fix, you just run a die down over the thread to bring the size back down; until you come to a left hand thread as there is on the ends of my tierods
As I live very close to industrial zones, I headed out to find an engineering or fabrication shop that could help me out; with so many locally, I was sure to find one... or maybe not. Even one of the largest engineering companies in Sydney couldn't help me...
Next thought was to try the engineering supplies stores; the first one wanted $103 & "it'll be here tomorrow", The other one wanted $83 (that's a bit better) &, again, "it'll be here tomorrow".
Now, if I was going to use it every day, I could warrant the expense but, seeing as the tierods only cost me about half that much, not gonna happen...
In desperation, after almost 2 hours, I headed home & googled it, just to see what would show up. DUMBA$$!! One of the first entries was from a (sort of) local chinese tool shop: I say "(sort of) local" as it's a bit further than I had travelled earlier but still only 15 minutes away & "chinese tool shop" because it stocks chinese tool & it's also run by chinese...
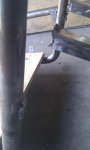
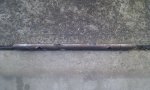
I called them to make sure they had one in stock & headed over there. I ended up getting an M8 left hand die, 1" die spanner & an M8 left hand tap, all for $36. It then took me 20 minutes to clean up all the threads & put it all together...
The moral of the story: Always consider absolutely every possibility & Murphy's law sux but, it does exist...
I apologise in advance for the "novel" you're about to read...
Just in case some of you don't know, when metal is chrome plated, it tends to "build up" the size of the metal, much the same as paint does. As a result, threads become slightly oversized. Easy enough to fix, you just run a die down over the thread to bring the size back down; until you come to a left hand thread as there is on the ends of my tierods
As I live very close to industrial zones, I headed out to find an engineering or fabrication shop that could help me out; with so many locally, I was sure to find one... or maybe not
. Even one of the largest engineering companies in Sydney couldn't help me...Next thought was to try the engineering supplies stores; the first one wanted $103 & "it'll be here tomorrow", The other one wanted $83 (that's a bit better) &, again, "it'll be here tomorrow".
Now, if I was going to use it every day, I could warrant the expense but, seeing as the tierods only cost me about half that much, not gonna happen...
In desperation, after almost 2 hours, I headed home & googled it, just to see what would show up. DUMBA$$!! One of the first entries was from a (sort of) local chinese tool shop: I say "(sort of) local" as it's a bit further than I had travelled earlier but still only 15 minutes away & "chinese tool shop" because it stocks chinese tool & it's also run by chinese...
I called them to make sure they had one in stock & headed over there. I ended up getting an M8 left hand die, 1" die spanner & an M8 left hand tap, all for $36. It then took me 20 minutes to clean up all the threads & put it all together...
The moral of the story: Always consider absolutely every possibility & Murphy's law sux but, it does exist...
Attachments
-
 IMAG0249.jpg99.9 KB · Views: 123


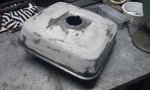
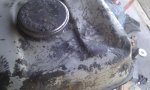
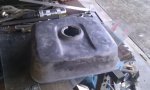
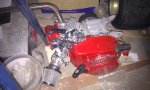
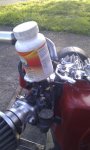
 It was time to start the engine for the first time. As the fuel tank isn't ready yet, I used the tank from the shifter to fuel it, put some oil in it & heaved on the rope; nothing. No, I mean nothing happened, the starter didn't engage. So, I pulled it apart, cleaned it up & put a few drops of oil on everything. You see, I made the mistake of using grease which only made it sticky. Put it all back together & it works fine, engages as soon as I touch it.
 Oh, great, where is the key? Never mind, I have one in the other engine
 ) I'll shoot another vid tomorrow...