2013 - AusEx (AmEx Replica)

Status
Not open for further replies.

OzFab

New member
Messages
15,615
Reaction score
8
Location
Warwick Qld, Australia
At the rate most projects get done around here, that a lot. :D

:lolgoku: :funnypost:

In 3 posts and like 20 pictures. :D It took a lot of work apperently? :cheers2:

Hey, you guys like pics, I give you pics :lolgoku:

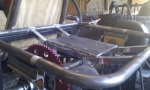
Forgive me if I blinked and missed it (working 2 jobs this week) but where did you get those freaky pedals?

Probably snagged them from that racing kart chassis he bought a while ago.

No, but they are from a racing kart. I bought them some time ago along with the steering wheel for, I think, $20.

Good to see you're keeping up ex :thumbsup:

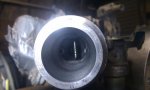
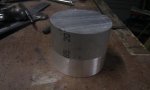
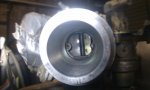
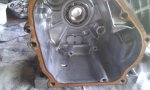
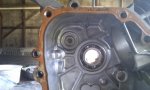
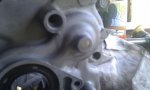
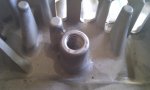
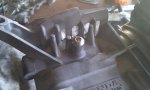
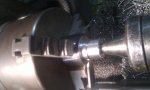
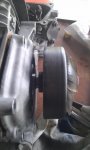
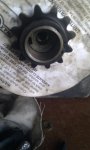
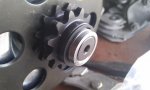
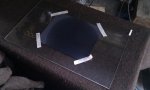
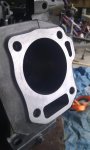
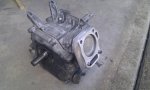
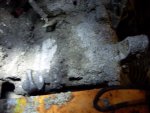
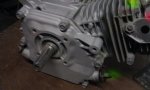
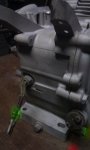
I cracked open the engine yesterday, more on that soon...
 

OzFab

New member
Messages
15,615
Reaction score
8
Location
Warwick Qld, Australia
Correct. I've sandblasted the entire engine & I'd previously removed the head but, this time, I stripped it down to bare block.

The first thing I had to do was file the crud off the shaft so I could remove the side cover. I got extremely lucky when I removed the side cover; the gasket remained intact on the block :wai: I then proceeded to strip the block bare...

Governor is now history! The hole in the side of the block (where the governor is mounted) was easy enough to fill; because it was such a tight fit, I simply cut down the pin that was in there & put it back in. The hole for the lever in the top was not so easy so, I tapped it out to 8mm & screwed in a M8x25mm button head bolt after applying a drop of blue loctite. A heavy soaking in degreaser to remove any remaining oil, sludge & metal filings (from tapping the hole in the top) & the inside is now pristine... except for a light honing of the steel bore.

The next thing to do was turn down the PTO shaft to fit the 3/4" clutch (sorry guys, no pics of the shaft before or during). So as not to put too much stress on my cutting tool, before I started the teardown, I formed a piece of steel to fit in the keyway, glued it in place with a smear of silicone, ground it down level & left it overnight to dry.

After turning down the shaft, I had to modify the key to get maximum contact with the shaft & slid the clutch on, only to discover the shaft was 1/2" short... Back to the lathe I go...
 

Attachments

  • IMAG0125.jpg
    IMAG0125.jpg
    59.2 KB · Views: 50
  • IMAG0126.jpg
    IMAG0126.jpg
    58.5 KB · Views: 45
  • IMAG0129.jpg
    IMAG0129.jpg
    44.7 KB · Views: 46
  • IMAG0127.jpg
    IMAG0127.jpg
    48.4 KB · Views: 45
  • IMAG0130.jpg
    IMAG0130.jpg
    52.6 KB · Views: 44
  • IMAG0131.jpg
    IMAG0131.jpg
    62.3 KB · Views: 42
  • IMAG0135.jpg
    IMAG0135.jpg
    60.5 KB · Views: 47
  • IMAG0134.jpg
    IMAG0134.jpg
    47.2 KB · Views: 45
  • IMAG0133.jpg
    IMAG0133.jpg
    62.8 KB · Views: 35
  • IMAG0136.jpg
    IMAG0136.jpg
    65.2 KB · Views: 42

OzFab

New member
Messages
15,615
Reaction score
8
Location
Warwick Qld, Australia
Because it was there, I used what was left of the steel I used for the spring retainers, drilled the centre out to 8mm, turned 1/2" down to 19mm & an extra 3mm to 22mm. After parting off, I reversed the spacer in the chuck & countersunk the end to fit a countersunk bolt head.

Clutch done...
 

Attachments

  • IMAG0139.jpg
    IMAG0139.jpg
    46.2 KB · Views: 23
  • IMAG0137.jpg
    IMAG0137.jpg
    82.8 KB · Views: 15
  • IMAG0138.jpg
    IMAG0138.jpg
    70.5 KB · Views: 21

OzFab

New member
Messages
15,615
Reaction score
8
Location
Warwick Qld, Australia
One or two small updates... Time has been in short supply the last few weeks so, I haven't made great progress but, I have managed to get a few things done.

While the engine was in pieces, I thought I'd clean up the deck surface. I taped a piece of 180 grit wet & dry to a sheet of glass, added a bit fo fuel & started rubbing the block over it. A few minutes later I had a nice, even cross-hatch pattern; I'm happy with that...

I used the same grade paper to clean up the bore, it didn't do much but, as I'm not replacing the rings, I didn't really want it to. After cleaning the small amount of carbon off the piston I proceeded to put everything back together, torqueing everything up as I went.

Bottom end done...
 

Attachments

  • IMAG0140.jpg
    IMAG0140.jpg
    54.4 KB · Views: 33
  • IMAG0141.jpg
    IMAG0141.jpg
    63.8 KB · Views: 34
  • IMAG0164.jpg
    IMAG0164.jpg
    80.8 KB · Views: 46

OzFab

New member
Messages
15,615
Reaction score
8
Location
Warwick Qld, Australia
Moving right along, I thought it was time to make the engine mount.

I could've just welded some square tube or angle between the rear bar & the seat bar but, that's too easy & boring. Besides, the engine would have to sit back too far to clear the seat. The alternative: Sunken bars!

I started off with some 20mm SHS &, after performing some slightly confusing math, I made two V cut in two lengths, rounded the ends to fit around the round tube & put them in position. A few tacks & the engine will now sit almost 3" below the top of the frame, which also means it can sit 3" further forward & my COG is lower.

Coincidently, the 1/4" offcut I had leftover from my bench build just happened to be the exact size I needed for an engine mounting plate :wai:

After marking out & centrepunching in the appropriate positions, I started drilling until all holes were 9mm. then I ran the air hacksaw through them &, finally, filed the edges down to create 4 2" long holes.

I bolted the clutch to the shaft, bolted the block to the plate, positioned it, put the chain on for alignment, took a few measurements & tacked the plate in place. After removing the block, I proceeded to weld the plate down.

Engine mount done...
 

Attachments

  • IMAG0161.jpg
    IMAG0161.jpg
    80.5 KB · Views: 63
  • IMAG0153.jpg
    IMAG0153.jpg
    76.3 KB · Views: 38
  • IMAG0156.jpg
    IMAG0156.jpg
    80.7 KB · Views: 28
  • IMAG0155.jpg
    IMAG0155.jpg
    72.4 KB · Views: 30
  • IMAG0154.jpg
    IMAG0154.jpg
    65.2 KB · Views: 35
  • IMAG0162.jpg
    IMAG0162.jpg
    65.8 KB · Views: 45
  • IMAG0163.jpg
    IMAG0163.jpg
    67.5 KB · Views: 71

OzFab

New member
Messages
15,615
Reaction score
8
Location
Warwick Qld, Australia
Twin post!

So, does everyone remember what those engines looked like when I got them? Here's what the 160 looks like now:
 

Attachments

  • SDC10490.jpg
    SDC10490.jpg
    89.2 KB · Views: 64
  • IMAG0171.jpg
    IMAG0171.jpg
    45.3 KB · Views: 67
  • SDC10489.jpg
    SDC10489.jpg
    120 KB · Views: 65
  • IMAG0170.jpg
    IMAG0170.jpg
    53 KB · Views: 71
  • SDC10488.jpg
    SDC10488.jpg
    92.2 KB · Views: 74
  • IMAG0172.jpg
    IMAG0172.jpg
    48.4 KB · Views: 64

OzFab

New member
Messages
15,615
Reaction score
8
Location
Warwick Qld, Australia
I started by removing what I safely could with a chisel, then hit it with huge grain sand (no, literally, sand) followed by a fine grade sand to give it a bit of lustre
 

Fast Eddie

Member
Messages
281
Reaction score
3
Location
Out in the garage
Great job bro...your fab work is 1st rate. You can tell you've planned and thought out this build. Too bad we couldn't just ship you an AmEx frame but I know the shipping cost would be huge.

Valvesprings will work perfect by the way.
 

Fast Eddie

Member
Messages
281
Reaction score
3
Location
Out in the garage
Eddie, Just so you know, it was your AmEx that made me want one (http://www.diygokarts.com/vb/showpost.php?p=215197&postcount=3) so, thanks for the praise, the compliments &, above all, the inspiration to build it.

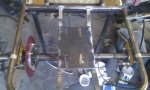
I probably could've had a frame shipped over (it probably wouldn't have cost much more than what I paid to have the frame bent up) but, where's the fun in that? :lolgoku:

Thanks bro...I appreciate it. You're doing a great job. Glad I could inspire you. And yes, it is fun fabbin' from scratch!
 

OzFab

New member
Messages
15,615
Reaction score
8
Location
Warwick Qld, Australia
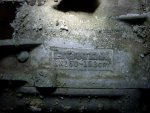
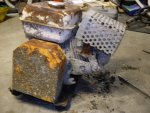
I think you should just put it in your sig "My motor was from a concrete mixer" Save you alot of questions :D

...but, it wasn't, it was on a compactor... :oops:

Anyhoo...

I jumped the gun a bit yesterday: I had to source some brakes & a chain tensioner roller so, while I was there, I got an air filter too. The smallest they had was 35mm so, now I have to come up with an adaptor to make it fit the stock carb. Around the corner (literally) to the steel merchant where I picked up a 50mm length of 65mm aluminium round bar.

Back home, after a few measurements, I whipped up a design that both worked & looked half decent, then I spent the next few hours on the lathe.

After I had the shape & size right, I then used the original gasket to mark out the base, drilled the holes, cut off the excess with a hacksaw, a few minutes of filing &:
 

Attachments

  • IMAG0189.jpg
    IMAG0189.jpg
    47.9 KB · Views: 37
  • IMAG0181.jpg
    IMAG0181.jpg
    49.9 KB · Views: 44
  • IMAG0179.jpg
    IMAG0179.jpg
    44.4 KB · Views: 36
  • IMAG0178.jpg
    IMAG0178.jpg
    52.5 KB · Views: 40
  • IMAG0177.jpg
    IMAG0177.jpg
    52 KB · Views: 38
  • IMAG0188.jpg
    IMAG0188.jpg
    47.3 KB · Views: 39
  • IMAG0187.jpg
    IMAG0187.jpg
    60.8 KB · Views: 62

OzFab

New member
Messages
15,615
Reaction score
8
Location
Warwick Qld, Australia
No, One of these:


Still, it doesn't explain how it got covered in concrete...
 
Status
Not open for further replies.
Top