Celerity Quicksilver Sport Coupe (EA racer)

Functional Artist

Well-known member
Messages
5,687
Reaction score
3,349
Location
Toledo, Ohio
But if you use wood cleats say 1”X1” at the joints there’s plenty of area to screw to. Back off on your sanding pressure if the board is flexing. Let the sandpaper do the work.
Hey Denny,

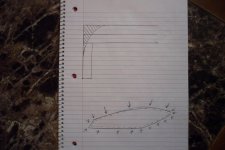
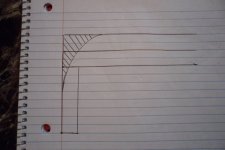
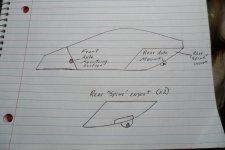
I drew a pic, for you ;)
SAM_9354 (1).JPG
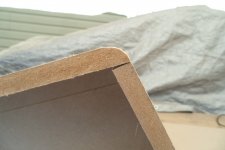
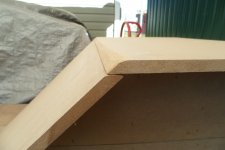
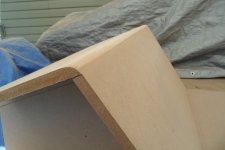
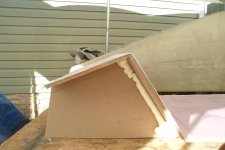
See how I was able to use the (2) "stacked" pieces of 1/2" MDF to form a nice round-over-curve
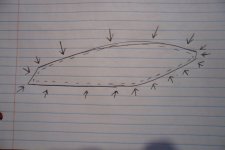
SAM_9355 (1).JPG
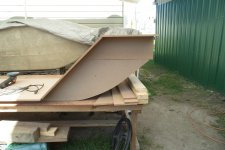
I'm using this compounded-curved, round-over concept, all along the perimeter of the sides :thumbsup:
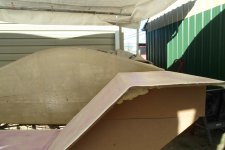
SAM_9356 (1).JPG
 

Functional Artist

Well-known member
Messages
5,687
Reaction score
3,349
Location
Toledo, Ohio
What? Wait! I'm gone for a coupla days and yer on to another project?
Has the paint dried on the last one?
Hey T,
Um...yup...I'm am :sifone:

No Rest for the Wicked :2guns:

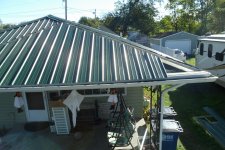
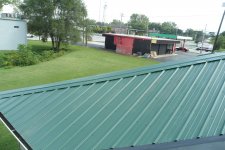
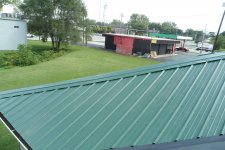
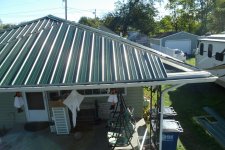
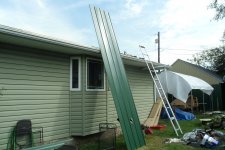
I've been alternating between towing, putting a roof on our home & "my art"

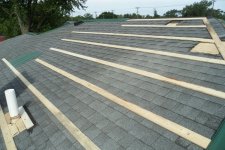
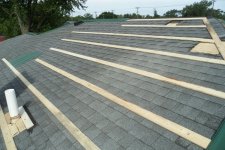
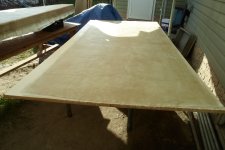
Installing the wooden strips
SAM_9245 (1).JPG
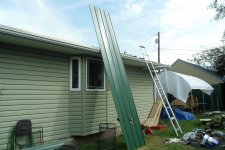
Lugging 16' panels

* Notice the hole for the vent pipe?
SAM_9244 (1).JPG
Last panel

** Working on installing the "caps"...now
SAM_9293 (1).JPG
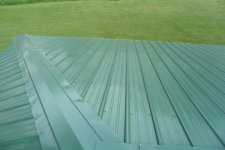
Now, it looks like this :bannana:
SAM_9248 (1).JPG
 

Attachments

  • SAM_9245 (1).JPG
    SAM_9245 (1).JPG
    1.9 MB · Views: 0
  • SAM_9248 (1).JPG
    SAM_9248 (1).JPG
    1.9 MB · Views: 0
  • SAM_9293 (1).JPG
    SAM_9293 (1).JPG
    1.9 MB · Views: 0
  • SAM_9244 (1).JPG
    SAM_9244 (1).JPG
    1.9 MB · Views: 0

Functional Artist

Well-known member
Messages
5,687
Reaction score
3,349
Location
Toledo, Ohio
Right body side mold & flat panel covered in (2) layers of 1708, the next morning

* The body side panel is marked for trimming
...which helps with de-molding ;)
SAM_9327 (1).JPG
Here's the flat panel
SAM_9326 (1).JPG
Another view
SAM_9328 (1).JPG
 

Wicked_Daddy

Gimme fuel, gimme fire, gimme that which I desire!
Messages
208
Reaction score
327
Location
Texas, Y'all
So, A metal roof goes on OVER the existing composite shingle roof by mounting it on wood spars? Didn't know that.

Nice fiber work. Anxious to see this finished!
 

Functional Artist

Well-known member
Messages
5,687
Reaction score
3,349
Location
Toledo, Ohio
So, A metal roof goes on OVER the existing composite shingle roof by mounting it on wood spars? Didn't know that.

Nice fiber work. Anxious to see this finished!
Hey WD,

Yup, "if" the existing roof is only (1) layer
...Ohio law only allows (2) layers of roofing...at a time

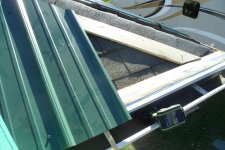
The wood strips have several purposes

1.) the strips "space" the steel panels above the roofing shingles
...so, the shingles can't abrade the finish off of the backside (like during thermal expansion & contractions)
SAM_9297 (1).JPG
2.) the strips get screwed down, with 2 1/2" screws, right into the rafters
...& then, provide a nice-n-wide "nailer" for screwing into, when installing the panels (ta make nice-n-purty lines)
SAM_9249 (1).JPG
Thanks :cheers2:

I'ma getin' done...what I can get done ;)
...'cause Winter is a comin' fast :confused:
SAM_9339 (1).JPG
 

Functional Artist

Well-known member
Messages
5,687
Reaction score
3,349
Location
Toledo, Ohio
After doin' some twilight trimmin' on the "nose" & "tail"
SAM_9329 (1).JPG
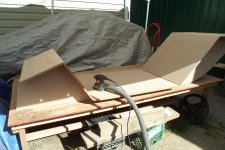
I roughly assembled the left side & right sides
...& the "nose" & Tail" pieces
...using the "overlap method" & a few wood screws
SAM_9340 (1).JPG
The "nose"
* The floorboard (from the flat panel) is just layed in place, for illustrative purposes
SAM_9342 (1).JPG
The "tail"
SAM_9341 (1).JPG
 

Functional Artist

Well-known member
Messages
5,687
Reaction score
3,349
Location
Toledo, Ohio
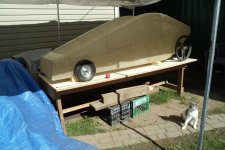
Body mock-up with "some" wheels "spaced" ~2 1/2" above the workbench

* Hi Ducky 😊
SAM_9351 (1).JPG
Um...looks like the rear wheel won't clear the "deck" that will be above it
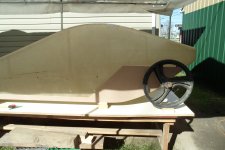
SAM_9352 (1).JPG
So, I drew in an extension
SAM_9353 (1).JPG
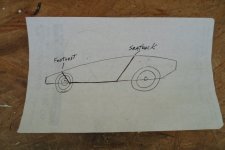
Drawing of the original plan
SAM_9278 (1).JPG
The plan was to make & use a couple of "spines" (made outta (2) FG panels bonded to the sides of, a 1/2" foam core)
...with interlocking footboard & seatback/deck panels (also, made outta (2) FG panels bonded to the sides of, a 1/2" foam core)
...all bonded together & then, installed inside the FG body
SAM_9280 (1).JPG
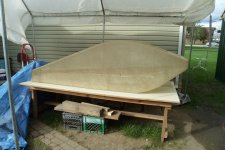
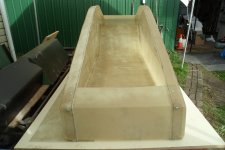
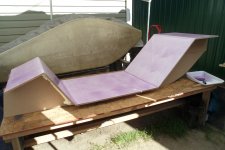
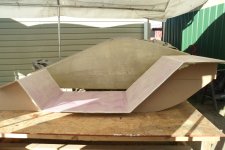
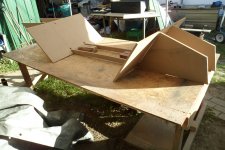
Now I'ma workin' with a "new" idea
...ta make a (1) piece floorboard
...that has the footboard & seatback/deck "built in"
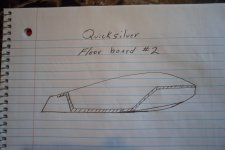
SAM_9357 (1).JPG
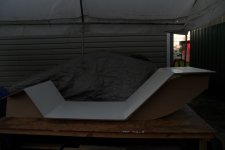
I'ma callin' it the "flyin' carpet" floorboard

* This concept should
...be a bit easier to make
...create a stiffer "inner "core"
...& provide more bonding surfaces

** It will bond all along the floorboard
...& to the upper body, in the front & rear too
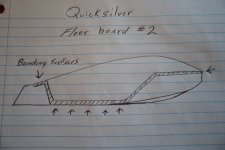
SAM_9358 (1).JPG
 

Functional Artist

Well-known member
Messages
5,687
Reaction score
3,349
Location
Toledo, Ohio
Hey Denny,

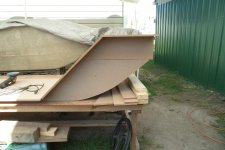
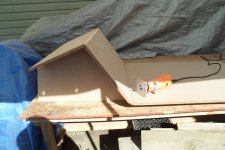
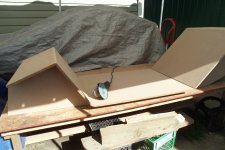
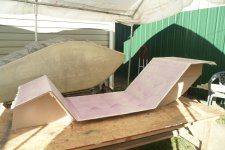
While working on assembling & shaping the mold for the "flying carpet" floorboard, I did a step-by-step description/illustration of my MDF shaping/forming method...for ya ;)

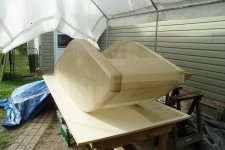
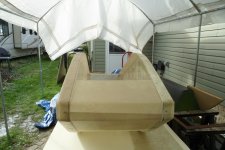
Footboard to upper body junction (in the rough)
SAM_9365 (1).JPG
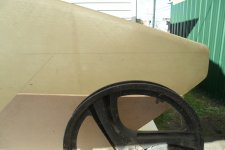
The tail (with extension)
SAM_9367 (1).JPG
Used the router to evenly remove ~1/4" of material
SAM_9371 (1).JPG
Like this
SAM_9373 (1).JPG
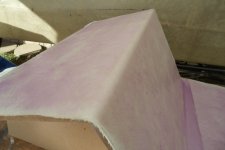
Then, used the disc sander (w/80 grit) to evenly round it off
SAM_9374 (1).JPG
Like this
SAM_9375 (1).JPG
Also, used the disc sander (w/80 grit) to rounded off the rear seatback to deck junction too
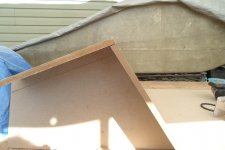
SAM_9378 (1).JPG
Then, used the palm sander (w/120 grit) to smooth everything...nicely
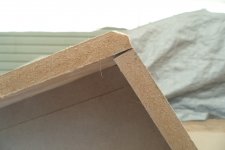
SAM_9379 (1).JPG
Like this
SAM_9380 (1).JPG
Now, it's ready for some paint :sifone:
 

Functional Artist

Well-known member
Messages
5,687
Reaction score
3,349
Location
Toledo, Ohio
I saw member @Mammoth was using a GTS 11 motor & Fardriver controller combo...like this...on his kart
https://www.diygokarts.com/community/threads/electric-off-road-kart.55075/
...& it sounds quite interesting
...so, I'ma thinkin' about gettin' one ;)
  • Brushless Motor Kit 72V 5000W Peak 8000RPM with 100A Fardriver Controller (~$600.00)

  • 72V Motor Kit for Off-Road Power - This 72V 5000W brushless motor delivers 8.5N.m rated torque (peak 35N.m) with rated speed of 6800 RPM and 8000 RPM no-load speed. The 5-pair V-magnet rotor provides massive low-end torque for climbing steep hills and powering through mud on your go kart or dirt bike. Pure copper winding and 90% max efficiency ensure you get the most out of every charge.

  • Built to Beat the Heat, External Hall & Heat Sink Design - The heat sink housing and IP54-rated body keep this 72V brushless motor cool during extended rides. The external Hall sensor is mounted near the rear cover for better heat dissipation and easier maintenance. A built-in KTY84-130 temperature sensor monitors internal temps, preventing overheating damage.

  • Tune It Your Way, Programmable 100A Fardriver Controller - The 72v motor kit includes a sine wave 100A controller, which supports wide 48-72V rated voltage, with 300A protect phase current and IP67 rating. Adjust acceleration, current limiting, and high/low level braking to match your riding style. Monitor motor temperature and performance in real-time, all from your smartphone or PC.
https://www.ebay.com/itm/227571498268?_trkparms=itmf=1&aid=1110006&rkt=12&asc=346061&pid=101875&mech=1&algv=SimplAMLv11WebTrimmedV3MskuWithLambda85KnnRecallV1V2V4ItemNrtInQueryAndCassiniVisualRankerAndBertRecallWithVMEV3CPCAutoWithCassiniEmbRecall&pmt=1&amclksrc=ITM&sd=407159394827&sid=AQALAAAAEA5Fi4evm7v6/0UcWM5HJ0E=&itm=227571498268&noa=0&plcampt=0:164656249017&algo=HOMESPLICE.SIM&ao=1&rk=1&mehot=none&lsid=0&meid=1d72268be2974196afee4faa4c4e3bbb&pg=2332490&_trksid=p2332490.c101875.m1851&itmprp=cksum:2275714982681d72268be2974196afee4faa4c4e3bbb|enc:AQALAAABcOrUAJyocs9zq5pLBX3YtmatWsILip3iH8cXvCuqAHQycQTv%2F0%2FsvMD%2FiujDLuk04YfjG4hB1bvoSoZT22fSr86l4ZShqsEbKB92VPEA3U8iJy4PIJKdxno0JaAN1O0l9SNW8FeXf9POlGhR7no0dngpp41JhUposDyp8wrIWePZ2WVit%2Fs77Ssad66Av4xRomYQyMUDStDu1D5%2BAHibh4wsepMn9lGDzeJG1ordnrHm%2FQHrBI3SY%2Bd3vPyGydT2KDsTTn56rguJ82OtqB%2BadHVXj%2BBYKr7hYD7O1ol6iVhDhLyA11LGbQuWTz2Hz1aU9VYXu7qcFD9NAYIZ037S9SC1Qy3isvQHGu1LquAsFIa8XPcbmjVP6kC7SQkGAEmrAiqiQj%2F0Rt9PpHezPr3CQveoX7sHL877VnRLK9QU0DQdM6H%2Bcr5rhH74Bjbd4U%2FAd3ZEHFeVbHGvKygCpKZ6LJkB16OhhXJpRg1DlKcCNnrX|ampid:pL_CLK|clp:2332490&itmmeta=01M5MJY33Y5R78PQ6ESHMNZQNT
 
Last edited:

Functional Artist

Well-known member
Messages
5,687
Reaction score
3,349
Location
Toledo, Ohio
That's a serious motor. 6800 RPM? Wow. I believe an on-board video is in your future.
Hey WD,

I looked up the specs of Predator 212 just for comparison ;)

HP & Torque Rating of the Predator 212 Engine​

The stock Predator 212cc engine produces about 6.5 HP at 3,600 RPM and 8.1 ft‑lb of torque at 2,500 RPM

Performance Notes​

  • The 6.5 HP figure is the rated output under standard conditions; real‑world performance can vary with load, tuning, and modifications

  • The 8.1 ft‑lb torque at 2,500 RPM provides strong low‑end pull, making it suitable for go‑karts, mini‑bikes, pressure washers, and small utility machines

  • Stock carburetor and governor are tuned for these ratings; performance upgrades (e.g., larger carb, camshaft) can push output toward 9–10 HP but may reduce low‑end torque and stress internals

Then, converted Ft. Lbs. to Nm (Foot Pounds to Newton Meters)

Converting 8.1 ft·lb to Newton‑meters (Nm)​

8.1 ft·lb ≈ 11.03 Nm
&

One electrical horsepower is exactly 746 watts.​

Conversion Formula​

To convert electrical horsepower (hp) to watts (W), use the formula:
Watts = Horsepower × 746
For example, if you have a 5 hp electric motor:
5 hp × 746 W/hp = 3,730 W
or
in our example 5,000W/746= 6.7HP

So, according to these numbers, a stock (6.5HP) Predator can deliver ~11 Nm
...& this little (also, ~6.5 HP) motor delivers 8.5N.m rated torque (peak 35N.m)

But, also, "keep in mind" that gas (ICE) engines need to "wind up" before they can deliver that torque
...whereas electric motors deliver their torque...right off the line :auto:

* Video...probably not until next spring...as Winter is almost upon us...here in the mid-west of the USA
 

Functional Artist

Well-known member
Messages
5,687
Reaction score
3,349
Location
Toledo, Ohio
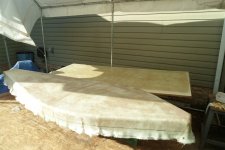
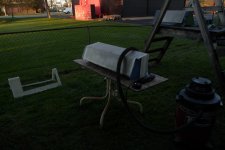
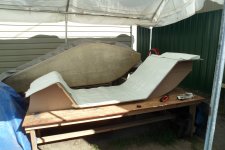
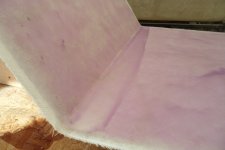
Used the mold to pre-cut some (3 layers) 1708 FG cloth (no measurin' required) :thumbsup:
SAM_9389 (1).JPG
Then, coated it with PVA
SAM_9390 (1).JPG
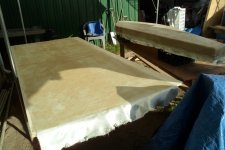
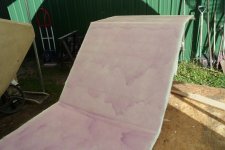
After a couple of hours (ta dry good) I layed down a layer of the 1708

* The first layer seemed to lay down pretty good
...it's nice-n-tight, on the curves
...& nice-n-smooth, on the flats ;)
SAM_9391 (1).JPG
Really didn't plan on gettin' this far on this project (being mid -October & all)
...&/so, ran outta the FG resin :confused:

So, I had ta stop...with just the (1) layer...for now
SAM_9392 (1).JPG
Footboard area
SAM_9393 (1).JPG
Seatback area
SAM_9394 (1).JPG
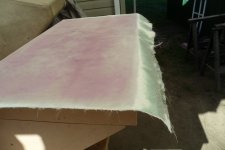
I purposefully left some "raw" FG cloth, hanging off the rear edge
...to use for installation/bonding, when installing the floorboard, into the body
SAM_9395 (1).JPG
 

Functional Artist

Well-known member
Messages
5,687
Reaction score
3,349
Location
Toledo, Ohio
According to the weather forecast, we are gonna have some nice weather (no rain & upper 60's & lower 70's) for another week
,..so, I went ahead & ordered a gallon of resin (~$50.00 per gal. :ack2: & folks area whinin' about $4.00 per gal. gas prices :huh:)

Whilst we wait, I aligned the floorboard with the body ta check & see how close "we is"

Overall view
SAM_9397 (1).JPG
Tail area
SAM_9398 (1).JPG
Nose area
SAM_9400 (1).JPG
I must say...looks "doable" :2guns:
 

Functional Artist

Well-known member
Messages
5,687
Reaction score
3,349
Location
Toledo, Ohio
Whilst waitin' for the FG resin, we can discuss axle mounting idea/concepts :thumbsup:

I'm thinkin' we can mount the front axle to the floorboard (kinda like we did on the Granite racer)
...& use (2) rear "spine" inserts (triangularly mounted to the seatback & the deck & the curved floorboard)

These inserts will be spaced ~8" apart
...could be/will be used for mounting the battery pack, motor & rear wheel
&
I'm thinking to use (2) metal (steel or aluminum) axle brackets
...bolted to the sides of the FG inserts, for mounting the rear wheel
SAM_9367 (1).JPG
Comments?
...concerns?? :unsure:
SAM_9363 (1).JPG
 
Top