Next...

Status
Not open for further replies.

Poboy kartman

Senior Moments Member
Messages
12,461
Reaction score
69
Location
White Settlement Texas
Just a quick aside on the drill bit -( well maybe two)..... what you have made is a mass produced drill with a name : it's called a brad point bit. Being a custom carpenter I use them quite frequently for their accuracy and clean cutting ability. The thing is- to the best of my knowledge- they are only manufactured to handle wood. I haven't run across any for metal.

As for the second aside- technically that is not a drill bit. (Either one). Technically a bit is on of those corkscrew looking things that goes in a brace which is basically a hand driven crankshaft affair. What those are are called drills. You put them in drill motors....It's been misused so much that it's now commonly accepted that you put a drill bit in a drill- but the old timers are rolling over in their graves every time you do. Just a little trivia. ...

Incidentdally- the other day someone asked me if I had a cordless screwdriver......I handed him a phillips......he looked at me puzzled. ...I said-" What??? -do you see a cord on that?":lolgoku:
 

machinist@large

Active member
Messages
2,865
Reaction score
32
Location
West Michigan, 49331
Just a quick aside on the drill bit -( well maybe two)..... what you have made is a mass produced drill with a name : it's called a brad point bit. Being a custom carpenter I use them quite frequently for their accuracy and clean cutting ability. The thing is- to the best of my knowledge- they are only manufactured to handle wood. I haven't run across any for metal.

The fact that you know it by a woodworking name probably explains why I've never connected with that; I've heard of brad point bits, but since they were always advertized for wood working, they never really registered...

OK, the drill that Fab posted is a one off custom, ground out of a standard HSS drill. There are probably an almost infinite # of custom applications based on stock drills (drill bits? At this point, I have trouble trying to sort things out for anyone I'm trying to train...).

That's why Fab and I were kind of hesitant to try and write a post on sharpening these things....
 

Poboy kartman

Senior Moments Member
Messages
12,461
Reaction score
69
Location
White Settlement Texas
The fact that you know it by a woodworking name probably explains why I've never connected with that; I've heard of brad point bits, but since they were always advertized for wood working, they never really registered...

OK, the drill that Fab posted is a one off custom, ground out of a standard HSS drill. There are probably an almost infinite # of custom applications based on stock drills (drill bits? At this point, I have trouble trying to sort things out for anyone I'm trying to train...).

That's why Fab and I were kind of hesitant to try and write a post on sharpening these things....

No it's a great idea and one of the downfalls of brad points to me. A PITA to sharpen..... Wish they came in solid carbide.....Anyway- thought that description might help people understand the shape....
 

OzFab

Well-known member
Messages
15,615
Reaction score
69
Location
Warwick Qld, Australia
Based on your written description, I was trying to figure out how you turned a two flute drill bit into a three flute. Then, on photo #3, I see what you called a "three pointer", is what I've seen described as a "Trepanning Point". Don't know for sure if that's the correct & proper name for it, and I'm not really worried about it because the photo shows it just fine. And it works.

Yes, 3 points, one in the middle & one on each of the two flutes; I've never know them by any name except a 3 pointer...

Just a quick aside on the drill bit -( well maybe two)..... what you have made is a mass produced drill with a name : it's called a brad point bit. Being a custom carpenter I use them quite frequently for their accuracy and clean cutting ability. The thing is- to the best of my knowledge- they are only manufactured to handle wood. I haven't run across any for metal.

I know that, the point was to show that it can be done easily & quickly...

A brad point is specifically for wood; the centre tip is much longer & the drill itself is much softer

As for the second aside- technically that is not a drill bit. (Either one). Technically a bit is on of those corkscrew looking things that goes in a brace which is basically a hand driven crankshaft affair. What those are are called drills. You put them in drill motors....It's been misused so much that it's now commonly accepted that you put a drill bit in a drill- but the old timers are rolling over in their graves every time you do. Just a little trivia. ...

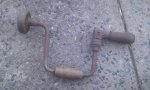
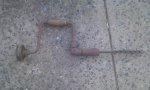
You mean like the dealy pictured below? Around here they are, in fact, know as a brace & bit. Those very tools were used to build the house I live in back in 1950...

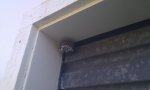
While on the hunt for those tools, I came across a wasps nest... or... should I say... a wasps nest came across me :ack2: Two stings to the right hand & one to the forehead... The worst part was I didn't even need to go near it, they were on completely the other side of the garage :censored: :mad2:

Incidentdally- the other day someone asked me if I had a cordless screwdriver......I handed him a phillips......he looked at me puzzled. ...I said-" What??? -do you see a cord on that?":lolgoku:

:funnypost: Very true :thumbsup:
 

Attachments

  • IMAG0449.jpg
    IMAG0449.jpg
    104.9 KB · Views: 3
  • IMAG0450.jpg
    IMAG0450.jpg
    96.7 KB · Views: 2
  • IMAG0447.jpg
    IMAG0447.jpg
    82.4 KB · Views: 2
  • IMAG0451.jpg
    IMAG0451.jpg
    46.4 KB · Views: 3
  • IMAG0448.jpg
    IMAG0448.jpg
    38.8 KB · Views: 5

zbuck

New member
Messages
781
Reaction score
3
Location
Ft. Wayne, IN
:wai: I guess I should have posted. People around here use a mulching blade with a high lift to help blow the clippings into the grass cacther. I have gator blades on my tractor deck and just leave the clippings as they make great fertilizer as they compost.
 

Poboy kartman

Senior Moments Member
Messages
12,461
Reaction score
69
Location
White Settlement Texas
:wai: I guess I should have posted. People around here use a mulching blade with a high lift to help blow the clippings into the grass cacther. I have gator blades on my tractor deck and just leave the clippings as they make great fertilizer as they compost.

Hmmmm.....That totally goes against what I understand/believe about mower blades. Some/maybe most mowers nowadays are equipped with the ability to discharge clippings or to not. The mulching blades have dual zone cutting surfaces and are more designed to keep the clippings in the deck longer to shred them more completely to leave them lay. A standard blade is designed to shear the blades and quickly push them out into a bag or to the side.

Without wanting to complicate the issue and start another debate, for the most part, in most cases- I think bagging clippings is idiotic. ....
 

landuse

Moderator
Staff member
Messages
18,772
Reaction score
555
Location
Pietermaritzburg, South Africa
While on the hunt for those tools, I came across a wasps nest... or... should I say... a wasps nest came across me :ack2: Two stings to the right hand & one to the forehead... The worst part was I didn't even need to go near it, they were on completely the other side of the garage :censored: :mad2:

For some reason wasps LOVE making nests under my roof overhang. I sometimes get at least 10 to 12 small nests that I have to get rid of. I grab a can of insects killer, get as close as I can to spray and then haul a$$ away as fast as I can
 

Poboy kartman

Senior Moments Member
Messages
12,461
Reaction score
69
Location
White Settlement Texas
For some reason wasps LOVE making nests under my roof overhang. I sometimes get at least 10 to 12 small nests that I have to get rid of. I grab a can of insects killer, get as close as I can to spray and then haul a$$ away as fast as I can

Take a 32oz. tumbler and put about 1/2" of liquid dishwashing soap in the bottom. Fill with water and stir. Douse the nest by chunking upward. They should drop like rocks instantly. If this doesn't then you might need more soap. I normally do about 1/3 soap / 2/3 water as insurance.

That spray stuff is a good way to get nailed.
 

zbuck

New member
Messages
781
Reaction score
3
Location
Ft. Wayne, IN
Any chance you can post pics of both for comparison? They may not use the same names over here...

:wai: Not yet picture savy. Go to gatorblade.com also goggle mulching lawn mower blades and click on E-How which explains why people use mulching blades that make it easier to transfer the clippings to the grass catcher.
 

OzFab

Well-known member
Messages
15,615
Reaction score
69
Location
Warwick Qld, Australia
A productive day was had yesterday, despite the searing heat (33°C) & overwhelming humidity... yes, I know, it was 12° hotter in Adelaide... Anyhoo...

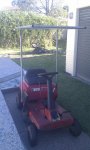
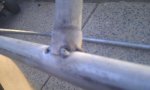
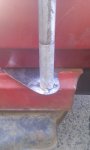
If you reacll, the tubing I'm using for the canopy if from a trampoline safety net so, apart from some pieces being slightly bent, they lock together so, the first thing I did was cut two pieces to accept the inserts &, with the uprights attached, tacked the stumps to the base plates. Then I cut the insert pieces of two pieces, birdmouthed the ends & tacked them to the top frame, allowing for "adjustments". I then fitted everything together, made necessary adjustments & added a few more tacks to secure everything. Now I need to drill a couple of holes to lock the top to the uprights, finish welding & cover the top frame.

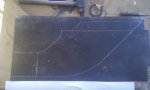
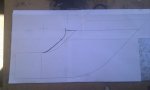
Once I'd done that. I moved onto marking out the catcher chute base. After designing the shape on the computer, I blew it up full size, printed it over 4 pages & carefully aligned all 4 pages to get a full size template.

I found a piece of thin sheet metal & painted it black (that'll be explained in a munute). Once the paint had completely dried, I taped the template to it, leaving the appropriate amount for edges.

Using a centre punch, I marked all the intersections on the template, that way I could simply join the dots to mark out the entire shape... except the radii... For that, I took a sharp craft knife &, using a lot of pressure, I cut along the radii. What that did was scratch the paint on the metal sheet below it.

Once I was satisfied I had sufficient markings, I removed the template & scratched out the rest of the lines.

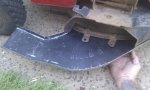
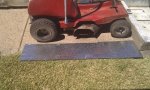
The next thing was to fold edges along the two sides which caused a bit of distortion along the radii but, a few snips fixed that. A few taps with a hammer & I'm happy with it...

Today, the sides...
 

Attachments

  • IMAG0454.jpg
    IMAG0454.jpg
    42.4 KB · Views: 8
  • IMAG0460.jpg
    IMAG0460.jpg
    99.7 KB · Views: 10
  • IMAG0458.jpg
    IMAG0458.jpg
    85 KB · Views: 9
  • IMAG0457.jpg
    IMAG0457.jpg
    57.3 KB · Views: 9
  • IMAG0459.jpg
    IMAG0459.jpg
    49.9 KB · Views: 9
  • IMAG0462.jpg
    IMAG0462.jpg
    65.1 KB · Views: 11
  • IMAG0456.jpg
    IMAG0456.jpg
    42.1 KB · Views: 8
  • IMAG0455.jpg
    IMAG0455.jpg
    22.1 KB · Views: 8
  • IMAG0453.jpg
    IMAG0453.jpg
    30.5 KB · Views: 9

landuse

Moderator
Staff member
Messages
18,772
Reaction score
555
Location
Pietermaritzburg, South Africa
Looking good. Are you going to brace the awning in any way? Just looking at the pics it doesn't look strong enough just being welded at those 2 points. I know you must have some plan to make it more sturdy (or have I missed something?)
 

Poboy kartman

Senior Moments Member
Messages
12,461
Reaction score
69
Location
White Settlement Texas
You Aussies are funny blokes. A shade to keep cool while mowing the lawn? Here in Texas- use of a riding lawnmower requires a handicap permit. Rather than go through all that red tape- most of us just get married. ....Ahhhh- nothing better than a cold one, a good ball game, and the sound of the little woman using a push mower......:lolgoku:
 

ak99

New member
Messages
131
Reaction score
2
Location
Queensland, Australia
You Aussies are funny blokes. A shade to keep cool while mowing the lawn? Here in Texas- use of a riding lawnmower requires a handicap permit. Rather than go through all that red tape- most of us just get married. ....Ahhhh- nothing better than a cold one, a good ball game, and the sound of the little woman using a push mower......:lolgoku:

And if he was here in Qld the mower would need an enclosed cabin and air conditioning.... and a portable fridge to keep the beer cold:D
 

Poboy kartman

Senior Moments Member
Messages
12,461
Reaction score
69
Location
White Settlement Texas
And if he was here in Qld the mower would need an enclosed cabin and air conditioning.... and a portable fridge to keep the beer cold:D

LOL. In the real rural Texas all the farmers gather in the morning for coffee and try to outdo each other on how rough farm life is at the local cafe. What you just described is their tractors - except they're GPS guided and have satellite television. :2guns:
 

OzFab

Well-known member
Messages
15,615
Reaction score
69
Location
Warwick Qld, Australia
Looking good. Are you going to brace the awning in any way? Just looking at the pics it doesn't look strong enough just being welded at those 2 points. I know you must have some plan to make it more sturdy (or have I missed something?)

No bracing, it's only a sun shade, it's not structural; as long as it stays above me I'm happy. I finished welding it today, it has a bit of a wobble but, nothing serious...

I also did some more work on the catcher chute. the outside face was easy enough, the top was a bit trickier & the inside face... well, lets just say I'm starting over with that one...

Gotta love the guys at my local steel shop; I've been a regular there for a few years now so, they all know me. I went to their new shop for the first time today (they moved to a bigger warehouse over the christmas break) to get more sheet, hoping to find a few small offcuts but, no go... until I walked past the scrap bin where I saw a piece. When I asked about it the guy said "it's in the scrap bin so, technically, it doesn't exist & it's worth nothing... see ya..." Obviously, I walked away happy :wai:

I did get it together enough to do a little air speed test...

http://www.youtube.com/watch?v=RAEBKTgLdwY&feature=youtu.be

Pay attention to the tree in the background...

For anyone who's worried the blade won't create enough speed to throw the cuttings into the catcher, I'm not...
 

Attachments

  • IMAG0464.jpg
    IMAG0464.jpg
    155.5 KB · Views: 4
  • IMAG0465.jpg
    IMAG0465.jpg
    76.8 KB · Views: 5
  • IMAG0467.jpg
    IMAG0467.jpg
    75.5 KB · Views: 4
  • IMAG0466.jpg
    IMAG0466.jpg
    60.6 KB · Views: 4
  • IMAG0468.jpg
    IMAG0468.jpg
    81.6 KB · Views: 4

OzFab

Well-known member
Messages
15,615
Reaction score
69
Location
Warwick Qld, Australia
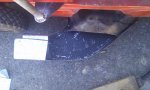
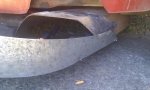
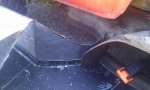
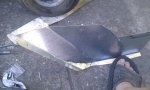
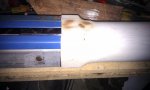
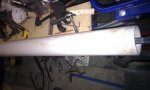
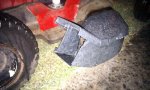
So, I've been plodding away at the chute for the last few days getting in right, it's all but done but, before I go & weld it together, I had to make sure I could get the exit the correct size shape.

The original idea was to use 6" round PVC but, after further deliberation, I came to the conclusions that:
1. 6" was too expensive
2. The whole unit would be huge
3. 6" would lead to a greater loss of velocity & possibly not carry the cuttings to the catcher.

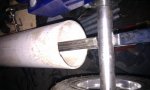
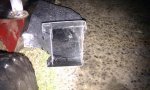
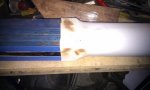
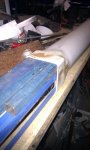
So, I decided on using 4". It just so happens that my buddy had a lenght under his house so, the next problem was how do you fit a round peg in a square hole?

Easy, you change the shape of the round peg by use of a heat gun & a LOT of square tube offcuts &, bit by bit, you end up with a square peg...
 

Attachments

  • IMAG0475.jpg
    IMAG0475.jpg
    55.8 KB · Views: 5
  • IMAG0474.jpg
    IMAG0474.jpg
    67.7 KB · Views: 5
  • IMAG0472.jpg
    IMAG0472.jpg
    66 KB · Views: 5
  • IMAG0471.jpg
    IMAG0471.jpg
    99.7 KB · Views: 5
  • IMAG0470.jpg
    IMAG0470.jpg
    94.5 KB · Views: 5
  • IMAG0476.jpg
    IMAG0476.jpg
    61.9 KB · Views: 5
  • IMAG0477.jpg
    IMAG0477.jpg
    75.7 KB · Views: 5
Status
Not open for further replies.
Top