Next...

Status
Not open for further replies.

itsid

Moderator
Staff member
Messages
11,563
Reaction score
245
Location
Ruhrpott [Germany]
Nice work indeed..
but to be completely honest with you.. I expected that, you being a panel beater and such ;)

'sid
 

OzFab

Well-known member
Messages
15,615
Reaction score
69
Location
Warwick Qld, Australia
I need your opinions

Due to the unavailability of parts I'm looking at making a catcher setup. The catcher itself will be relatively simple but, it's the delivery system I'm concerned about...

The catcher itself will be mounted to the rear of the mower but, the grass chute is on the side so, I'll make an adaptor to fit on the end of the chute that then fits a PVC pipe which then goes into the catcher. The part I'm not sure about is the diameter of the pipe; will 4" be wide enough or will the grass clog it up? I can get 6" pipe but, because it's not as popular, it's way more expensive (around 3 times the price of 4"... if I pay for it...)

Thoughts?
 

machinist@large

Active member
Messages
2,865
Reaction score
32
Location
West Michigan, 49331
Due to the unavailability of parts I'm looking at making a catcher setup. The catcher itself will be relatively simple but, it's the delivery system I'm concerned about...

The catcher itself will be mounted to the rear of the mower but, the grass chute is on the side so, I'll make an adaptor to fit on the end of the chute that then fits a PVC pipe which then goes into the catcher. The part I'm not sure about is the diameter of the pipe; will 4" be wide enough or will the grass clog it up? I can get 6" pipe but, because it's not as popular, it's way more expensive (around 3 times the price of 4"... if I pay for it...)

Thoughts?
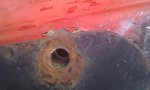
I'm guessing that the 4" would work for a machine of that size; I think the biggest thing will be having the correct blade to generate the air flow to push the crop up the pipe. Since I've never even had any desire to use a bagger of any sort, the correct style blade is a mystery...:oops:
 

OzFab

Well-known member
Messages
15,615
Reaction score
69
Location
Warwick Qld, Australia
Good point; I had thought about it but, maybe I'd better do something about it...

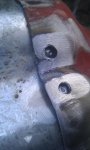
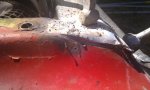
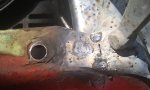
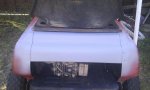
In the meantime, after a few days away, I drilled a few holes in the rear of the engine cover to plug weld the new piece in, removed the seat so I could clamp the new section & welded it in. When I refitted the seat I found that one of the mounting holes was almost 1/4" off (this is turning into a list of what NOT to do's)...

So, here's the procedure for finding & splitting spot or plug welds if you ever need to:

Spot welds are easy to find, just look for the divots in the metal & centre punch them. Plug welds are a bit harder, if they've been cleaned up. If you know the approximate location, hit it hard & quick with a grinder & a blue ring will appear around the weld; as with the spot welds, once you locate all the welds, centre punch them...

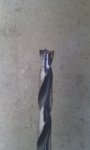
After all the welds are marked, drill into them with a 1/8" bit, not all the way through, only half way. Now you need a 3 pointed drill bit around the same size as the welds (for this exercise I used a standard 1/4" bit & re-sharpened it into a 3 pointer). Now you simply drill out the welds until you break through the top surface; if you do it correctly, the lower piece should break away from the top piece; if you miss slightly, don't panic, there's a simple solution.

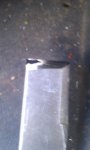
Early in my panel beating days, I was taught that the best material to make a chisel for this next step is a piece of VW Beetle leaf spring; the individual leaves are 1/8" spring steel ranging from 1/2" to 1.5" wide; I have 5 in varying widths...

With the sharpened chisel laying flat on the workpiece, lightly tap it to start, making sure it goes between the two layers of metal near the drilled out weld. Once you're sure it's started correctly, bash away at it until the weld breaks, keeping the chisle as flat as possible. One thing to watch out for is, if you totally missed the weld, the chisel is capable of cutting through 1mm steel (if sharpened correctly).

So, once I'd split all the welds on the affected side, I bolted the seat in the correct position & clamped the new piece in...

That was Saturday. I planned to weld it back in today but, when I woke up, I found it hurt to open my right eye &, being Sunday, I couldn't go to my doctor to find out why, I'll do that tomorrow...

Not sure why, probably a bit of grit or somethingin it, it's happened before but, I usually feel it straight away, not the next morning...

Lets see what happens tomorrow...

Oh, & if anyone else has input on the catcher, feel free to comment...
 

Attachments

  • IMAG0428.jpg
    IMAG0428.jpg
    91.8 KB · Views: 8
  • IMAG0429.jpg
    IMAG0429.jpg
    54.2 KB · Views: 7
  • IMAG0431.jpg
    IMAG0431.jpg
    50.5 KB · Views: 12
  • IMAG0432.jpg
    IMAG0432.jpg
    75.4 KB · Views: 7
  • IMAG0433.jpg
    IMAG0433.jpg
    46 KB · Views: 7

machinist@large

Active member
Messages
2,865
Reaction score
32
Location
West Michigan, 49331
Drill bit's again...

Based on your written description, I was trying to figure out how you turned a two flute drill bit into a three flute. Then, on photo #3, I see what you called a "three pointer", is what I've seen described as a "Trepanning Point". Don't know for sure if that's the correct & proper name for it, and I'm not really worried about it because the photo shows it just fine. And it works.

For anyone who stumbled over the drill sharpening side track we had on another thread recently, this is kind of a custom tool; it's basically a hack on a standard drill, where you grind the end flat, and then relieve the back edges between the center and the edges in the same fashion as you would a regular drill, leaving a center point to locate the bit, and two separate cutting tips at the outside edges. The goal is to cut around the outside of the spot weld, to disconnect it from the top piece, while causing as little distortion as possible to both pieces....

For anyone who would rather buy a tool for that, here in NA Eastwood Co. sells a double ended spot weld cutter, #11279 for around twenty bucks, plus shipping......

:cheers2: :thumbsup: :popcorn: Pat
 

fowler

New member
Messages
5,463
Reaction score
17
Location
Bullsbrook West Aus
I'll be watching this with interest
I need to make a catcher for my mower

If u go to Clark's rubber
They sell air Seeder hose for cheap

Like 4,6,8,10 in flexy hose

EDIT

Also I was thinking of putting a thermo fan on the catcher box to create a bit of vacume to draw the grass up
 

machinist@large

Active member
Messages
2,865
Reaction score
32
Location
West Michigan, 49331
I'll be watching this with interest
I need to make a catcher for my mower

If u go to Clark's rubber
They sell air Seeder hose for cheap

Like 4,6,8,10 in flexy hose

EDIT

Also I was thinking of putting a thermo fan on the catcher box to create a bit of vacume to draw the grass up

Fowler, almost all the heavy duty units I see it the summer have a dedicated engine to run the vacuum, just as you surmised. I like the way you think.... But sometimes the world we live in gets in the way of where we would like to be....

There are several reasons I didn't bring it up....A] I have zero experience with them, and hence have little knowledge of the fine details that they need, and B] Fab is running on a Mc Budget, which means he really doesn't have one in the first place. I try to remember those facts when I try to offer advice....
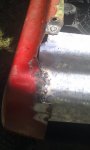
 

Poboy kartman

Senior Moments Member
Messages
12,461
Reaction score
69
Location
White Settlement Texas
Based on your written description, I was trying to figure out how you turned a two flute drill bit into a three flute. Then, on photo #3, I see what you called a "three pointer", is what I've seen described as a "Trepanning Point". Don't know for sure if that's the correct & proper name for it, and I'm not really worried about it because the photo shows it just fine. And it works.

For anyone who stumbled over the drill sharpening side track we had on another thread recently, this is kind of a custom tool; it's basically a hack on a standard drill, where you grind the end flat, and then relieve the back edges between the center and the edges in the same fashion as you would a regular drill, leaving a center point to locate the bit, and two separate cutting tips at the outside edges. The goal is to cut around the outside of the spot weld, to disconnect it from the top piece, while causing as little distortion as possible to both pieces....

For anyone who would rather buy a tool for that, here in NA Eastwood Co. sells a double ended spot weld cutter, #11279 for around twenty bucks, plus shipping......

:cheers2: :thumbsup: :popcorn: Pat

I bought some cheap ones (actually turned out to be very expensive) -because they would cut one spot weld (max) and then lose teeth faster than a 98 lb. loudmouth drunk in a shabby biker bar- rendering them useless. .....
 

OzFab

Well-known member
Messages
15,615
Reaction score
69
Location
Warwick Qld, Australia
Fowler, almost all the heavy duty units I see it the summer have a dedicated engine to run the vacuum, just as you surmised.

There are several reasons I didn't bring it up....A] I have zero experience with them, and hence have little knowledge of the fine details that they need, and B] Fab is running on a Mc Budget, which means he really doesn't have one in the first place. I try to remember those facts when I try to offer advice....

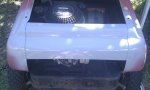
My budget isn't that tight, I just have a problem spending more on the accessories than I did on the machine itself. I know that's gonna be difficult since I've already spent more repairing it than I did buying it :lolgoku:

Again, I had thought of that idea, I've seen a few mowers with that setup but, I've seen more without it. The biggest problem I see with that idea is creating enough wind speed to do the job while keeping the propeller/impeller out of the path of the grass cuttings... & powering it... Remember, it's a pull start
 

OzFab

Well-known member
Messages
15,615
Reaction score
69
Location
Warwick Qld, Australia
Well, I went to the Docs this morning but, he couldn't find anything in my eye &, to be honest, I couldn't feel it, it must've dislodged & washed out overnight...

So, back to work...

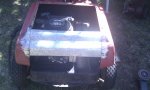
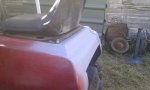
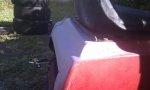
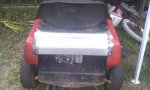
I had a rather productive day today. I rewelded the new, rear piece in then set about filling the gap on the left side of it. I started with a piece of scrap about the same thickness as the body, cut to the approximate overall size of the patch, then bent in the contour. I then placed it over the area to be filled & drew lines approximately where it needed to be cut, cut off the excess & repeated until I had it just about right.

I then tacked the bottom into place & worked my way up along the join until I got to the hole. Then I went to the top, trimmed* it & tacked that.

Then I had to fill the hole in the corner. A few cuts in the correct places, a few taps with a hammer, tack it all together & hey presto, hole gone & original profile restored

*An easy way to make sure you have the line correct before/for welding is to overlap the two pieces (the job & the patch) & cut through both with a thin cutting disc or power/air hacksaw. This will ensure a nice clean join.

-----------------------------------------------------

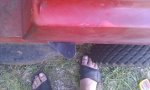
Next it was time to do something with the seat plate. A PO had "modified" it but putting two nuts under each corner to raise it, possible to improve airflow. However, they also cut off the folded piece at the back, removing all the strength & allowing it to bend. As a remedy, I first straightened it out a bit then welded a length of 15mm x 3mm flat stock across the back at 90° to the base plate to restore the strength & refitted it without the nut spacers...
 

Attachments

  • IMAG0435.jpg
    IMAG0435.jpg
    54.2 KB · Views: 4
  • IMAG0440.jpg
    IMAG0440.jpg
    59.6 KB · Views: 7
  • IMAG0439.jpg
    IMAG0439.jpg
    62.2 KB · Views: 5
  • IMAG0438.jpg
    IMAG0438.jpg
    80.3 KB · Views: 5
  • IMAG0436.jpg
    IMAG0436.jpg
    71 KB · Views: 4
  • IMAG0437.jpg
    IMAG0437.jpg
    79 KB · Views: 4
  • IMAG0443.jpg
    IMAG0443.jpg
    65.3 KB · Views: 6
  • IMAG0444.jpg
    IMAG0444.jpg
    59.3 KB · Views: 6
  • IMAG0441.jpg
    IMAG0441.jpg
    63 KB · Views: 8

OzFab

Well-known member
Messages
15,615
Reaction score
69
Location
Warwick Qld, Australia
Once that was done, I could get back to the canopy:

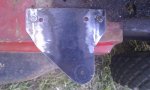
I decided it was easier to modify the plate I had than create a new one so, I gave it wings...

First I determined how much I needed at the back, cut a piece of the same material I used & double welded it on. Then, after measuring the bolt hole centres, I cut a piece for the other end & welded it on, marked out the new holes, drilled & fitted it; much better :) :wai:

You can see from the pic how far off the holes were...
 

Attachments

  • IMAG0442.jpg
    IMAG0442.jpg
    75.7 KB · Views: 5
  • IMAG0445.jpg
    IMAG0445.jpg
    76.7 KB · Views: 4
  • IMAG0446.jpg
    IMAG0446.jpg
    65.6 KB · Views: 5

zbuck

New member
Messages
781
Reaction score
3
Location
Ft. Wayne, IN
:cheers2: Very professional work, now it needs some paint. Idea, instead of a grass cacther, install a mulching blade/blades.
 

fowler

New member
Messages
5,463
Reaction score
17
Location
Bullsbrook West Aus
Depends what type of stuff your cutting

Over here there a type of grass called Kykuyu
It is self seeding and can grow 3 inches in a day given the right conditions

It's very common for public areas and lawns because it'll live off almost no water over summer
And weeds can't touch it because it creeps too fast

If I don't take up the clipping then they blow into the garden beds and 10 days later u have kyk choking out roses
 

OzFab

Well-known member
Messages
15,615
Reaction score
69
Location
Warwick Qld, Australia
:cheers2: Very professional work, now it needs some paint.

All in good time; I plan to tear the whole thing down next winter & refurb everything so, I'll paint it then...

Idea, instead of a grass cacther, install a mulching blade/blades.

Depends what type of stuff your cutting

Over here there a type of grass called Kykuyu
It is self seeding and can grow 3 inches in a day given the right conditions

It's very common for public areas and lawns because it'll live off almost no water over summer
And weeds can't touch it because it creeps too fast

If I don't take up the clipping then they blow into the garden beds and 10 days later u have kyk choking out roses

Not to mention dandelions, onion weed & several dozen other noxious weeds that tend to grow faster than grass...
 
Status
Not open for further replies.
Top