Yerf Dog 3200 renovation

Status
Not open for further replies.

Iron John

New member
Messages
397
Reaction score
1
Location
NA
It's been four years since I posted anything about our old Yerf Dog 3200.

In the last day or two I resumed work on it. This thread is to catch up.

I left off with these two threads:

Handling issues:

http://www.diygokarts.com/vb/showthread.php?t=18272

Engine swap:

http://www.diygokarts.com/vb/showthread.php?t=18586

First, to catch up:

- The Predator motor swap that was done 4 years ago worked really well in some ways but there were a couple of glitches. What went well was the motor itself. We've used the cart 2 or 3 times in 4 years and each time the motor started on the first or second pull, and with the same tank of stale gas. We always have run the carb dry and drained the bowl when putting it away, and run E-10 gas with some 2-stroke oil added.

- What was not so good was rapid belt wear. I finally realized that the center-to-center distance was a little too loose. Not much, just enough. I had to dismount the motor and elongate the motor mounting plate holes on the cart. That gave us what we needed to get the belt set correctly. I have no idea why it was necessary to do this. Maybe a Predator factory manufacturing tolerance? :confused:

- I never got around to correcting the Ackerman or accurately setting toe-in. The cart just saw hardly any use at all. As a result, even though handling was better from when we started, the left front tire saw extreme scrubbing wear in, basically, a few miles of use. Not good.

- One annoying problem is that the turning radius turning one direction is less than turning the other. As a result we could not make a U-turn on our street if turning to the right. You could only do it turning to the left, and of course that is not the intuitive way to make a U-turn.

I'd say that the cart has seen an hour total of use in the past four years. After talking it over with my son we decided that we are past it and I decided to spruce up the cart to prepare it for sale.

In this post I will document the work I am doing to dial everything in so that it can go to a new owner with a clear conscience.
 

Iron John

New member
Messages
397
Reaction score
1
Location
NA
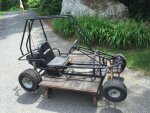
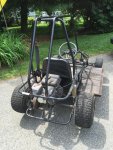
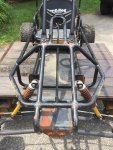
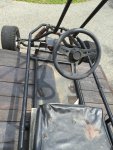
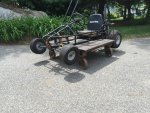
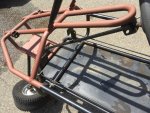
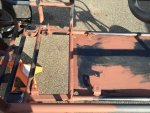
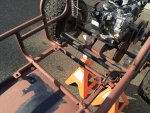
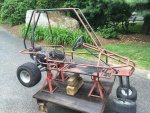
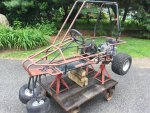
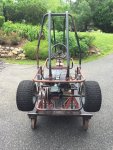
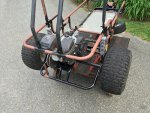
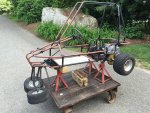
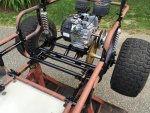
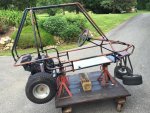
Here are a few pictures of what the cart looked like as of a few days ago. It has weathered quite a bit as a result of outside storage.

I have it on a dolly so I don't have to bend as much to work on it.

IMG_3228.jpg

IMG_3229.jpg

IMG_3235.jpg

IMG_3238.jpg

IMG_3239.jpg

The first thing I did was to start it. The motor started right up on 4 year old gasoline! :) I bench ran it on the dolly with the wheels hanging free. The throttle, torque converter, governor, brakes, and kill switches all worked properly.
 

Iron John

New member
Messages
397
Reaction score
1
Location
NA
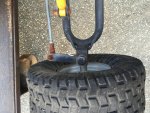
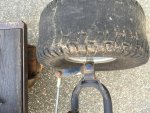
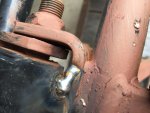
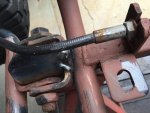
The first thing I looked at was the different turning circle right or left.

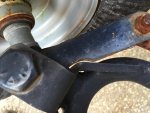
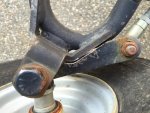
The steering arms on the hubs hit the front suspension at different points left to right.

I marked the material that had to be removed and used a die grinder to provide the needed clearance.
This change does nothing to correct the Ackerman, but I am now getting the same steering angle side to side. Both front wheels also turn more than they did before; I will have to test ride the cart to see if that makes the handling too twitchy or likely to roll over. If so, I'll have to add stops. But for now this is what it is.

IMG_3241.jpg

IMG_3242.jpg

IMG_3245.jpg

IMG_3246.jpg
 

Iron John

New member
Messages
397
Reaction score
1
Location
NA
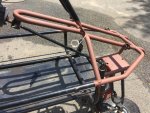
Next, I removed some componentry and used an angle grinder with Rol-Lock disks to smooth scratches and gouges and rust spots and the residual stickers (none were salvageable) on the frame rails.

I then sanded with 180 grit sandpaper to smooth that out and to provide tooth on the areas of the frame that had not been ground.

The frame is powder coated from the factory so the paint will probably adhere better since it is scuffed.

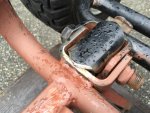
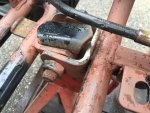
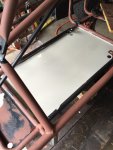
I drilled large drain holes at all corners of the floor pans - the large center section and the little area up front by the pedals. The floor pan did not have any rust perforation but the powder coat was bubbling in one spot. I don't know why the factory did not add drain holes. I also do not know why I did not drill drain holes 25 years ago when I bought this cart new. LOL.

One thing I noticed were the very sloppy factory welds. I had never noticed this before - I guess I was never this up close and personal with this frame. Plenty of weld spatter and schnoobles of MIG wire. Some voids that should have been welded. Oh well, it's not like this was made to run a Formula 1 race.

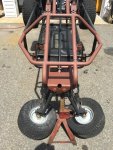
I then began priming the frame with Rustoleum red oxide primer. This was brushed on with a wide artist's pain brush. Added a dash of mineral spirits to make it flow better. Maybe 1" wide and with stiff bristles about 1 1/2" long.

IMG_3249.jpg

IMG_3250.jpg

IMG_3252.jpg

IMG_3255.jpg

Yo yo yo, cart's got stance, Bro!

IMG_3253.jpg
 

Iron John

New member
Messages
397
Reaction score
1
Location
NA
I then continued grinding and sanding the frame after mounting it on jack stands to get it up even higher and so I could access underneath.

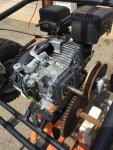
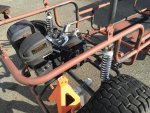
I cleaned the dirt and grime off the engine and driveline by liberally spritzing with a degreasing soap (liquid soap used in carpet cleaning machines) and then vigorously hosing it down.

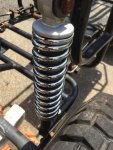
The coil springs were golden brown with rust. I used an artist's brush to apply muriatic acid. Left it on for a few minutes and hosed it off. The chrome shines!!

Wiped down the frame with a rag moistened with mineral spirits and primed the remaining areas that needed it.

IMG_3260.jpg

IMG_3262.jpg

IMG_3269.jpg

IMG_3270.jpg

IMG_3271.jpg

That's it for today. Tomorrow I will start adding some color.
 

Poboy kartman

Senior Moments Member
Messages
12,461
Reaction score
1
Location
White Settlement Texas
I have a little story about muratic acid. I was working on some heads and I decided to try muratic acid as a deruster. It didn't work too well. So...I have two 4' wide doors that basically open up to expose my whole shop. I forgot to close them and a heavy thunderstorm poured rain into my shop!!!! Well...as expected all my tools got a little bit of rust. A month later I was finding more and more rust...(which at first I just attributed to that one time dousing.)

Then...I found that danned bottle of muratic with the cap off....EVERYTHING in my shop is rusted to hail!
 

Iron John

New member
Messages
397
Reaction score
1
Location
NA
I have a little story about muratic acid. I was working on some heads and I decided to try muratic acid as a deruster. It didn't work too well. So...I have two 4' wide doors that basically open up to expose my whole shop. I forgot to close them and a heavy thunderstorm poured rain into my shop!!!! Well...as expected all my tools got a little bit of rust. A month later I was finding more and more rust...(which at first I just attributed to that one time dousing.)

Then...I found that danned bottle of muratic with the cap off....EVERYTHING in my shop is rusted to hail!

Yes, it can do that. Nasty stuff.

One ground rule I set for myself on this renovation is to only use items and supplies that I already have on hand. Paint, sandpaper, you name it. Reason is that I don't have the $$ to spend just now and it just makes sense to use up what I have. I had the muriatic acid sitting right there, so I tried it and darn if it did not work.
 

Iron John

New member
Messages
397
Reaction score
1
Location
NA
Some progress today. The weather was humid so I did not want to spray black paint lest it blush.

The cart was easy to move on the cart and easier to work on with the high jack stands. Why not combine the two?

IMG_3276.jpg

IMG_3278.jpg

IMG_3280.jpg
 

Iron John

New member
Messages
397
Reaction score
1
Location
NA
Some mechanical work taken care of.

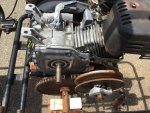
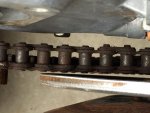
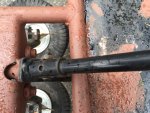
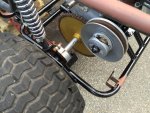
The inboard side of the TC driven sheave sometimes kisses the chain, making an annoying sound. I used the angle grinder to take a little off the inside lip. I rotated the rear wheel with one hand and held the grinder wheel against the lip with the other. The sheave turns faster than the wheel so it is easy to do this lathe-like. I used the air grinder with a Roloc to chamfer the edges and smooth things out as the grinder has a more aggressive wheel. Here you can see that I've got some clearance in there now.

IMG_3290.jpg

The rear subframe has two pivot points. The pivot points have a floating metal stop to act as a limit stop. These stops are heavy steel and they loosely fit over the subframe fulcrum bolts.

They clank around like mad. I decided to tack weld the leading edge of each stop to the frame so that they would still function as stops, but would no longer clank around. I ran a couple of small bridge beads on each. This way some future owner can easily grind off the beads should they want to put the cart back to stock.

IMG_3282.jpg

IMG_3283.jpg

IMG_3286.jpg

IMG_3285.jpg
 

Iron John

New member
Messages
397
Reaction score
1
Location
NA
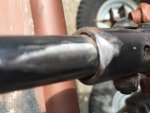
The steering column shaft fits into a sleeve and is secured by a through bolt. It's a terrible design. Over time the bolt and/or holes elongate and you get quite a bit of play in the steering. And that is not good as it really diminishes the driving experience and adds instability.

Another tack weld so a future owner can get it apart if needed.

Here is the original setup and with some grinding to expose fresh metal before welding.

IMG_3284.jpg

IMG_3287.jpg

I made sure that the steering wheel was centered and that the pitman arm was pointing straight down before welding.
 

Iron John

New member
Messages
397
Reaction score
1
Location
NA
I decided to paint a racing stripe down the middle of the floor pan, and selected Ford Gray enamel as I had a quart sitting on the shelf and do not own a Ford. :)

This shade is nice; it has a light olive cast. It should contrast nicely with the black.

I painted the entire floor pan and plan to mask off the gray stripe(s) before shooting the black.

Here is a shot - my friends, that was painted with a brush! :)

IMG_3292.jpg
 

Iron John

New member
Messages
397
Reaction score
1
Location
NA
Just a couple of free hours today so basically getting it ready for spraying.

I find it a PITA to spray tube. Nooks and crannies and it is easy to get runs if you are trying to get paint into some crevice. It's equally easy to miss a spot. I decided to try something new.

I prepainted any place that could be tricky with the spray gun, using an artist's brush (nice long handle) and slightly reduced paint. I hit all the welds where two or more tubes come together, brackets, fasteners, and so on - any place that could require the spray gun to hover, likely producing a run.

This had another benefit. It was easier to paint some of the obscure parts of the cart, like underneath the engine cradle, with a brush as opposed to all the masking that would be needed.

You might also notice that I started detailing some of the components, such as the TC driven pulley and the sprocket. I am using Hammertone paint for this. I had a few unopened cans from when it was still made by Hammertone. Now the product is offered by Rustoleum.

I'm thinking that the gray racing stripe down the middle of the floor pan should also have some red in it. I have a great shade of red that would go great with the black and the gray. It is Valspar New Holland Red.

Weather permitting I will spray the black tomorrow and will wait until that is well cured before attacking the stripes.

Any ideas on how I could lay out the stripes? I welcome suggestions as I am not the best at graphic design layout.

IMG_3296.jpg

IMG_3295.jpg

IMG_3298.jpg

IMG_3299.jpg

IMG_3293.jpg
 

Iron John

New member
Messages
397
Reaction score
1
Location
NA
This thread does not seem to be getting much traction, so maybe I should abandon it.

If there is interest I will continue posting - painting is complete and it is near completion. If not, no problemo.
 

chancer

ɔ ɥ ɐ u ɔ ǝ ɹ
Messages
9,358
Reaction score
8
Location
COMFORT, TEXAS
Well dont abandon it! Maybe we are just not Graphic design artists. LOL
Just keep inputting your progress as you go.

Post a pic of the finished paint job. I wanna see
 

Iron John

New member
Messages
397
Reaction score
1
Location
NA
Well dont abandon it! Maybe we are just not Graphic design artists. LOL
Just keep inputting your progress as you go.

Post a pic of the finished paint job. I wanna see

I appreciate the comment, but it is not only about the question I posed regarding graphic design.

I've put a lot out already with not too much interaction. The Forum is about collaboration and sharing; there's no point to me broadcasting if it is not generating interest, questions, suggestions, challenges, and even the occasional insult. :)

It's quite a PITA to go through the photo upload process five at a time; if this thread is not helping drive traffic here then perhaps it is not needed.
 

Hellion

Disc brakes are for cowards
Messages
5,371
Reaction score
714
Location
Location: Location:
I'm a new fan of this thread. You're doing a great job on the documentation and the steps you're taking to restore this beast.

I was a little shocked to see the amount of material removed from your spindle arms to make the kart steer symmetrically. I still don't know about that but I did notice that basically all the steering gear looks thin and undersized compared to the big wheels and control arms. They are probably fine in real life and beefy enough.

As far as the graphic project for the floor pan goes, I like the typical Manco graphics of one or more arrows overlapping each other and pointing forward. Seems to add some needed "movement" and action to the kart while sitting still. Maybe something along those lines, but simplified? An arrowhead?

Think I'll have a beer while you mull it over...
 

Iron John

New member
Messages
397
Reaction score
1
Location
NA
I'm a new fan of this thread. You're doing a great job on the documentation and the steps you're taking to restore this beast.

I was a little shocked to see the amount of material removed from your spindle arms to make the kart steer symmetrically. I still don't know about that but I did notice that basically all the steering gear looks thin and undersized compared to the big wheels and control arms. They are probably fine in real life and beefy enough.

As far as the graphic project for the floor pan goes, I like the typical Manco graphics of one or more arrows overlapping each other and pointing forward. Seems to add some needed "movement" and action to the kart while sitting still. Maybe something along those lines, but simplified? An arrowhead?

Think I'll have a beer while you mull it over...

Thanks for your input.

I, too, was concerned about the thought of the amount of material being removed from the spindle arms. When I dove into it, I realized there is a vertical gusset underneath on the far side. (Luckily, it is on the far side as otherwise this would have been a lot tougher to pull off.) There is still plenty of meat there.

Also, those arms just move a lightweight and lightly loaded front wheel. If the arms are significantly weaker now (I don't believe they are, but let's just say) in an accident situation, that might be good as it could save the frame from damage.

Once I saw what was underneath I had no qualms about not adding any additional gusseting.

I am glad you brought this up, though, as it is an obvious question that was part of the thought process, but I did not mention it up front.

:cheers2:

Thanks also for the ideas on the arrows.

:)
 

ezcome-ezgo

G'me sumthin to write on
Messages
4,769
Reaction score
1,345
Location
Atlanta, GA
There isn't much you can say when the photos are excellent and the progress you are making is so well documented. I have to say, if I ever found one of these karts for sale, I would feel more confident about the purchase knowing this thread existed.
 
Status
Not open for further replies.
Top