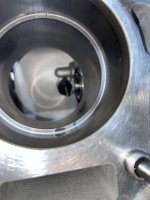
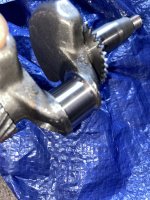
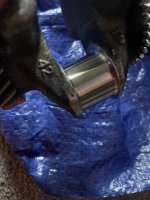
There She Blows

bob58o

SuckSqueezeBangBlow
Messages
9,646
Reaction score
1,865
Location
Chicago-town USA
Ports
 

Attachments

  • IMG_3691.jpeg
    IMG_3691.jpeg
    1.2 MB · Views: 3
  • IMG_3692.jpeg
    IMG_3692.jpeg
    1 MB · Views: 3
  • IMG_3693.jpeg
    IMG_3693.jpeg
    1 MB · Views: 2
  • IMG_3694.jpeg
    IMG_3694.jpeg
    1.7 MB · Views: 3

bob58o

SuckSqueezeBangBlow
Messages
9,646
Reaction score
1,865
Location
Chicago-town USA
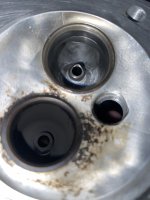
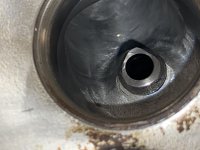
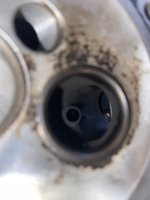
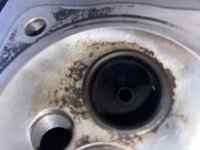
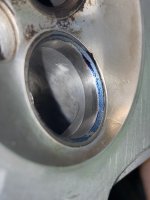
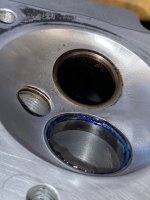
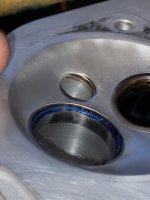
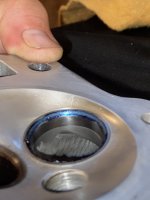
I put some prussian blue on the back of the valves and pressed into the valve seat without rotating, then removed the valve, cleaned the seat, rotated the valve (outside the head), then repeated a few times.
I’m not sure what I learned but at least my hands are blue.

Here’s some photos.
 

Attachments

  • IMG_3701.jpeg
    IMG_3701.jpeg
    1.4 MB · Views: 3
  • IMG_3704.jpeg
    IMG_3704.jpeg
    1.1 MB · Views: 3
  • IMG_3705.jpeg
    IMG_3705.jpeg
    1.2 MB · Views: 3
  • IMG_3706.jpeg
    IMG_3706.jpeg
    1.1 MB · Views: 5
  • IMG_3707.jpeg
    IMG_3707.jpeg
    998.4 KB · Views: 5
  • IMG_3730.jpeg
    IMG_3730.jpeg
    1,021.1 KB · Views: 5
  • IMG_3729.jpeg
    IMG_3729.jpeg
    1,014.1 KB · Views: 4
  • IMG_3727.jpeg
    IMG_3727.jpeg
    1.1 MB · Views: 4
  • IMG_3726.jpeg
    IMG_3726.jpeg
    1 MB · Views: 4

BrownStainRacing

Well-known member
Messages
1,367
Reaction score
1,486
I put some prussian blue on the back of the valves and pressed into the valve seat without rotating, then removed the valve, cleaned the seat, rotated the valve (outside the head), then repeated a few times.
I’m not sure what I learned but at least my hands are blue.

Here’s some photos.
😆 🤣 😂 😹, blue hands.
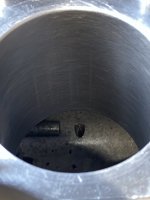
Just put it back together, with spark plug.
Lay it flat. Chamber up.
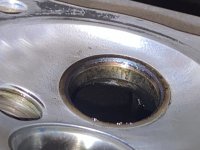
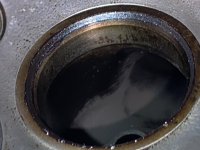
Fill with water.
Watch for leaks out the intake or exhaust ports.

I don't get all fancy dancy with vacuum test, I leave that to the professionals.

The water test works jus fine for me.
 

bob58o

SuckSqueezeBangBlow
Messages
9,646
Reaction score
1,865
Location
Chicago-town USA
😆 🤣 😂 😹, blue hands.
Just put it back together, with spark plug.
Lay it flat. Chamber up.
Fill with water.
Watch for leaks out the intake or exhaust ports.

I don't get all fancy dancy with vacuum test, I leave that to the professionals.

The water test works jus fine for me.
Last time I checked valves for leaks I think I used soapy water then blew compressed air at the back of the valve from the port and looked for bubbles.
 

bob58o

SuckSqueezeBangBlow
Messages
9,646
Reaction score
1,865
Location
Chicago-town USA
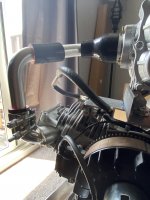
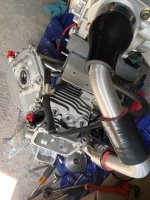
Intake Iteration Alteration Alliteration #3.
 

Attachments

  • IMG_3731.jpeg
    IMG_3731.jpeg
    1.5 MB · Views: 8
  • IMG_3732.jpeg
    IMG_3732.jpeg
    1.7 MB · Views: 8
  • IMG_3733.jpeg
    IMG_3733.jpeg
    1.8 MB · Views: 8
  • IMG_3734.jpeg
    IMG_3734.jpeg
    1.9 MB · Views: 8

bob58o

SuckSqueezeBangBlow
Messages
9,646
Reaction score
1,865
Location
Chicago-town USA
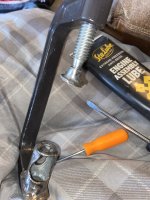
I may not know much about much, but I know the only way I can install valves requires this homemade tool, assembly lube, a magnetic flathead screwdriver, and some sort of pick. Even with all that, I still feel lucky every time the split keepers go and stay where they should.
 

Attachments

  • image.jpg
    image.jpg
    1.9 MB · Views: 6

bob58o

SuckSqueezeBangBlow
Messages
9,646
Reaction score
1,865
Location
Chicago-town USA
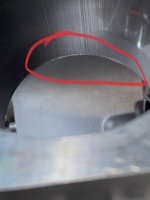
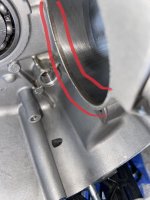
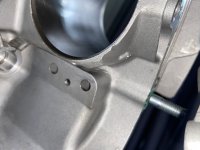
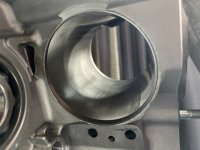
So I tried to play Sherlock Holmes and investigate the engine to look for signs of rubbing.

I noticed the sleeve didn’t seem true/straight in the block. My terminology may be off.

The bottom of the sleeve has this taper on one side, the other side doesn’t have a taper and maybe the piston is scraping in the location shown in the photos.
 

Attachments

  • IMG_3749.jpeg
    IMG_3749.jpeg
    474.5 KB · Views: 5
  • IMG_3747.jpeg
    IMG_3747.jpeg
    196.4 KB · Views: 5
  • IMG_3748.jpeg
    IMG_3748.jpeg
    719.8 KB · Views: 5

bob58o

SuckSqueezeBangBlow
Messages
9,646
Reaction score
1,865
Location
Chicago-town USA
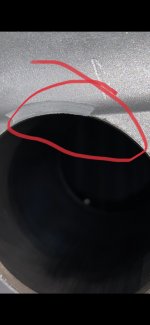
Ok… what’s going on here?
the one side of the piston is clearly scraping the block, right?

Why it do that?
Why no taper?
Why piston line of travel directly in line block that possibly over hangs ID of sleeve?

I did clearancing on the bottom for cam lobes or whatever?but don’t remember doing anything on the opposite side (where it’s scraping).
 

Attachments

  • IMG_3750.jpeg
    IMG_3750.jpeg
    1.1 MB · Views: 9
  • image.jpg
    image.jpg
    2.6 MB · Views: 8
  • image.jpg
    image.jpg
    2.3 MB · Views: 9
  • image.jpg
    image.jpg
    3.3 MB · Views: 9

bob58o

SuckSqueezeBangBlow
Messages
9,646
Reaction score
1,865
Location
Chicago-town USA
Maybe it’s better after some sandpaper? Hopefully it won’t be scrapping once the rings are installed.
 

Attachments

  • IMG_3756.jpeg
    IMG_3756.jpeg
    2.7 MB · Views: 4
  • IMG_3758.jpeg
    IMG_3758.jpeg
    2.4 MB · Views: 4
  • IMG_3755.jpeg
    IMG_3755.jpeg
    2.6 MB · Views: 4
  • IMG_3757.jpeg
    IMG_3757.jpeg
    1.5 MB · Views: 4

bob58o

SuckSqueezeBangBlow
Messages
9,646
Reaction score
1,865
Location
Chicago-town USA
Since I’m waiting on parts…

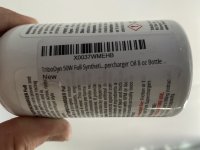
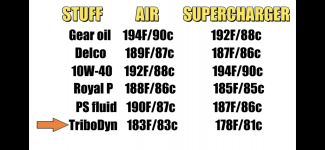
This was proven to best oil for maintaining low temperatures inside this little supercharger compared to a few other options according to third party independent (non-sponsored) testing performed by Robot Cantina… If you enjoy this type of stuff and you don’t follow his channel on YouTube you are missing out. Who doesn’t want to watch high speed snow-thrower powered Saturns?

The bottle doesn’t have a weight listed, but the sticker on the bottle says 50W.


Attachments

  • image.jpg
    image.jpg
    2.3 MB · Views: 5
  • IMG_3767.png
    IMG_3767.png
    535.8 KB · Views: 5

bob58o

SuckSqueezeBangBlow
Messages
9,646
Reaction score
1,865
Location
Chicago-town USA
Before I start searching…

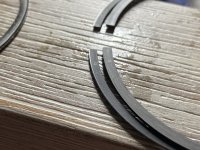
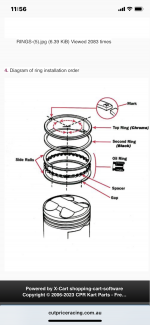
If anybody reading along knows which ring is top ring in this set.

One is all back.

One has a “silver” ring on the outside.

I believe I’ve read that the markings (In this case the letter “R”) face up.
 

Attachments

  • IMG_3771.jpeg
    IMG_3771.jpeg
    2.1 MB · Views: 2

bob58o

SuckSqueezeBangBlow
Messages
9,646
Reaction score
1,865
Location
Chicago-town USA
I did a little polishing. My cheap calipers read 1.191” across the journal in one direction and 1.194” perpendicular to that.

I’ll have to check the specs on ARC for roundness and diameter specs.

The new rings seem to both have gaps of 0.013” when pushed into the cylinder about 1” below the deck surface (before honing).
 

Attachments

  • IMG_3774.jpeg
    IMG_3774.jpeg
    1.3 MB · Views: 3
  • IMG_3775.jpeg
    IMG_3775.jpeg
    1.1 MB · Views: 3
  • IMG_3777.jpeg
    IMG_3777.jpeg
    1.7 MB · Views: 3
  • IMG_3776.jpeg
    IMG_3776.jpeg
    1.7 MB · Views: 3

bob58o

SuckSqueezeBangBlow
Messages
9,646
Reaction score
1,865
Location
Chicago-town USA
If I take enough measurements, a few of them read 1.188”. Lol

it’ll be fine. My hands and my calipers both are failing.

“Measure the crank pin diameter with the outside micrometer. It should measure 1.188" +/- .0005". Measure it in several spots to insure roundness. If the diameter is out of round more than .0005", it should likely be replaced. The crank pin finish should be smooth to the touch.”
 

bob58o

SuckSqueezeBangBlow
Messages
9,646
Reaction score
1,865
Location
Chicago-town USA
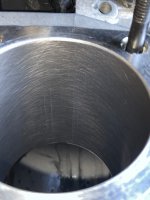
My first attempt at the 240 grit flex hone.
You can still see some of the vertical score lines.

Good enough… Or more flex-honing? Those might have been 180 grit scratches?
 

Attachments

  • IMG_3802.jpeg
    IMG_3802.jpeg
    888.5 KB · Views: 4
  • IMG_3801.jpeg
    IMG_3801.jpeg
    1.3 MB · Views: 4

65ShelbyClone

Active member
Messages
704
Reaction score
221
Location
SoCal
Going back to the bottom of the cylinder, I think your block was defective in that QC didn't catch the casting flash hanging out by the piston. You can see that the bottom of the sleeve has a chamfer on it. It's there to prevent a sharp edge from scratching the piston when it inevitably rocks in the bore. The Lifan plant or whoever made it probably cut out a machining step by putting the chamfer there before the liner was cast into the block rather than cutting it in the boring process. The latter would have prevented the problem.
 

bob58o

SuckSqueezeBangBlow
Messages
9,646
Reaction score
1,865
Location
Chicago-town USA
Hopefully the flex hone cleaned up the casting flash at bottom of the cylinder enough.

It looks less scrapy. Comparing to previous photo, I think it looks ok.

Through the magic of time travel… the before and after.
 

Attachments

  • IMG_3816.png
    IMG_3816.png
    2.5 MB · Views: 4
  • IMG_3819.jpeg
    IMG_3819.jpeg
    2.3 MB · Views: 4
Top