bob58o
SuckSqueezeBangBlow
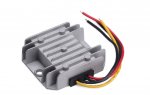
https://www.amazon.com/dp/B01EMYHOC6/ref=psdc_10967761_t1_B0159W0UL2
What do you think?
Can I use something like this to regulate the DC voltage for charging the battery?
Do I need to regulate the DC voltage if spinning 5-6k RPM?
Guessing a 12V regulator wouldn't provide the voltage needed to charge a battery? (14.4V)
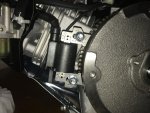
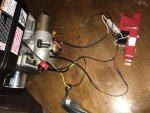
How would I wire it?
+ input from the coil through the diode.
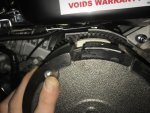
- input from the ground (grn wire) in the keybox housing
+ output to the battery + through a diode
- output to the battery -
Set output to 14 Volts. Set output to 3 Amps - 5 Amps.
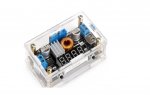
Parameters:
Input voltage: DC 7-36V
Output voltage: DC 1.25-32V (Continuously adjustable)
Output current: adjustable, 5A Max(please use it within 4.5A)
Output power: 75W Max(please use it within 50W, if the pressure difference is big,please reduce power)
Working frequency: 180KHz
Conversion efficiency: Up to 96%
Working temperature:-40°C - +85°C
Installation: 4pcs 3mm screws
Module dimensions: L 68.2mm*W 38.8mm* H 15mm
description:
Short circuit protection : Yes
Over temperature : Yes (automatically shut off the output after over temperature)
Input reverse polarity protection: No(if necessary, please in input String into high current diode)
Wiring: terminal block or solder terminals, V-IN is the input, V-OUT is output
Usage:
Use as a battery charger
Use as high power constant current LED drive module.
Use as a normal Step-down modules with over current protection capability.
Note:
1. Because the factory default output voltage is 17V. If the module can not be adjusted, the output voltage is always equal to the input voltage.When you encounter this problem, counterclockwise rotation of the potentiometer 10 laps or more, by doing this you can adjust the output voltage.
2.Because of Module output terminal string has a current sampling resistor, it is a normal phenomenon that there will be 0-0.2V voltage drop after connected to the load.
3.When its output is more than 3A/35W, please enhance heat dissipation!
4.This DC converter is single output, the output voltage of the USB port is the same as the output voltage of the module, if your load is USB device, please make sure the module's output voltage is set at 5V.
Packing including:
1 x Buck Converter
What do you think?
Can I use something like this to regulate the DC voltage for charging the battery?
Do I need to regulate the DC voltage if spinning 5-6k RPM?
Guessing a 12V regulator wouldn't provide the voltage needed to charge a battery? (14.4V)
How would I wire it?
+ input from the coil through the diode.
- input from the ground (grn wire) in the keybox housing
+ output to the battery + through a diode
- output to the battery -
Set output to 14 Volts. Set output to 3 Amps - 5 Amps.
Parameters:
Input voltage: DC 7-36V
Output voltage: DC 1.25-32V (Continuously adjustable)
Output current: adjustable, 5A Max(please use it within 4.5A)
Output power: 75W Max(please use it within 50W, if the pressure difference is big,please reduce power)
Working frequency: 180KHz
Conversion efficiency: Up to 96%
Working temperature:-40°C - +85°C
Installation: 4pcs 3mm screws
Module dimensions: L 68.2mm*W 38.8mm* H 15mm
description:
Short circuit protection : Yes
Over temperature : Yes (automatically shut off the output after over temperature)
Input reverse polarity protection: No(if necessary, please in input String into high current diode)
Wiring: terminal block or solder terminals, V-IN is the input, V-OUT is output
Usage:
Use as a battery charger
Use as high power constant current LED drive module.
Use as a normal Step-down modules with over current protection capability.
Note:
1. Because the factory default output voltage is 17V. If the module can not be adjusted, the output voltage is always equal to the input voltage.When you encounter this problem, counterclockwise rotation of the potentiometer 10 laps or more, by doing this you can adjust the output voltage.
2.Because of Module output terminal string has a current sampling resistor, it is a normal phenomenon that there will be 0-0.2V voltage drop after connected to the load.
3.When its output is more than 3A/35W, please enhance heat dissipation!
4.This DC converter is single output, the output voltage of the USB port is the same as the output voltage of the module, if your load is USB device, please make sure the module's output voltage is set at 5V.
Packing including:
1 x Buck Converter
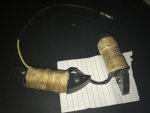
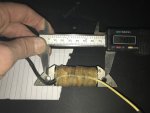
Attachments
-
 reg.jpg80 KB · Views: 1
 C 5.5-32V