That looks cool  ,
,
I'm just wondering.. where do you put your feet?
Axle pegs or will it have foot rests somewhere?
'sid
,I'm just wondering.. where do you put your feet?
Axle pegs or will it have foot rests somewhere?
'sid
,That looks cool
I'm just wondering.. where do you put your feet?
Axle pegs or will it have foot rests somewhere?
'sid

Oh, sounds uncomfortable in tight turns, but I'm sure you already know that.
Nevermind, that thing looks mean; I like it
'sid
Don't forget that low gearing multiplies torque...


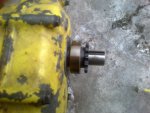
Dude, how are we supposed to know how much space needs to be filled when the only pic of the engine in the entire thread has a sprocket on it?
You should know better :toetap05:
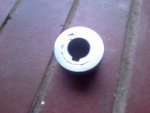
Also, is there a size difference in the shaft between the actual shaft & where it comes through the casing?
Dude, how are we supposed to know how much space needs to be filled when the only pic of the engine in the entire thread has a sprocket on it?
You should know better :toetap05:
Also, is there a size difference in the shaft between the actual shaft & where it comes through the casing?
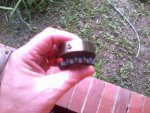
Just cut a piece of tubing/pipe to the length you need and slide it on..... Stacked washers will move with time and torque loads..... one piece of tube fixes that problem......
I assume I would have to try get a piece of tubing with the inner diameter as close to the diameter of my PTO?
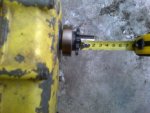
3/4" pipe (as opposed to tube) should fit just about perfect. It needs to be cut/ground/filed absolutely square though, otherwise, it won't butt properly...
Wait, did you say it's bigger than 3/4"?
It is 22mm in diameter.
 I've seen offered as "Quality" material, I refuse to even think of blaming you for being cautious or doubtful when it comes to just grabbing something without checking it......
 Pat
Pat