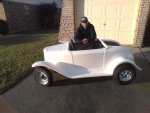
Kart Klinic 32 Hot Rod

firemanjim

Just kartin' around....
Messages
5,247
Reaction score
87
Location
Houston Texas
:censored::censored::mad:
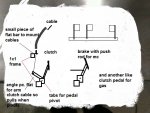
Gots no room for my feet! Once I put in pedals, the room needed to use the pedals might not be there. Was gonna do left foot/brake, right foot/clutch, and hand throttle using clutch lever from shifter kart. I was thinking maybe a 2" dropped floor in the front, maybe 8" long. Then angle it back up to the chassis. ?.?.?.?
Last night I had the bright idea that maybe the 200cc atv engine in my storage might fit this chassis. As long as the sprocket shaft will line up with the pivot bolts, I can make new mounts. It's a Honda atv engine with a high/low 5 speed gear box. (so it's a 10 speed.....:rolleyes:)
It's also a semi automatic, iirc, so I could eliminate a foot pedal........hhmmmmmmm gonna have to go get it....... Just to see.
Being that it has a real low first, in low range, I wonder if I could pop a wheelie.......:wai: that would be cool....:rolleyes:
Got some work done, I'll post pics later tonight. Still trying to tinker while the weather lets me..... :thumbsup:. L8TR
 

wagx2

New member
Messages
127
Reaction score
0
Location
Lexington NC
I used the set-up from Yamaha rhino, for pedals then modified the mount to give more room, and then used a Honda pilot throttle cable which was long enough to route it from front to back, as far as the low gear wheelie, you have low center of gravity, compared to a 3 wheeler, but should be able to get good whip-lash effect. so far looking good, I'm still plugging away but the last details like pedals fuel tank and wiring seem to take a lot more time than the build. but if you keep the 450 with clutch may be the regular go kart pedal config. would work:

1426465719893.jpg


don't know how much room you have but may give a diff idea as far as space use...? I had to use part of the space in the front a arm box portion above steering to house mc, and back half of pedal set-up a lot of good space taken up by front end boxing.
 

firemanjim

Just kartin' around....
Messages
5,247
Reaction score
87
Location
Houston Texas
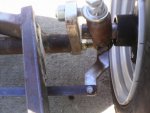
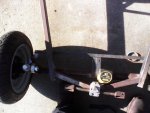
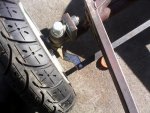
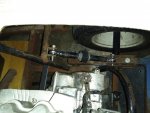
The rack and pinion has a throw of 1.75" each direction, from center. Right now I have my arms at a 90° to the spindle ,still giving me good Ackerman. BUT , I need 2.25" throw each way, to get full swing of wheel. My arms are 3" to the bolt hole. Do I move the arms in 1/4" per side, or make them longer? Move them in, right?
 

Attachments

  • IMG_20150429_174723.jpg
    IMG_20150429_174723.jpg
    78.6 KB · Views: 9
  • IMG_20150429_174700.jpg
    IMG_20150429_174700.jpg
    87.1 KB · Views: 14
  • IMG_20150429_174626.jpg
    IMG_20150429_174626.jpg
    111.7 KB · Views: 12

wagx2

New member
Messages
127
Reaction score
0
Location
Lexington NC
yea to get more throw move bolt hole in, and if the arms could be angled in more and bolt hole moved in, you could get more throw. also the rack and pinion you have in the picture, I see the bolt holes for mounting it, but it looks like when its mounted, the spline for steering will be facing up? or do you have another bracket that puts it at a angle so that you don't have to have 3 joints to make the 90 turn?
 

Joe-405

Enjoying New Projects
Messages
2,673
Reaction score
97
Location
U.S.A.
You can still make it all hand operated. You could make the clutch and brake on one and throttle on the other. The clutch will work when instantly pulled and brake will come in after.


So basically you pull half way for clutch and all the way for clutch and brake.
 

firemanjim

Just kartin' around....
Messages
5,247
Reaction score
87
Location
Houston Texas
yea to get more throw move bolt hole in, and if the arms could be angled in more and bolt hole moved in, you could get more throw. also the rack and pinion you have in the picture, I see the bolt holes for mounting it, but it looks like when its mounted, the spline for steering will be facing up? or do you have another bracket that puts it at a angle so that you don't have to have 3 joints to make the 90 turn?
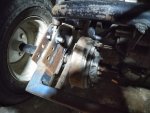
No, it will only have 2 shafts connected by a diy swivel. The mounting plate you see was first bent upwards by my floor jack a few nights ago. Didn't realize I was touching it as I jacked the kart up. Then today, for measuring purposes, I bent it up further. It will be angle around 45-50`.......

You can still make it all hand operated. You could make the clutch and brake on one and throttle on the other. The clutch will work when instantly pulled and brake will come in after.


So basically you pull half way for clutch and all the way for clutch and brake.
Hmm, that's good food for thought... :thumbsup: I thought about something similar. Throttle and brake on right pedal, together. Using a toe hook pedal, push for GO!!! Pull back with toes for WHOA!!!.... You only need about a half inch travel with a m / c to activate a pulling ram. Speedway motors has a nice little clutch pulling solenoid for $40. You don't need much throw for this drum brake set up I'm using.....
I will figure something out....
 

firemanjim

Just kartin' around....
Messages
5,247
Reaction score
87
Location
Houston Texas
Return of the '32

Howdy! You long timers will remember me and the last kart I was working on. To the ones who don't, :cornut: ....
Well, after some time sitting, I dusted off the ol kart to get er done....😁 This is an impromptu post , just wanted to get it going while I think about it... Maybe the mods will combine my old build thread with this so you can all catch up. Please feel free to look up my old threads related to this kart.
At last post, I had rear suspension.... Due to hating where the engine was , I no longer have rear suspension...☹️😁 I made links to replace the shocks. This will eventually be the chain tensioner.
The engine was too far forward and not leaving me much foot room, and that's why and when I quit working on it... Fast forward 2+ years. ....
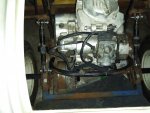
Got into a wreck on Feb 14 and ended up breaking my sternum and 2 ribs.... Sitting at home in the garage , in limp mode, I kept staring at the kart and engine placement. I decided to move the engine 6" back and 3" down. I'll now have to build a jackshaft assembly for it and modify the swing arm to accept the pillow blocks and recessed for chain clearance.
The Bendix brand brake drum is going to be a parking brake now and I'm adding rear disc brakes and front disc brakes in the semi near future.

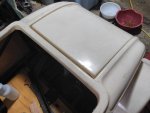
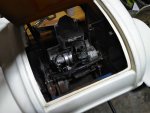
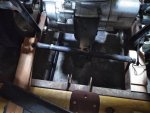
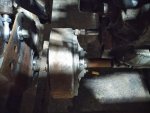
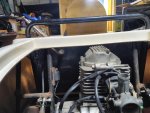
In the pics , the engine needs to go rearward about another 1.5" ..... The engine is currently tilted back a little, temporarily... . It will eventually sit snugly under the rear deck lid. It's kinda hard to hold up a 60+ pound engine, hold the steel hoop, AND weld it , when your chest is broke all the way across ...☹️ That's why it's currently off a tad.... Good thing I only tacked it .....the engine mounts though, I fully welded. They should be pointed downward about 15° more...☹️ I can work with that though.... (I hope )
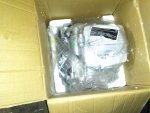
Oh , and I bought a brand new 200cc engine for it a while back.... Just sitting around collecting dust....😑
 

Attachments

  • FB_IMG_1564766233727.jpg
    FB_IMG_1564766233727.jpg
    58.4 KB · Views: 12
  • IMG_20200318_232927.jpg
    IMG_20200318_232927.jpg
    221.6 KB · Views: 9
  • IMG_20200318_232939.jpg
    IMG_20200318_232939.jpg
    260.1 KB · Views: 10
  • IMG_20200318_233005.jpg
    IMG_20200318_233005.jpg
    245.5 KB · Views: 7

landuse

Moderator
Staff member
Messages
18,777
Reaction score
559
Location
Pietermaritzburg, South Africa
Welcome back Jim!!!! :D I hope you are well. It will be nice to finally see this project complete.

I have merged your new post with the old thread. Let me know if there are any issues :thumbsup:
 

JTSpeedDemon

2019 Build Off Winner!
Messages
4,026
Reaction score
162
Location
Texas
Hey, welcome back Jim! I keep saying we have more and more old timers returning!

I wanna see that 200 on that kart! It'll be sick!
 

itsid

Moderator
Staff member
Messages
11,563
Reaction score
246
Location
Ruhrpott [Germany]
Hey Jim, good to see you!

Wow broken sternum doesn't sound like a fun valentines day to me :eek:
Hope you'll have a speedy -and most of all painless- recovery.

have you thought about making a cardboard mockup of the engine..
some stiff cardboard and a few sticks of hotsnot just to get the mounting locations and overall dimensions correct..
then mount that instead of the engine to get the welds done.
should be easier to lift with one hand and such ;)

'sid
 

firemanjim

Just kartin' around....
Messages
5,247
Reaction score
87
Location
Houston Texas
:furious2: due to the crapademic going on , my kart work has been put on the back burner until mid week.... We are shutting our shop down for 2 weeks, so I'll have plenty of time to get the engine in there. In the meantime, I'm fixing to order a few things...:wai: :wai:
Until Wednesday gentlemen..... Until Wednesday.....:roflol:
On a side note, I really don't have much to go to get this running and driving.... I MIGHT actually get er dun.....:popcorn:
 

firemanjim

Just kartin' around....
Messages
5,247
Reaction score
87
Location
Houston Texas
Got a lot going on this week. Crazy work schedule....Last night I cut off the engine mounts I put on in the wrong angle. Today , I cleaned them back up and rewelded them in the new position. Somewhere, I screwed up again and the shifter shaft is hitting the Bendix brake drum. 🤬. ... The final drive sprocket is in a good location , so happy with that.... The hood fits flat again and I have about 1" clearance at the minimum, around the head.... With an aluminum heat shield , should be no problem....
If I'm off tomorrow, I'll be sorting out the shifter location, and possibly modifying the angle of the rear engine mount. I'd LIKE to not have to cut the shifter shaft shorter, but will if need be. That's like just a tiny issue to work around. Stuffing this engine into this tiny hold was considerably more....😁
I'm also going to make the front engine mount locating tabs to bolt that tube onto. Yes it's at an angle, but so is the original mount it's welded to so 🤷*♂️🤷*♂️
Working on too many projects at the moment doesn't help either. My 1 man mini speed boat is almost done. Started an indoor garden project for an old neighbor of mine. And I am currently designing another mini speed boat , but fir 2 people , and jet drive. Of course , you know me, so it too will be running a go kart engine (or 2) fir power..... Just like my mini v hull speed boat....😁😁:cheers2:
 

Attachments

  • IMG_20200405_174929.jpg
    IMG_20200405_174929.jpg
    179.6 KB · Views: 4
  • IMG_20200405_174940.jpg
    IMG_20200405_174940.jpg
    191.4 KB · Views: 4
  • IMG_20200405_175014.jpg
    IMG_20200405_175014.jpg
    200.5 KB · Views: 4
  • IMG_20200405_175034.jpg
    IMG_20200405_175034.jpg
    246.8 KB · Views: 4
  • IMG_20200405_175051.jpg
    IMG_20200405_175051.jpg
    228.2 KB · Views: 4

firemanjim

Just kartin' around....
Messages
5,247
Reaction score
87
Location
Houston Texas
Pulled an engine out of my uncle's car this morning, then came home and took a nap. I guess I had a dream or something, cuz when I woke up, I immediately set out to weld up my exhaust...🤔
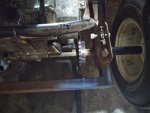
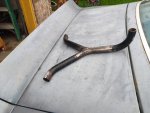
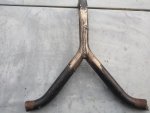
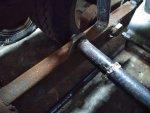
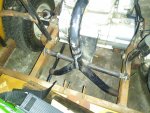
I opened up the original exhaust seal ring to fit a 1.25" exhaust tube. Then I hacked up a pressure washer frame to get these bent pieces...😂😂 I forgot to take pics , but I notched the long tube down where the Y is. I cut it in half length wise and then did the same to the other short section. They fit together perfectly, for once...:wai:
Anywho.... I welded it up in two passes. First was a tight bead to fuse the edges together. Then I cleaned it off and did a wider pass over it. For me, it helps to keep from burning through thinner metals. You can see in a couple spots I went too fast and got a smaller bead. I need to start wearing reading glasses when I weld....😑
The exhaust will exit in front of the rear tires on each side. No mufflers to start.... We will see how loud it is and play it by ear...😂😂
I also cut up some 1/4" flat bar and made the mounting tabs for the front engine mount. I'll weld it once I align the engine sprocket with the axle sprocket .
Having to split up your free time between projects blows.....☹️ Gonna order the bearings for my jack shaft tomorrow morning. (Unless I can find some locally🤔🤔)
Once I get the engine set , I can work out the shifter location , and come up with some gas and brake pedals....
Now that I think about it, I guess I could start running all the wiring.... I got a full wiring harness with key start....😁 I'll post pics of that later tonight. I haven't even pulled it out the package yet either...🤔🤔
 

Attachments

  • IMG_20200409_184453.jpg
    IMG_20200409_184453.jpg
    376.1 KB · Views: 4
  • IMG_20200409_184428.jpg
    IMG_20200409_184428.jpg
    255.3 KB · Views: 5
  • IMG_20200409_184351.jpg
    IMG_20200409_184351.jpg
    221.4 KB · Views: 5
  • IMG_20200409_184327.jpg
    IMG_20200409_184327.jpg
    215.7 KB · Views: 4
  • IMG_20200409_184320.jpg
    IMG_20200409_184320.jpg
    221.9 KB · Views: 5
  • IMG_20200409_184508.jpg
    IMG_20200409_184508.jpg
    195.4 KB · Views: 3

firemanjim

Just kartin' around....
Messages
5,247
Reaction score
87
Location
Houston Texas
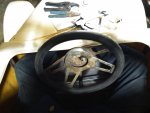
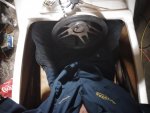
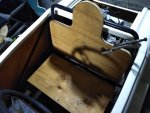
This is the seat I'm going to end up using. It gives me way more leg room , just not as comfy as the racing bucket seat I planned on using. With the bucket seat , my knees were at the top bar of the cage. As you can see in the pics, I have about 3"-4" space from knee to cage. My legs are more extended and comfortable too. Brake and throttle pedals should be easy now. (Clutch is on the shifter )
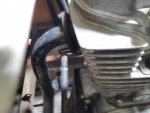
I opened up the exhaust retaining plate to fit the new header this morning. Welded on the seal bung and opened up the bend to about 100°-110° instead of the 90° it had so it would clear the front engine mount. I'll run a mounting tab off that to hold the header down by the Y to keep it from rattling around.... 😁
Remember when I said the shifter shaft was too close to the brake drum? Well guess what! I figured out an EASY solution.... I'm going to add in 1/4" flat bar between the pillow blocks and frame. I just need to cut off the brake drum mount and redo it so it's lower.... No problem....
I took out the wiring harness to 👀 it.... So much for "complete harness"..... There is one plug that I'm almost sure goes to lights, but have no corresponding plug for it. And there's like 4 other wires I have no idea where they go.... I'll post pics of that tomorrow. Maybe one of you guys knows what they're for.....
Till next time .....:auto::auto:
 

Attachments

  • IMG_20200411_015853.jpg
    IMG_20200411_015853.jpg
    151.3 KB · Views: 3
  • IMG_20200411_015814.jpg
    IMG_20200411_015814.jpg
    155.6 KB · Views: 3
  • IMG_20200411_015757.jpg
    IMG_20200411_015757.jpg
    161.9 KB · Views: 3
  • IMG_20200411_015513.jpg
    IMG_20200411_015513.jpg
    235.9 KB · Views: 3
  • IMG_20200411_015433.jpg
    IMG_20200411_015433.jpg
    254.5 KB · Views: 3
  • IMG_20200411_021507.jpg
    IMG_20200411_021507.jpg
    182.3 KB · Views: 3
  • IMG_20200411_021733.jpg
    IMG_20200411_021733.jpg
    168.8 KB · Views: 3
  • 15865906258092316551840870119635.jpg
    15865906258092316551840870119635.jpg
    248.9 KB · Views: 3

firemanjim

Just kartin' around....
Messages
5,247
Reaction score
87
Location
Houston Texas
Busy day so didn't get much done. Tomorrow is coming on real fast already.....
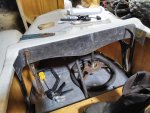
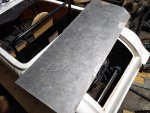
Cut out the dash panel today at work. Might run some screws through to the 1" square tubing inside the windshield base, if I can find my box of assorted self tapping screws. I have 2 of the large aluminum panels to do the door panels and then curve around the rear deck. I'll cover the gap with an angled piece , to help draw fresh outside air to the engine head and header. Will also keep the heat out of the drivers area.... :wai:
I got my bearings and chain in today..... Would have been nice if I had order the sprockets too... I'll try to get em ordered tonight or tomorrow... I'm pooped.... 4:30am comes too quick.... Tomorrow I have a car I have to work on for a friend . Hoping to get the door panels bent up and mocked up in place by tomorrow night. We shall see....
The bearings..... I think I should have ordered 3....18" is a long span for a 3/4" shaft with a bunch of torque pulling on it.... Put one in the center and it should be good for 30+ ft pounds of torque.... I hope.....:lolgoku:
Until next time......
 

Attachments

  • IMG_20200413_202821.jpg
    IMG_20200413_202821.jpg
    188 KB · Views: 5
  • IMG_20200413_202836.jpg
    IMG_20200413_202836.jpg
    259.7 KB · Views: 5
  • 15868287648392588531992166786213.jpg
    15868287648392588531992166786213.jpg
    220.7 KB · Views: 3
Top