Go-Kart Alley the Series

Status
Not open for further replies.

Poboy kartman

Senior Moments Member
Messages
12,461
Reaction score
63
Location
White Settlement Texas
Just some random thoughts: Hope I'm not intruding.

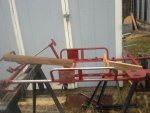
If I were doing that ride, give it a little tiny bit of flair to accentuate what the car was...

Find a crappy LTD... and..., or, something that resembles door handles.

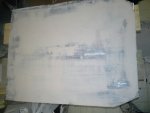
Here's a crappy photoshop job.

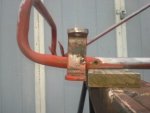
Make the bumper silver. It's a big ole thing on the car, and this kart seems to have it to work with.

On the sides, put flat sides & some door handles, make it appear to be the 4 door.

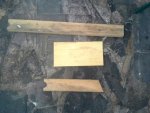
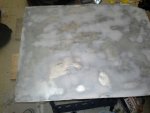
And the back pieces. Maybe they could be taller, pic 2

Just some thoughts. Take it or leave it.

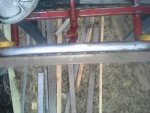
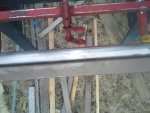
You read my mind brother. I was thinking the same thing- with a few extras.My big idea is the rub guards on the bumper- very 80's ....and not just a little bit out of the scenario for the bump scene.I see a camera shot of those zooming in pre-bump. Soooo- needless to say- the bumper is now straight ( pretty much). I was also thinking a press-on chrome/rubber trim piece to run the full length of the side.

Anyway- yeah- just couldn't see the main focal point of the "thugkart" being jacked. But this is Dennis' baby- all I promised was a kart that looked brand new- I'll have to clear the mods with him. BTW- this is his wife's kart- so I'm doing stuff you don't need to just for a prop.
 

Orange Krate

Active member
Messages
1,117
Reaction score
14
Location
North Texas
Sounds good to me:D hadn't thought about it much before. Some of those LTD cat emblems would be cool too if we can find 'em.

I guess you're right Poboy, you don't "have" to do anything but I'm glad you are. I just don't want to put you out too much:)

No comments on the stunt rigging:( I was really proud of that...
 

Poboy kartman

Senior Moments Member
Messages
12,461
Reaction score
63
Location
White Settlement Texas
OK- Time to post the long-winded backstory with pictures to follow. Totally off-topic from the build: I just can't seem to get to sleep before 3 or 4 am lately. The day I got thugkart- went to sleep at 4 am- woke up at 11. Had stuff to do around here- so didn't get to Orange Crate's until @ 3. Think I got home @ 6:30. Finally had breakfast @ 10:30- then spent the next couple of hours eating lunch and supper. DANG IT!- 4:00 AM again! Got up at 8- did all the stuff in the thread and then some- didn't start eating 'till the sun went down.

Up till 4 AM again-back up at 7:30, hit the ground running. Worked on the kart until 1:40 PM - then went to the folks for Christmas. Finally REALLY ate....

Up till 3- up at 7- weather got nasty and I am tired.......

So- I decided to fix the front bumper. It was bent up some and had a bow in the middle of about 1/4". It didn't take too long to fix it and it's better than 90% fixed. Gonna post pics now and an explanation later.
 

Poboy kartman

Senior Moments Member
Messages
12,461
Reaction score
63
Location
White Settlement Texas
OK-Here goes:
 

Attachments

  • 13883794288081.jpg
    13883794288081.jpg
    111.4 KB · Views: 21
  • 13883795207654.jpg
    13883795207654.jpg
    25.2 KB · Views: 19
  • 13883794598182.jpg
    13883794598182.jpg
    116.4 KB · Views: 20
  • 13883794824243.jpg
    13883794824243.jpg
    102.6 KB · Views: 24
  • 13883795419435.jpg
    13883795419435.jpg
    112.9 KB · Views: 25

Poboy kartman

Senior Moments Member
Messages
12,461
Reaction score
63
Location
White Settlement Texas
In the first picture I have a straight edge clamped to the top of the bumper. The bow in is @ 1/4". In another you see the bend upward. The pieces of wood are red oak and pine. You can see how they line up in another, the space between to be filled by a 20 ton hydraulic jack. Finally you see the process in action. I thought I took more and better pictures but at least this can reference what I now need to describe.
 

Poboy kartman

Senior Moments Member
Messages
12,461
Reaction score
63
Location
White Settlement Texas
It only took about 10 minutes to get the pieces ready. For the most part it worked as planned. I started out with just the wood and jack, positioned just slightly left of center. Very quickly, it became apparent that I needed to stabilize the right side because it was where it needed to be. I had planned to put pipe clamps on both sides to take out the bow before I star ted, but since the left side needed to be pushed down anyway I started without any. I put the pipe clamp on the right side and put the pressure on.

I was cold so I went in for a short break. When I came out, everything had popped loose and was on the ground. I then added a ratchet strap to hold the pipe clamp and positioned the pusher stick on the far left side. I didn't get the results I wanted so I took everything off and used a jackstand and a BFH. I still didn't get to where I wanted, so I gave up on trying to straighten in that direction. I put everything back together with a ratchet strap and pipe clamps on both sides. I got it 99% straight when the right side pipe clamp snapped at the threads. That's when I called it good.

I started working on another problem but fatigue and cold drizzle stopped it for the day. More tomorrow. .....
 

Oxymoron

Newbesque builder.
Messages
444
Reaction score
10
Location
Maryland
No comments on the stunt rigging:( I was really proud of that...

I dig it. I just don't comment as much these days.

I expected to see the rigging in the video with the post, but it was the same vid as before.

It's a neat idea. I think it will work great, man.

MacGuyverism.
 

Orange Krate

Active member
Messages
1,117
Reaction score
14
Location
North Texas
I'm setting aside my entire spring for it if I can keep from being interrupted.

Now why'd I have to go and say that? A long building dame drama at my wife's business came to a head today resulting in half the staff quitting. So I'm losing my right hand woman as she'll have to pick up the slack leaving me to play Mr. Mom in addition to full time job. It's still on the market...maybe it'll sell soon:)

Don't let me stop now...we're on a roll!
 

Poboy kartman

Senior Moments Member
Messages
12,461
Reaction score
63
Location
White Settlement Texas
OK- It was cold today. .did some welding. ....

I have the cheapest wire welder Harbor Freight sells. It ran out of wire today. That was the spool it came with and sums up my welding experience. Funny thing, with the new spool my welds were much better. I can't say they were "rolls of nickles"- but they more closely resembled an assortment of loose change than the area under a pigeon roost which describes my previous welds. I made some progress, but nothing I really want to post up yet. Still doing little tweaking stuff, but I'll post it all up eventually.

Been doing a little off the cuff calculations and I think I have room to bring the frame inside and prep it some- probably will. Meanwhile there is plenty of work to do on all the small pieces. .....

Anyway- some pictures to follow. ...
 

Poboy kartman

Senior Moments Member
Messages
12,461
Reaction score
63
Location
White Settlement Texas
Some from yesterday and some from today:
The first one shows the result of "jacking with it" .... (I'm so funny- sometimes I make my own self laugh-but usually there's a mirror involved- but then again, that's also what makes me cry)....Then you can see some Bondo on the floor pan, the last one shows high spots I need to hit with a pecking hammer. Then a rim- something I can play with hand sanding with a big towel on my lap watching the idiot box and soaking up suds.......
 

Attachments

  • 13884530459135.jpg
    13884530459135.jpg
    51.2 KB · Views: 13
  • 13884530265874.jpg
    13884530265874.jpg
    68.5 KB · Views: 15
  • 13884529259431.jpg
    13884529259431.jpg
    84.5 KB · Views: 16
  • 13884528809390.jpg
    13884528809390.jpg
    116.1 KB · Views: 18
  • 13884531030846.jpg
    13884531030846.jpg
    105 KB · Views: 15

Orange Krate

Active member
Messages
1,117
Reaction score
14
Location
North Texas
I can't say they were "rolls of nickles"- but they more closely resembled an assortment of loose change than the area under a pigeon roost which describes my previous welds.

Haha! Keep "jacking with it!" Looking good! With drama subsiding, I'm back on the General today. Hope to have it primed today.
 

Poboy kartman

Senior Moments Member
Messages
12,461
Reaction score
63
Location
White Settlement Texas
Kwik update- Thought the pan was pretty much ready for paint, but when I shot a coat of primer filler on it and eye-balled it sideways I saw too many flaws, so I'm going to do a reading coat of black lacquer and probably am going to need a touch of glazing putty to get it right.

I'm not going to short-cut that though, when I painted custom boat trailers, it was all about the fenders- get them right and nobody looks anywhere else. With karts it's the pan.

Just an aside- one time I pulled a trailer out of the paint booth and someone was simply awed by the look. "Man- it just looks like you could stick your hand right in there-( really good paint jobs have depth)....so HE DID!!!!!!

Fortunately- I had enough self- control that I can relate this from free world and not serving a life term. BTW- yes, it was the fender......:rolleyes:
 

Poboy kartman

Senior Moments Member
Messages
12,461
Reaction score
63
Location
White Settlement Texas
The best upgrade you can do to that HF wire feed is to buy some quality wire for it.

Thanks-; IDKY- But there was definitely a difference in the wire that came with it and the replacement spool ( both from HF). Meanwhile- I am "Poboy" so the upgrade will have to wait until the spool is empty......:popcorn:
 

firemanjim

Just kartin' around....
Messages
5,247
Reaction score
83
Location
Houston Texas
Thanks-; IDKY- But there was definitely a difference in the wire that came with it and the replacement spool ( both from HF). Meanwhile- I am "Poboy" so the upgrade will have to wait until the spool is empty......:popcorn:

Doug, do yourself a favor and yank that $20 crap out of the welder and run down to a welders supply and buy the same size roll of Miller wire for like $$15 or the one made by an American Co . Cant think of the name but it has a US flag and a dude in a welding hood welding.... on the spool . It WAY better wire,WAY easier and BETTER looking welds with LESS splatter ,and its cheaper. It is here anyway,assume by you too. I go to Standard Steel Supply. I buy 2 rolls of miller wire for $31..... Home depot has miller for $12 or $13 .....
 

Poboy kartman

Senior Moments Member
Messages
12,461
Reaction score
63
Location
White Settlement Texas
Thanks for the suggestions, I really do appreciate them and will do so when funds allow. Right now those funds are earmarked for milk, eggs and ice cream. ....and the milk and eggs aren't a given.:thumbsup:
 

Orange Krate

Active member
Messages
1,117
Reaction score
14
Location
North Texas
Picked up some 3/4" key way shaft for the stunt rigging. Then put it right back down. $56!!! No key way was only $15. So I guess I'll cut 'em in the mill. Sheesh! I should be in the business of putting in key ways. Or even better, if one is high how about splines and gear teeth? Oh wait...that's my day job.

1st day back at work kicked my butt. Hopefully progress tomorrow. Definitely Saturday.
 
Status
Not open for further replies.
Top