American Ethos (2025) Electrathon America Racer

Functional Artist

Well-known member
Messages
5,345
Reaction score
2,834
Location
Toledo, Ohio
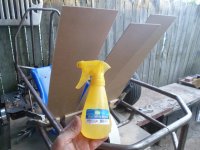
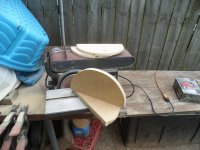
I'ma thinkin' that a bit of water
SAM_5101.JPG
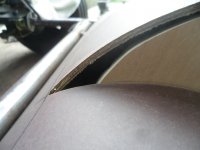
"Misted" on the underside, of this Hardboard
...should help "soften" 'er up
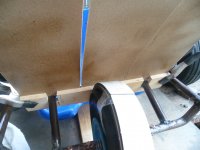
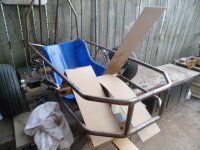
SAM_5102.JPG
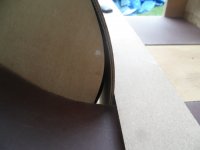
Then, add a bit of pressure &/or "coercion" to get 'em, ta curve nicely
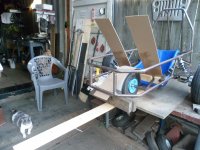
SAM_5104.JPG
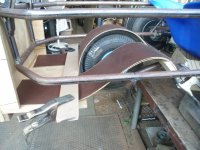
Everything seemed ta be goin' pretty good

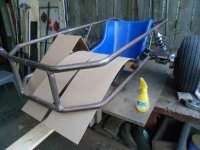
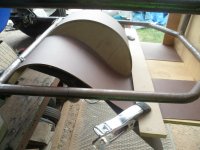
I got the center strip ta curve nicely around the tire
...& "tucked" under a frame rail
...plus ~1/2" of "padding" to help ensure tire clearance
But,
While workin' ta curve the left strip
...& "tuck" under a frame rail
...it "SNAPPED" :eek: (that was NOT part of the plan) :mad2:
SAM_5106.JPG
OH...DARN :furious2:

Well, HECK :huh:
...while I'ma at it, lemme see what I can do with, the other strip ;)

Hmmm...that's not too bad :wai:
SAM_5107.JPG
But, when I went ta curve 'er down a bit more
..."SNAP"...again :censored:
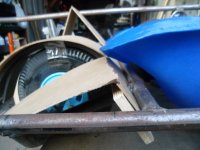
SAM_5111.JPG
Well...I guess
...back ta the drawin' board :huh:
 

Functional Artist

Well-known member
Messages
5,345
Reaction score
2,834
Location
Toledo, Ohio
Less mist, more soak.

Ive said for a while now;
Anything worth doing right is worth doing twice.
Hey WTR,

Sometimes...even more times o_O

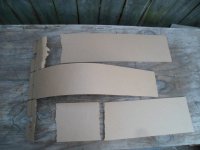
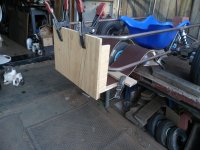
Here is (what's left of) the hardboard floorboard
...but, we can still use it as a "template' ta make...more :thumbsup:
SAM_5112.JPG
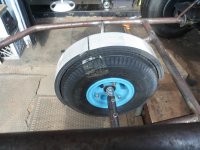
Here is the front wheel with the 1/2" "spacer" pad (2 pieces of 1/4" foam rubber taped in place)
SAM_5114 (1).JPG
I wasa lookin' on FB Marketplace
...& found an ad for (2) 4' x 4' pieces of Formica (countertop material)

They were brown & scuffed
...but, couldn't beat "both for $5.00"
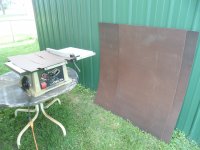
SAM_5115 (1).JPG
Plan B
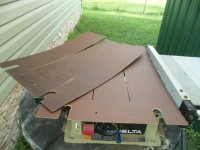
Used the Hardboard "template" ta "mark 'em up"
...& the Table saw ta "cut 'em up"

Yup, I made (2) in case I mess (1) of 'em up :)
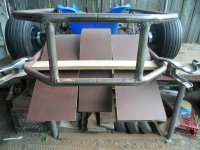
SAM_5117.JPG
Test fit"
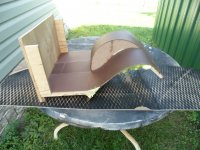
...& yup, they "B" more flexible :wai:
SAM_5118.JPG
This is how I'ma formin' the "Nose panel" & footwell
SAM_5120 (1).JPG
Side(er) view ;)

* Initial "mock ups" went pretty well (no breakin')
...so, I went ahead & "doubled 'em up"

Seemed like it would make the structure stronger
...& help it to "hold its shape" better...too :sifone:
SAM_5121 (1).JPG
 

Functional Artist

Well-known member
Messages
5,345
Reaction score
2,834
Location
Toledo, Ohio
Weather man lied...again :mad:

I got a lot of the floorboard "mocked up" & glued
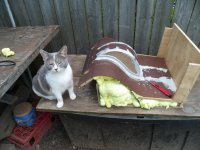
...& then, went on a tow...while everything...dried
&
While I wasa gone...we got a "pop up" rain shower :huh::mad2:

Even, "soaked" my camera
..."see" the vapor "blur" in the middle of the pic (w/Ducky)?
SAM_5135 (1).JPG
Before leaving, I made up a CAD "fender sidewall template"
...but, it got wet/destroyed in the "deluge" :(

Luckily...I had used it to "mark" a piece of wood...before leaving ;)

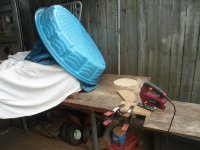
After the fact, I found a use for this old plastic kids pool (with a crack in the bottom...so, it don't hold water)
..."rain blocker" :thumbsup:
SAM_5125 (1).JPG
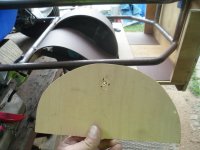
Wooden, fender "sidewall" insert :2guns:
SAM_5128 (1).JPG
 

Functional Artist

Well-known member
Messages
5,345
Reaction score
2,834
Location
Toledo, Ohio
I "finagled" (technical term) the wooden fender side wall insert "in place" (in-between the wheel & the floorboard)
...but, it "left" some "gaps" :(
SAM_5129 (1).JPG
There is a pretty good sized "gap" in the rear :furious2:
SAM_5130 (1).JPG
...& a bit of a smaller "gap" in the front
...but, still "gappy" :huh:
SAM_5131 (1).JPG
So, I made some "notes-n-notations"
...& then, made up another one (or 2) ;)

* Also, notice, I made (V2) out of 1/2" MDF (Multi Dimensional Fiberboard)
...which gives us a nice-n-wide gluing surface
...& some bulk/thickness, for "rounding" the edge :)
SAM_5127 (1).JPG
Yup, (V2) fits much better
...nice-n-tight :thumbsup:
SAM_5133 (1).JPG
Another view :sifone:
SAM_5132 (1).JPG
 

Functional Artist

Well-known member
Messages
5,345
Reaction score
2,834
Location
Toledo, Ohio
Now glass it all together to make a plug to make a mold.
Hey Denny,

I'ma thinkin' "this" will be the mold :thumbsup:

Just gotta "stiffen 'er up"
...so, I can "take 'er off" the chassis

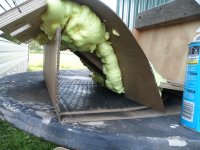
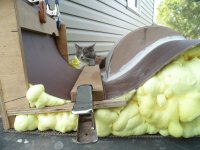
So, I used spray foam (ta help 'er hold its shape)
...& "lock" everything together
...& "firm" the whole unit up a bit ;)
&/also,
I installed a tube
...& inflated the front tire :cheers2:

* Pic "caught Ducky sleepin' again :innocent:
...& still has the "vapor" spot :huh:
SAM_5136 (1).JPG
 

Functional Artist

Well-known member
Messages
5,345
Reaction score
2,834
Location
Toledo, Ohio
Got the front fender/floorboard "form or mold" off the chassis :thumbsup:
SAM_5139 (1).JPG
Spray foam helped 'er to "keep the shape"
SAM_5143 (1).JPG
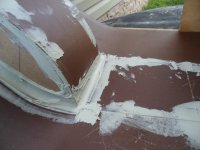
Body work...Brought to you by Bondo (body filler) ;)
SAM_5149 (1).JPG
I used the bottom 1/2 of a plastic "bolt bag" (re-purposing)
...with the corner "cut off"
...as a (like for decorating cakes...I don't remember...so insert name here) :smartass:
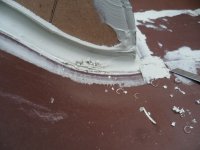
...to "squeeze out" the body filler
...into the "corner"
SAM_5157.JPG
I got 'er all "roughed in"
SAM_5158.JPG
* I used a 14mm deep well socket to help "establish" the "inner curve"
SAM_5159.JPG
Across the front...too
SAM_5160 (1).JPG
 

Functional Artist

Well-known member
Messages
5,345
Reaction score
2,834
Location
Toledo, Ohio
You’re making a mess now! :ROFLMAO:
Hey Denny,
Ya gotta bread some eggs ta make a...(you know) :thumbsup:

While that "mess" wasa hardin' up
...I added a piece of cardboard as a bottom (as the mold was kinda "rock-ity")
...& it should make 'er stiffer & stronger too
SAM_5163 (1).JPG
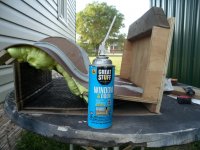
Got another can of spray foam (as the last can was "leftovers" from makin' the monocoque "mold" for Diamonite)
...ta fill 'er in

* Spray Foam Tip:
The Window & Door "type" doesn't expand as "aggressive"
...or exert as much pressure
...on the "area" being foamed :cheers2:
SAM_5162 (1).JPG
Got 'er mostly filled in
...& do ya see what I see? :unsure:
SAM_5164 (1).JPG
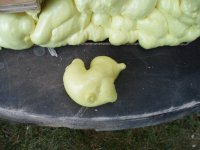
This here "drip" looks like a 'wittle Ducky :bannana:
SAM_5165 (1).JPG
 

Denny

Canned Monster
Messages
11,633
Reaction score
8,069
Location
Mayberry, Indiana
Hey Denny,
Ya gotta bread some eggs ta make a...(you know) :thumbsup:

While that "mess" wasa hardin' up
...I added a piece of cardboard as a bottom (as the mold was kinda "rock-ity")
...& it should make 'er stiffer & stronger too
View attachment 155235
Got another can of spray foam (as the last can was "leftovers" from makin' the monocoque "mold" for Diamonite)
...ta fill 'er in

* Spray Foam Tip:
The Window & Door "type" doesn't expand as "aggressive"
...or exert as much pressure
...on the "area" being foamed :cheers2:
View attachment 155231
Got 'er mostly filled in
...& do ya see what I see? :unsure:
View attachment 155236
This here "drip" looks like a 'wittle Ducky :bannana:
View attachment 155237
I mostly see how momma is going to kick your azz for screwing up her picnic table! :roflol:
 

Functional Artist

Well-known member
Messages
5,345
Reaction score
2,834
Location
Toledo, Ohio
I mostly see how momma is going to kick your azz for screwing up her picnic table! :roflol:
Hey Denny,

Thats the old picnic table
...& I already got in trouble for that :devil2:

Ducky says "The Bondo is good-n-hardened up
...& the Spray Foam is good-n-set...too"

I'ma usin' this knife ta "cut away" some of the excess (ta save some sandin' time) :thumbsup:
SAM_5171 (2).JPG
Yes, this excess
Kinda "whittles" like wood
SAM_5173.JPG
Usin' that 14mm deep well socket helped us make some nice "fillets" :2guns:
SAM_5174 (2).JPG
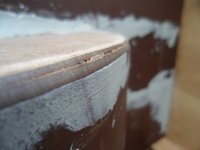
Then, I used a router w/a 1/4" round over bit ta
..."round off" the edges, of the fender (ta save some sandin' time)
SAM_5182 (1).JPG
Kinda like this
SAM_5184 (2).JPG
 

Functional Artist

Well-known member
Messages
5,345
Reaction score
2,834
Location
Toledo, Ohio
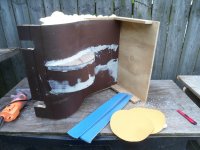
For smoothin' here are my Sanding Weapons (or aids) :2guns:
SAM_5186 (1).JPG
Usin' some 40 grit "rock paper" (as ya can't really call 'er sandpaper 'cause its really rough)
...& some 80 grit "smaller rock paper" (not quite as rough)
SAM_5187 (1).JPG
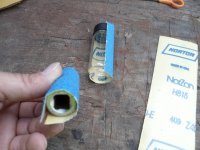
We can use the sticky-ness on the backside for attachin' ta tools :thumbsup:
SAM_5189 (2).JPG
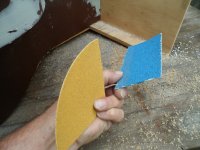
The sticky-ness is good for makin' (2) sided "sanders" too :sifone:
SAM_5192 (2).JPG
After removin' some of the excess
...I used a "round sander" ta do some "inner" roundin" ;)
SAM_5199 (1).JPG
Still sandin & roundin'
...& makin' progress/gettin' closer :cheers2:
SAM_5203 (1).JPG
&
Yup, me & Ducky are usin' a koolin' &/or exhaust fan whilest a sandin' & roundin' :cornut:
SAM_5205 (2).JPG
 

Functional Artist

Well-known member
Messages
5,345
Reaction score
2,834
Location
Toledo, Ohio
Ducky says (while takin' a break from watchin' a foam "head lookin' thing" expandin' from the inside of a foam formation) :eek:

"What about curvin' the transition
...from the floorboard upwards to the "front panel"?

Don't cha needs ta do that? :unsure:

Um...yea...maybe...I guess :innocent:

So, last minute
...addition
...or script change
...&/or plot twist :cheers2:
SAM_5207 (2).JPG
So, I added a piece
...& then, Ducky says (while still watchin' the foam "head" raisin' outta the foam Volcano) :huh:
"Wow! ...that is quite the transition" :p
SAM_5208 (2).JPG
 

Functional Artist

Well-known member
Messages
5,345
Reaction score
2,834
Location
Toledo, Ohio
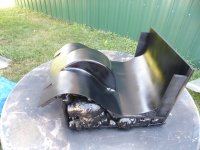
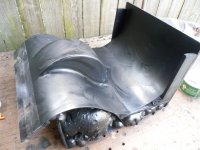
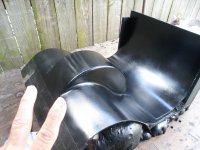
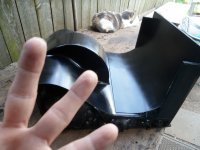
I got the floorboard mold all rounded & sanded pretty smoothed
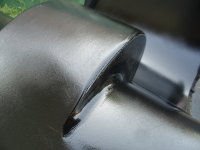
...then, sealed 'er up w/Satan Black spray paint :thumbsup:

* Remember "this" is the mold
...so, we mainly need 'er to be all smooth & roundy (technical term)
...& any imperfections "seen" will be on the underside, of the fiber glassed piece ;)
SAM_5211 (1).JPG
View from the rear
SAM_5213 (1).JPG
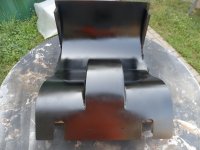
View from the front
SAM_5214.JPG
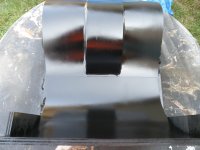
Close up view
SAM_5212 (1).JPG
 

Functional Artist

Well-known member
Messages
5,345
Reaction score
2,834
Location
Toledo, Ohio
I really don’t see how it’s a mold. It looks like a plug for a mold.
Hey Denny,

Well...I did some measurin'
...& note makin'
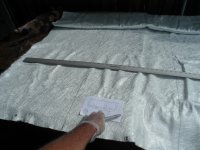
...& then, applied those "specs" to some 1708 Fiberglass cloth

* Notice I'ma wearin' some PPG (Personal Protective Gear)
SAM_5239 (2).JPG
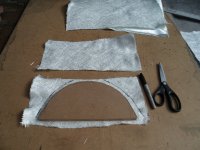
I used (1) of the wooden 1/2 circles I made up as "rough" templates
...ta make the fender "side panel" pieces
SAM_5242.JPG
Ducky says we B ready ta do this :cornut:
SAM_5257.JPG
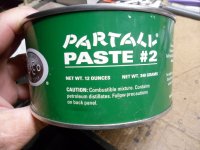
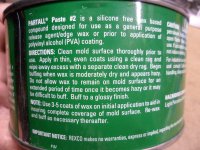
Mold Separation Wax
SAM_5253.JPG
Instructions say to apply several (3 - 5) coats
SAM_5254.JPG
At the last minute I noticed that those "holes" needed covered
...so, we will produce a nice-n-smooth surface
...& we'll re-establish those holes...later

A couple of "strips" of box tape did the trick ;)
SAM_5260.JPG
First coat of mold wax
SAM_5264.JPG
First coat of mold wax
...buffed off
SAM_5265.JPG
Second coat of mold wax
...& buffed off
SAM_5267.JPG
Third coat of mold wax
...& buffed off
SAM_5268.JPG
 

Functional Artist

Well-known member
Messages
5,345
Reaction score
2,834
Location
Toledo, Ohio
From my YouTube University edumication :smartass:

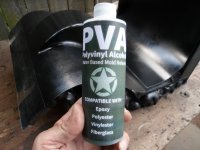
I learned that some folks also use a product called PVA (Polyvinyl Alcohol)
...which is basically some kinda plastic dissolved in alcohol
...& when spread over "something" it creates a thin "plastic barrier"

* This product is a mold release "agent" on its own
...but, we are basically using it as a "secondary" release "layer" :thumbsup:
SAM_5270.JPG
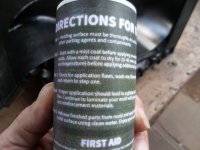
* This product is "water based"
...so, it can be easily removed/washed off with plain 'ol water

* Notice at the end of step 5 it says "enjoy your success" :wai:
SAM_5271.JPG
I just brushed 'er on with a foam brush (recommended in the videos)
...& spreads kinda like oil-based paint
SAM_5272.JPG
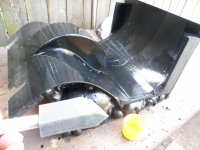
Close up view of what coated vs. un-coated looks like ;)
SAM_5273.JPG
All Ready to Rock :2guns:
SAM_5274.JPG
 
Top