2020 - Excalibur Electric Racing kart

Functional Artist

Well-known member
Messages
4,403
Reaction score
1,679
Location
Toledo, Ohio
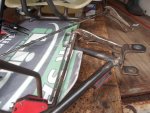
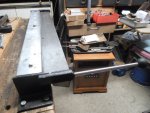
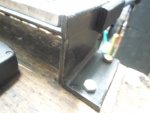
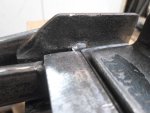
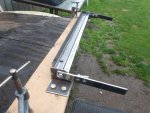
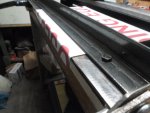
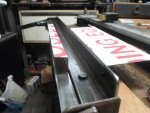
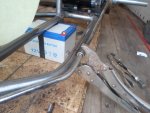
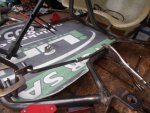
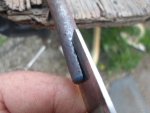
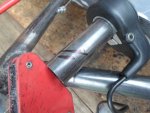
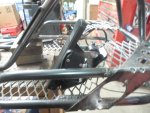
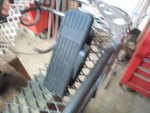
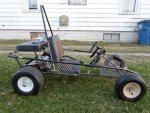
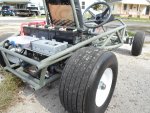
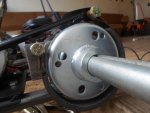
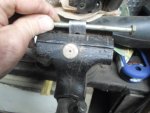
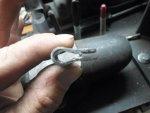
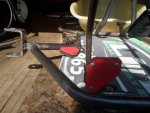
I aligned the floor board within the frame rails
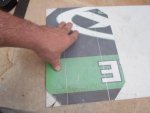
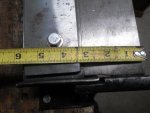
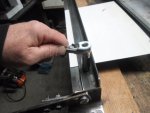
…& then, used the "tabs" (as guides) to drill some (1/4") holes :thumbsup:

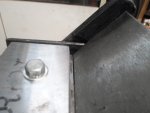
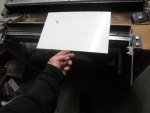
Then, simply bolted 'er on :cheers2:

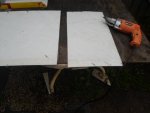
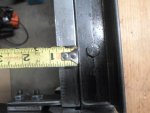
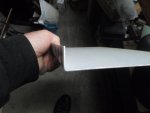
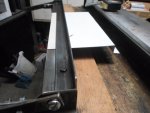
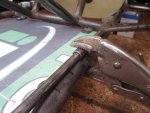
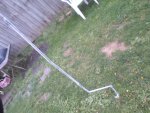
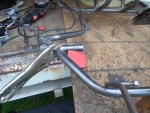
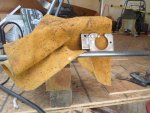
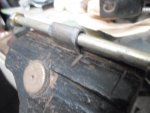
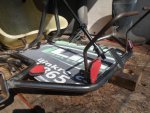
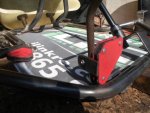
* May be able to angle the "wings" (extended front/side edges) "up" a bit, to add some extra stability :2guns:
...but, this floor board actually feels pretty stable already
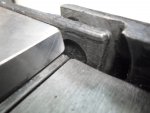
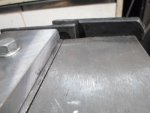
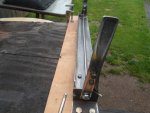
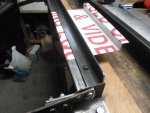
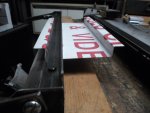
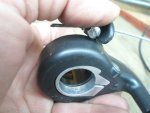
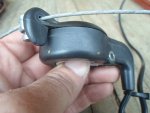
…& the pedals "function" well too :wai:

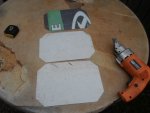
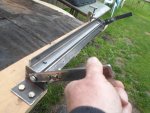
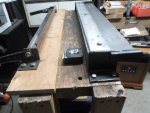
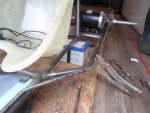
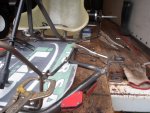
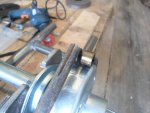
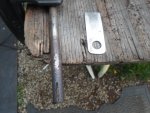
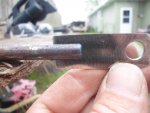
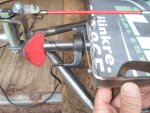
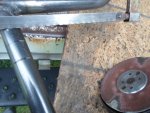
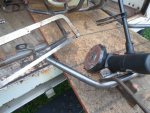
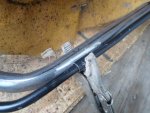
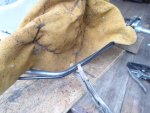
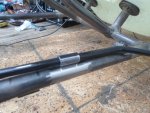
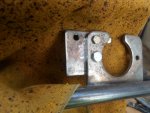
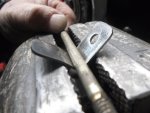
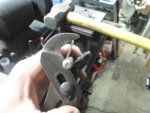
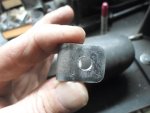
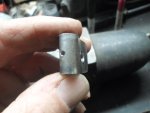
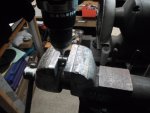
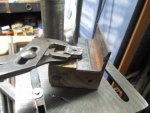
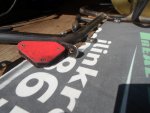
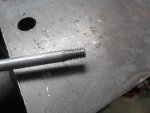
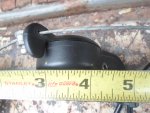
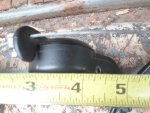
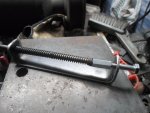
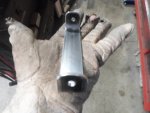
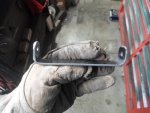
Next up, pedal "linkages" :popcorn:
 

Attachments

  • SAM_4521.JPG
    SAM_4521.JPG
    312 KB · Views: 7
  • SAM_4522.JPG
    SAM_4522.JPG
    313.5 KB · Views: 6
  • SAM_4523.JPG
    SAM_4523.JPG
    315.5 KB · Views: 5
  • SAM_4524.JPG
    SAM_4524.JPG
    315.7 KB · Views: 5

Functional Artist

Well-known member
Messages
4,403
Reaction score
1,679
Location
Toledo, Ohio
Been thinkin' about & workin' on the throttle linkage :thumbsup:

I measured, the thumb throttle (that Ima gonna use) seems to have ~1" of travel or "throw"
...so, this way we know what we need for "pedal travel" :cheers2:

I made up a spring loaded "slide stop"
...but, IDK :yawn: 
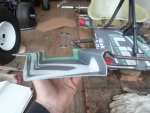
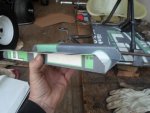
just, not "feelin' it" :huh:
Still thinkin' :idea2:
…& bouncin' ideas
 

Attachments

  • SAM_4557.JPG
    SAM_4557.JPG
    310.4 KB · Views: 5
  • SAM_4583.JPG
    SAM_4583.JPG
    314.8 KB · Views: 4
  • SAM_4582.JPG
    SAM_4582.JPG
    312.5 KB · Views: 4
  • SAM_4581.JPG
    SAM_4581.JPG
    310.8 KB · Views: 5
  • SAM_4580.JPG
    SAM_4580.JPG
    314.4 KB · Views: 4
  • SAM_4579.JPG
    SAM_4579.JPG
    314.8 KB · Views: 5
  • SAM_4572.JPG
    SAM_4572.JPG
    307.5 KB · Views: 5
  • SAM_4571.JPG
    SAM_4571.JPG
    317.5 KB · Views: 6

Functional Artist

Well-known member
Messages
4,403
Reaction score
1,679
Location
Toledo, Ohio
While thinkin' about the throttle linkage, I figured I would get my HF 30" sheet metal bender out
...to "angle" the "wings" (of the floor board) up a bit :thumbsup:

Mainly, to see how it could/would affect the "routing" of (both throttle & brake) linkages
...but, also to see how much it "stiffened" the front area, of the floor board
(yup, a noticeable increase in "stiffness") :cheers2:


While I had 'er out, I figured I'd bend up some "battery trays" too ;)

I was able to cut (1) "blank" out of the "scrap", left from making the floor board
…& then, I cut a couple more, out of another old sign that I had in storage :2guns:


Technical note:
I think it would be "best" to NOT let these batteries "hang" lower than the chassis
(as to NOT/NEVER be able to scrape on the ground)

So, I'm thinkin' that these "trays" should be only ~1" deep
…& they'll need a ~1' "lip" (for mounting)

* The (12V 12AH) batteries, that I'm using for the initial tests are ~4" wide x ~6" long
…so, (2) of them "end to end" would be ~4" wide x ~12" long

As such, these "tray blanks" needed to be ~12" x 8" wide :cool:
…1" (lip) x 1" (side) x 4" (bottom) x 1" (side) x 1" (lip)

But, this design, presented a new problem :huh:
...how to put (2) "opposing" 90* bends 1" apart from each other :idea2:
...as my bender has ~3" "bending plates" on both sides :mad2:
 

Attachments

  • SAM_4626.JPG
    SAM_4626.JPG
    310.9 KB · Views: 5
  • SAM_4556.JPG
    SAM_4556.JPG
    312.8 KB · Views: 3
  • SAM_4554.JPG
    SAM_4554.JPG
    310.2 KB · Views: 3
  • SAM_4547.JPG
    SAM_4547.JPG
    316.3 KB · Views: 3
  • SAM_4545.JPG
    SAM_4545.JPG
    314.6 KB · Views: 3
  • SAM_4548.JPG
    SAM_4548.JPG
    311.1 KB · Views: 3
  • SAM_4637.JPG
    SAM_4637.JPG
    309.7 KB · Views: 3
  • SAM_4638.JPG
    SAM_4638.JPG
    310.9 KB · Views: 3

Functional Artist

Well-known member
Messages
4,403
Reaction score
1,679
Location
Toledo, Ohio
I thought about "modifying" my bender
...but, no :huh: not really a good idea :mad2:

Then, I thought maybe, I can make a "clone" of it :idea2:
(it's a pretty simple design & doesn't seem like it would be that complicated)
...but, a bit smaller, "lighter duty" & to my specifications :thumbsup:

It looks like the most important thing is to make sure the "pivot" is right in the middle of the plates :2guns:

So, I rounded up some angle iron
…& went to measurin' markin', cuttin' & weldin' :cheers2:

It seemed to come out pretty good :wai:

Now, we'll see if it works :rolleyes:
…&/or for how long :popcorn:

The last pic is of the (2) benders "back to back"
 

Attachments

  • SAM_4651.JPG
    SAM_4651.JPG
    313.6 KB · Views: 3
  • SAM_4648.JPG
    SAM_4648.JPG
    309.7 KB · Views: 3
  • SAM_4645.JPG
    SAM_4645.JPG
    315.4 KB · Views: 3
  • SAM_4644.JPG
    SAM_4644.JPG
    315.4 KB · Views: 3
  • SAM_4647.JPG
    SAM_4647.JPG
    310.7 KB · Views: 7
  • SAM_4642.JPG
    SAM_4642.JPG
    315.4 KB · Views: 5
  • SAM_4595.JPG
    SAM_4595.JPG
    312.4 KB · Views: 6
  • SAM_4594.JPG
    SAM_4594.JPG
    313.1 KB · Views: 4
  • SAM_4593.JPG
    SAM_4593.JPG
    312.6 KB · Views: 6
  • SAM_4650.JPG
    SAM_4650.JPG
    313.2 KB · Views: 8

Functional Artist

Well-known member
Messages
4,403
Reaction score
1,679
Location
Toledo, Ohio
Of course my bias is toward race karts, but I have to say that I like this one very much.
You’re doing a nice job, and it’s looking great.

Thanks :thumbsup:

This is my first endeavor into the racing "style" kart world :cheers2:
…& I'm really enjoyin' the "challenges" :wai:

I can't wait to "start the engine" :rolleyes:

Um, wait, "we" don't do that around here :smartass:

I mean, testin', yea testin', I can't wait to start testin' 'er :auto:

* Makin' "specialty" tools certainly slow things down :toetap05:
...but, enjoyin' them "challenges" too :2guns:
 

Functional Artist

Well-known member
Messages
4,403
Reaction score
1,679
Location
Toledo, Ohio
Battery trays

I used my "new" bender to bend up some battery trays :thumbsup:

They came out nice
...but, I had ta do some adjustin' to my measurements :popcorn:
...because, a "tray" with a 1" depth still sits too low (duh) :furious2:

The pipe that I made the frame out of is 7/8" OD
…& as such, (1") "sides & mounting "lips" are a bit too wide

Also, the "bottom" was a bit too wide too :mad:
(I want 'em to kinda "snug" the batteries)

Luckily I made "my" bender with a 3/4" capability :wai:

So, I gotta cut some "new" blanks @ 6 7/8" x 12"
…& then, bent 'em @ 3/4" (lip) x 3/4" (side) x 3 7/8" (bottom) x 3/4" (side) x 3/4" (lip) :2guns:
 

Attachments

  • SAM_4590.JPG
    SAM_4590.JPG
    313.8 KB · Views: 4
  • SAM_4591.JPG
    SAM_4591.JPG
    320.3 KB · Views: 3

Functional Artist

Well-known member
Messages
4,403
Reaction score
1,679
Location
Toledo, Ohio
I made up a few more battery "trays" :thumbsup:
...just playin' with my "new" toy, I mean practice, I was practicin' :wai:

Goin' with the 3/4" "spacing" makes it so easy :cool:

Simply, insert the "blank", "aligned" with the edge of the "bending plate" & lift the lever
...then, pull 'er out & flip 'er over
...& then, "align" the bend with the edge of the "bending plate" & lift the lever again :cheers2:

Then, turn the "blank" around (360*) & repeat the procedure :2guns:
 

Attachments

  • SAM_4695.JPG
    SAM_4695.JPG
    314.1 KB · Views: 2
  • SAM_4692.JPG
    SAM_4692.JPG
    297.2 KB · Views: 2
  • SAM_4688.JPG
    SAM_4688.JPG
    310.6 KB · Views: 2
  • SAM_4682.JPG
    SAM_4682.JPG
    311.6 KB · Views: 2
  • SAM_4679.JPG
    SAM_4679.JPG
    301.1 KB · Views: 2
  • SAM_4698.JPG
    SAM_4698.JPG
    315 KB · Views: 2
  • SAM_4699.JPG
    SAM_4699.JPG
    314 KB · Views: 2
  • SAM_4701.JPG
    SAM_4701.JPG
    311 KB · Views: 2
  • SAM_4704.JPG
    SAM_4704.JPG
    315.3 KB · Views: 2
  • SAM_4706.JPG
    SAM_4706.JPG
    304.3 KB · Views: 2

gegcorp2012

Active member
Messages
491
Reaction score
62
Location
Alabama
Nice work on the bender and the tray.

Are you going to weld on some 90* angle to the ends or notch and bend the ends somehow ?

Sent from my SM-J700T using Tapatalk
 

Functional Artist

Well-known member
Messages
4,403
Reaction score
1,679
Location
Toledo, Ohio
Thanks guys :cheers2:

I don't think puttin' ends on the battery "trays" should be necessary
...as the frame should provide enough support (to hold 'em in place)
...& also, protection (from both the ground & side impacts) for the front & rear of the batteries :thumbsup:

A (2) sided battery "tray" (kinda like mine) is how many riding lawn mowers "mount/support" the battery

MTD Yard Machine's for example, mount their batteries up under the seat, in a (2) sided "sleeve"
…& suspend 'em right above the trans axle's "spinnin" input pulley :ack2:

I just made 'em a bit "shallower" :2guns:
 

Functional Artist

Well-known member
Messages
4,403
Reaction score
1,679
Location
Toledo, Ohio
Brakes

For the Brakes Ima gonna use a standard 4" band "style" brake w/drum :cheers2:

* I know it's NOT up to par for "racing" :ack2:
...but, I already have all of the components :wai:
…& we can easily "up grade" 'er later :thumbsup:

Next, I guess we gonna need a "connectin' rod" :cool:

It's gonna need some custom bends (to follow the contours of the frame)
...but, we gotta keep 'em kinda "gentle" too :rolleyes:

So, here is what I came up with ;)

A 3/8 rod with a 90* bend (to connect @ the pedal)
...then, it has a connecting/adjustment "nut"
...then, it goes thru a "guide"
...then, it "kicks" outward
...then, it "kicks" back inward (so, it's back "in line" with the front section)
...then, it goes thru another "guide" tube
...then, it "kicks" upward (just a bit) to "line up" with & connect to the brake band :2guns:

* Slides pretty smooth :sifone:

Now, I gotta make a connector :popcorn:
...to connect the brake rod to the brake band
 

Attachments

  • SAM_4659.JPG
    SAM_4659.JPG
    316 KB · Views: 7
  • SAM_4658.JPG
    SAM_4658.JPG
    312.1 KB · Views: 5
  • SAM_4657.JPG
    SAM_4657.JPG
    314.1 KB · Views: 5
  • SAM_4656.JPG
    SAM_4656.JPG
    313.7 KB · Views: 5
  • SAM_4655.JPG
    SAM_4655.JPG
    316.3 KB · Views: 7
  • SAM_4662.JPG
    SAM_4662.JPG
    314.9 KB · Views: 10
  • SAM_4660.JPG
    SAM_4660.JPG
    315 KB · Views: 10

Functional Artist

Well-known member
Messages
4,403
Reaction score
1,679
Location
Toledo, Ohio
To connect the brake band with the brake rod, Ima gonna simply use a piece of steel with a 3/8" hole in it
...slid into a "slot" cut into the end of the rod :thumbsup:
(kinda reminds me of an arrow)

* During "fittin'" it looked like it would be beneficial to "angle" the "end piece" up a bit :idea2:

Hopefully this, helps to keep 'er from hangin/rubbin' on the brake drum
...which would be extremely annoyin' :ack2:

Then, I simply "clamped" 'er in place with a pair of vise grips
…& welded 'er on (from the bottom side for a cleaner look)

* Don't know what I was thinkin' :huh:
...but, it "popped in my head" that it would be a good idea to "seal 'er up" :rolleyes:

Then, while it was dryin', I thought, WTF :mad2:
...the guide tubes are to be welded to the frame
…& I haven't welder 'er on yet :oops:
...but, I did "slide" 'em up so, I could paint up under 'em :cheers2:
 

Attachments

  • SAM_4663.JPG
    SAM_4663.JPG
    317.9 KB · Views: 5
  • SAM_4668.JPG
    SAM_4668.JPG
    311.8 KB · Views: 5
  • SAM_4672.JPG
    SAM_4672.JPG
    319.5 KB · Views: 6
  • SAM_4670.JPG
    SAM_4670.JPG
    317.9 KB · Views: 5
  • SAM_4675.JPG
    SAM_4675.JPG
    313.2 KB · Views: 6
  • SAM_4678.JPG
    SAM_4678.JPG
    309 KB · Views: 5
  • SAM_4785.JPG
    SAM_4785.JPG
    305.7 KB · Views: 6
  • SAM_4718.JPG
    SAM_4718.JPG
    318.4 KB · Views: 7

Functional Artist

Well-known member
Messages
4,403
Reaction score
1,679
Location
Toledo, Ohio
I tried/looked around for places to mount the thumb throttle (that Ima actually, hookin' to the throttle pedal)
...like along the frame rail (in front of the seat)
...up under the seat
…or even behind the seat
…& then, connect 'er to the pedal via a cable

But then, it seemed like I was "over-complicating" things :huh:

So then, I tried puttin' 'er
..."off to the side"
...right behind the pedal :cheers2:

It lines up nicely :cool:
&
I like it
…"short sweet & to the point" :2guns:

So, I got a piece of pipe
...marked 'er (leaving a little extra for the "fish mouth")
…cut 'er

Next, I marked the area (where the piece is to be attached on the frame)
…& cleaned 'er up

Then, I clamped 'er on (at the marks)
…prepped the "patient" for weldin' (covered everything that I didn't want "spatter" on)
…& welded 'er on :2guns:
 

Attachments

  • SAM_4789.JPG
    SAM_4789.JPG
    313.6 KB · Views: 7
  • SAM_4791.JPG
    SAM_4791.JPG
    311.9 KB · Views: 5
  • SAM_4805.JPG
    SAM_4805.JPG
    315.4 KB · Views: 6
  • SAM_4799.JPG
    SAM_4799.JPG
    312.4 KB · Views: 5
  • SAM_4798.JPG
    SAM_4798.JPG
    313.4 KB · Views: 5
  • SAM_4797.JPG
    SAM_4797.JPG
    309.5 KB · Views: 6
  • SAM_4794.JPG
    SAM_4794.JPG
    320.9 KB · Views: 6
  • SAM_4807.JPG
    SAM_4807.JPG
    316.6 KB · Views: 6
  • SAM_4809.JPG
    SAM_4809.JPG
    312.7 KB · Views: 7
  • SAM_4819.JPG
    SAM_4819.JPG
    308.4 KB · Views: 7

redflash

Well-known member
Messages
650
Reaction score
619
The idea for a thumb throttle seems primative ( forgive me)
I bought a electronic gas pedal from "electric scooter parts" that wires directly to the electronic controller ( no cables , springs , or otherwise)
just a direct wire tht plugs into the controller box...i believe about $35.00forthe best one and itbolts directly to the floor board with no special welded brackets.....seems a simpler and less bulky option.

Da flash:surrender:
 

Functional Artist

Well-known member
Messages
4,403
Reaction score
1,679
Location
Toledo, Ohio
The idea for a thumb throttle seems primative ( forgive me)
I bought a electronic gas pedal from "electric scooter parts" that wires directly to the electronic controller ( no cables , springs , or otherwise)
just a direct wire tht plugs into the controller box...i believe about $35.00forthe best one and itbolts directly to the floor board with no special welded brackets.....seems a simpler and less bulky option.

Da flash:surrender:

"Howdy redflash :cheers2:

Yup, your right :thumbsup: using an electric pedal would be simpler
...but, with this kart, I'm goin for the "race kart" look
(like in the movie that I referenced @ the beginning of this thread)
…& IMO it would kinda "ruin" the look :huh:

* FYI, I'm using a kool electric pedal on my Lunar Rover kart
http://www.diygokarts.com/vb/showthread.php?t=42557

Surplus Center currently (he he :smartass: electric pun) have them available for (~$30.00)
https://www.surpluscenter.com/Elect...lt-DC-Hall-Effect-Position-Sensor-11-3493.axd

Here is some info on them: ;)
"FOOT PEDAL WITH 5 VDC HALL EFFECT PEDAL POSITION SENSOR
New takeoffs, some light superficial rust. Originally made for use in RAVEN brand electric mowers. Hall effect pedal position sensor outputs a 0-5 VDC signal based on pedal position; 5 VDC output when pedal fully depressed. Hall effect sensor can be removed revealing a 0.10" thick x 0.32" wide male tang that rotates up to 55 degrees as the pedal moves.
Plastic pedal, 8 gauge steel lower bracket. Three wire leads terminated with a six cavity electrical connector."


** The twist throttles, thumb throttles & electric pedals all use the same "Hall Effect" technology :cornut:

I like to use these thumb throttles because their so universal :wai:
...Damien has one (for thumb use) mounted on the steering wheel
http://www.diygokarts.com/vb/showthread.php?t=40084
...my El Moto has one "tucked" up under the gas tank & is actuated via the "stock" motorcycle twist throttle
http://www.diygokarts.com/vb/showthread.php?t=37062
…& the Atom kart has one mounted on the side of the battery tray that's actuated via a pedal
http://www.diygokarts.com/vb/showthread.php?t=40167
 

Attachments

  • SAM_3199.JPG
    SAM_3199.JPG
    316.9 KB · Views: 10
  • SAM_3198.JPG
    SAM_3198.JPG
    322.5 KB · Views: 11
  • SAM_0414.jpg
    SAM_0414.jpg
    490.6 KB · Views: 11
  • SAM_1770 (2).jpg
    SAM_1770 (2).jpg
    543.5 KB · Views: 12
  • SAM_1037.jpg
    SAM_1037.jpg
    440 KB · Views: 12

Functional Artist

Well-known member
Messages
4,403
Reaction score
1,679
Location
Toledo, Ohio
I got the brake rod guides cleaned up
…& welded 'er on
…& also, welded the brake band "bracket" onto the bearing mount

Then, reassembled the brake system
…& gave 'er a try

Slides nicely, in the "guides' :thumbsup:

Feels, good-n-firm
...actually, very firm (with no noticeable flexing of the connecting rod)
…& the pedal "travel" is only ~1" :2guns:
 

Attachments

  • SAM_4873.JPG
    SAM_4873.JPG
    315.3 KB · Views: 4
  • SAM_4872.JPG
    SAM_4872.JPG
    312 KB · Views: 3
  • SAM_4866.JPG
    SAM_4866.JPG
    313.9 KB · Views: 4
  • SAM_4865.JPG
    SAM_4865.JPG
    312.7 KB · Views: 3
  • SAM_4858.JPG
    SAM_4858.JPG
    307.3 KB · Views: 4
  • SAM_4862.JPG
    SAM_4862.JPG
    316.5 KB · Views: 5
  • SAM_4926.JPG
    SAM_4926.JPG
    313.1 KB · Views: 4
  • SAM_4925.JPG
    SAM_4925.JPG
    307.7 KB · Views: 3

Functional Artist

Well-known member
Messages
4,403
Reaction score
1,679
Location
Toledo, Ohio
The Plan is to mount the thumb throttle onto the "stub"
...run a short piece of throttle cable (forward) to connect 'er, to the pedal
…& also, a small "return" spring (rearward) to connect 'er, to the frame :thumbsup:

This spring 'll keep 'er 100% "off" (Zero throttle) when the pedal is not actuated
…& also, provide the "return action" for the pedal too :cool:

All pretty simple
...but, to get 'er all together, we gonna need a "custom connector", to connect the cable to the pedal :cheers2:

A little smoke :sifone:
…a few mirrors :stir:
…& "Boom" we got a kool DIY cable to pedal connector :2guns:
 

Attachments

  • SAM_4825.JPG
    SAM_4825.JPG
    317.3 KB · Views: 3
  • SAM_4826.JPG
    SAM_4826.JPG
    311.6 KB · Views: 2
  • SAM_4829.JPG
    SAM_4829.JPG
    312.5 KB · Views: 2
  • SAM_4830.JPG
    SAM_4830.JPG
    318.2 KB · Views: 3
  • SAM_4831.JPG
    SAM_4831.JPG
    316.6 KB · Views: 2
  • SAM_4837.JPG
    SAM_4837.JPG
    315.2 KB · Views: 2
  • SAM_4836.JPG
    SAM_4836.JPG
    312.9 KB · Views: 2
  • SAM_4833.JPG
    SAM_4833.JPG
    314.5 KB · Views: 2
  • SAM_4832.JPG
    SAM_4832.JPG
    316.4 KB · Views: 2
  • SAM_4838.JPG
    SAM_4838.JPG
    312.4 KB · Views: 2
Top