Well...to summarize & conclude...
El Dingo ended up being (2) builds.
Build (1) Dingo with simple speed controller (Jan. 2016 - Aug. 9, 2016)
Build (2) Dingo with Kelly speed controller (Aug. 10, 2016 - Oct. 15, 2016)
I started doing research & designing a frame for an electric kart last winter.
I found a couple of electric karts on Youtube.
Most were kids size or WAY over the top (like over 50 mph or doing burnouts until they burnt the tires off)
I already did kids size so, let's try over the top.

While doing research, I found out real quick that over the top can get expensive, real quick.

I found a "big" electric motor (advertised as 8,000 watt/10HP) for under $400.00.
There was an available mounting bracket to mount the motor to a go kart & the ad said "Make a super fast go cart", "No expensive controller required", "let your battery voltage control your speed" & even had a diagram of a slide contactor illustrating the concept.
Yup, I was sold! I can do this!
So, I ordered the motor & bracket & began designing a frame for our new beast.
While waiting for the motor, I was looking for parts for our new project on CL, I came across an ad for a kart/frame that needs bearings, had no motor & no seat.
Picked it up, ($50.00) mainly for live axle & spindles/brackets.
Upon closer examination, it ended up being a Manco / Dingo (model 285-09) that was in fairly good condition.
It had been sitting out in the woods for a while but, wasn't wrecked, twisted, rusted out or broken & even came with the rear half of the factory roll cage.
I figured, if I just cleaned it up & rolled with it I could get to the "big" motor part faster.
While cleaning up the frame I was thinkin', if I convert this Dingo to electric, we can call it (Electric Dingo) El Dingo.

I got her all cleaned up & rolling then turned to the electric drive train.
Everything seemed pretty straight forward & simple.
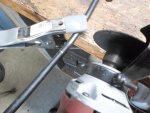
I mounted the electric motor to the bracket & mounted both to the stock ICE (internal combustion engine) mount.
Aligned the axle sprocket with the motor sprocket & mounted the 3 batteries next to the motor.
I could not find any type of slide contactor like the one described in the ad so I made one. (actually a V-glide ran backwards)
The concept seemed suspect, so I bench tested it on a small motor off a scooter first.
It seemed to work, so I tested it on the big motor.
It seemed to work fine on the bigger motor as well.
The results from bench testing & road testing turned out very different.
Conclusion of first (and only) test drive with simple speed controller, on the kart & under load was both successful & a failure.
Success: the kart moved it self, accelerated, cruised along & stopped as planned.
Failure: It banged hard when accelerating because the motor speed would instantly jump up 864 rpm's at a time.(going from 12V to 24V & then 36V)
It banged so hard on that on that (1) test drive it stretched the chain & bent the mounting bracket.
https://www.youtube.com/watch?v=_5EK9EOulsY
---------- Post added at 01:38 PM ---------- Previous post was at 01:14 PM ----------
I removed the entire drive train & started all over.
Although the chassis was already complete, build (2) was much more complicated.
It started Aug. 6, 2016 with a thread in electrical projects (like over 40 posts)
http://www.diygokarts.com/vb/showthread.php?t=33805
Sid explained to me about speed controllers, found one to match up to the motor I had & helped me understand just about everything associated with making it work.

I had to move the motor to the left for better balance & additional air flow space to help keep the motor kool.
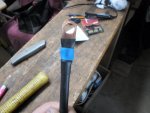
I built a control box to house & protect the electrical components & a control console for the forward controls.
I designed a wiring harness & soldered a million connections.
First test drive (Oct. 12, 2016) with Kelly controller was completely successful.
She now cruises smoother than a baby's bottom.
 https://www.youtube.com/watch?v=AV0BQPm5JFo
---------- Post added at 02:24 PM ---------- Previous post was at 01:38 PM ----------
Build 1
Dingo frame $50.00
Motenergy motor $379.95
Motor mount $56.95
shipping $73.42
Motor sprocket $20.55
Rear bearings $10.95 x 2 $21.90
Seat materials $30.00
36V solenoid $30.00
Batteries $69.00 x 3 $207.00
Cable lugs $17.30
Throttle cable, clips & pin $11.30
Total for build (1) ended up ~ $850.00
Gear ratio: (5.4 :1) motor sprocket 10 tooth / axle sprocket 54 tooth
I also reduced the rear tire size from 18 x 9.50 x 8" to 16 x 6.50 x 8" & from a very aggressive tread pattern to a smoother turf style to help reduce drag. (I figured it would lessen the drain on the batteries thus increasing drive time)
Build 2
Kelly speed controller $319.00
Heat sink $9.00
HD 36V solenoid $69.00
Battery cut-off switch $10.00
Fuses & resistors ~$20.00
more lugs & battery cables ~$20.00
Control box ventilation fan $10.00
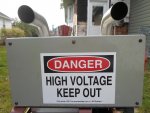
Decal (high voltage) $5.00
Total of additions (build 2) ~$500.00 extra
Total 2016 El Dingo build ~$1,350.00
Oh, ya...
Paint job: I call it urban/industrial camoflage (red oxide & flat black)


 SAM_1739.jpg335.2 KB · Views: 11
 SAM_1746.jpg273.9 KB · Views: 8
 SAM_1741.jpg222.4 KB · Views: 9
 SAM_1744.jpg307.8 KB · Views: 9
 SAM_1747.jpg294 KB · Views: 7