Half-breeder
"Edit" button removed
- Messages
- 1,686
- Reaction score
- 9
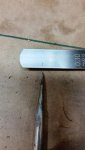
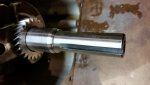
Okay, so it's been about two weeks since I've even touched the cart at all. I'm ready to plug up the bolt and arm holes for the governor but I'm not sure what bolt size/thread I'll need to do so. I tried some Google searching but no one actually verified the exact sizes they were using. I think I'm going to stop by Napa today to pick up a digital micrometer, a Feeler gauge and some Plastigauge to prepare for the installation of all the parts.
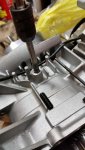
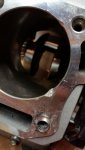
... probably cause its 'NOT' recommended to make openings into a block/case (unless you KNOW what to do... before hand). Gonna need to see pics of where these holes you are speaking of. I have yet to make a single hole opening into my case/block, so I cant compare. If you scroll back to post #38 i exclaimed briefly... (sorry if I misunderstand your question, but it reads like what I said before was ignored...)
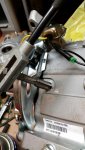
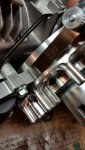
...plz dont remove the governor like some of the vids will show, punching a hole in the block, from the back. Take the time to remove the ring/clamp, washer, gear.
I feel there is lil usage in me explaining what I did, seeing as that you already made the decision and made the holes... So Ill end w/ a direct answer to the question.
....................................................................................
... I dont know... I figured out EVERY aspect of my build before hand(before I even ordered parts. Adding holes to plugup, were NOT in the plans, so I cant say, from experience, what to do.
... But if I HAD to seal/fill a hole ... Id find a big/small enough screw/bolt to 'just' slide freely into the opening... then JBweld it in. If any of the bolt/screw protrude into the case, Id grind it down.

 I value everyone's advice and suggestions on this forum so if I'm instructed not to do something, Im not going to do it.


 Then I couldn't pay....