Sid, I'm curious to the math (mainly the assumed values) for the 12 hp - 60 mph 'rule'. Care to elaborate? I feel it may be a bit too generalizing.
Nope it's not too generalizing
")
It's simple math really..
simplified (to top speed reached & level asphalt road) but still valid.
the base formula is this:
Pm = m * g * sin(alpha) * v + m * g * Cr * cos(alpha) * v + Ca * m * a * v + 0.5 * Da * Cw * A * v³
simplified to this:
Pm = m * g * Cr * v + 0.5 * Da * Cw * A * v³
(again alpha = 0° & a = 0)
m is the mass of the vehicle incl the driver,
g gravitational constant
Cr rolling coefficient of a tyre
Da airdensity
Cw wind coefficient -(typical race kart values used)
A frontal Area of the vehicle -(typical race kart values used)
and finally v the velocity
All values are strictly metric of course
and as a result
we get
150 kg * 9.81 m/s² * 0.02 * 27.778 m/s + 0.5 * 1.2 kg/m³ * 0.7 * 0.9 m² * (27.778 m/s)³
= 8919.553 W
8.9 kW roughly or 12.13 HP.
This is probably a bit vague but can you put a value on an acceleration rate the "feels" like the kart is pulling or that puts you back in your seat?
Well, the acceleration value indeed is vague..
it's the theoretical maximum acceleration possible.
it's based on the engine torque at max rpm
Since I cannot just go ahead and 'guess' a torque curve, that is the only value I can calculate, that times the gear ratio allows me to calculate wheel torque, max wheel torque and weight let's me calculate acceleration.. that's all there is to it.
Since there is friction, inertia and engine lag the real world value is lower;
then again max torque is PRIOR max rpm, thus higher than the known value I calculate with... so that should be at least within reach (it's not spot on of course)
For now basically all calculations are based on above formula and what we know about gear ratios anyways.
The more data you guys are willing to share with me using the calculator, the closer the values get to real world values;
but that takes time
'sid


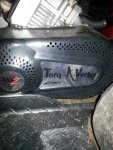
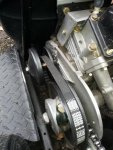


 . Not knowing much about the Tav 2 to begin with I'm curious to know what I would need in order to swap the TC from my current motor to the next one.
 Any suggestions/guidance?
 . Just keep inmind throughout the project... you are making a toy that WILL kill you at the speeds we are gonna travel... at the least, mame/handicap/deform... EVERYTIME you find yourself getting that 'hurry up' feeling, remind yourself of what will happen if 1 bolt is loose n falls off... then ensure(by design) that everything'll work as planned... run mental, 'what if' scenarios... and ALWAYS start off slow for new builds and test on terrain that you know(bumps/dips/cracks/ruts...).

 . I'd like to just get an entire set to have on hand. I'll be needing a new head gasket, cover gasket and exhaust gasket.