You are using an out of date browser. It may not display this or other websites correctly.
You should upgrade or use an alternative browser.
You should upgrade or use an alternative browser.
Really Slow Yamaha Banshee Build
- Thread starter maxpower49
- Start date
- Status
- Not open for further replies.
maxpower49
Member
Looking good. I found this old pic of me giving my eldest daughter a ride on my banshee. I was the age that she is now when the picture was taken. Time flys when you're having fun.
Time really fly's that is for sure, it is aways kinda tough to tell when banshee photos were taken because they looked pretty much exactly the same for the twenty ish years (1987 all the way to 2006 then they were banned in the us and in 2011 they stopped production) the only thing that stands out on it is that it is a j arm frame so about 87-90.
I have looked into the power valve motors and always kind of want one when I see a set pop up on other forums but I pretty much finished this engine and don't want to open it back up, besides this little stroker with the right set up should be in the 70 horsepower range hehe

 The valves apparantly smooth out the power delivery so you don't get that real kick in the pants when it gets into the band .
maxpower49
Member
Yeah everything I read about power valves is that they widen the power band to make heavily ported engines like the cheetahs more trail friendly, I may go with one someday but as for now I think I will have plenty of fun as it is, plus the first thing everyone says to mod is the suspension so I made sure to tick that off first.
maxpower49
Member
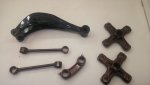
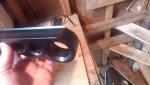
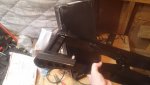
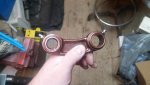
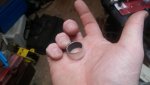
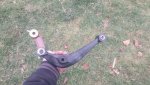
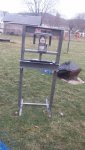
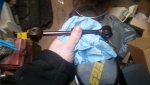
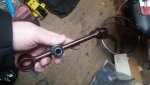
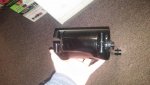
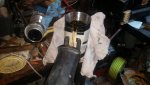
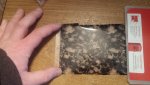
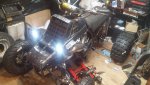
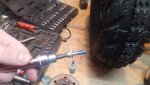
Been doing a bunch of powder coating lately, and parts have been arriving, got held up on a couple of the major parts of the build by a couple small things, I had to wait for some bushings for the engine mounts to arrive before I could mount the engine and I needed a chain slider for the rear swing arm that is one solid part and had to be slid on before mounting the swing arm so had to wait for that to arrive before mounting the rear arm otherwise I would have ended up taking it back off again to install a small plastic part. However the bushings have arrived as well as the slider and I had a bunch of stuff to press into place and instead of paying someone to do it or risk damaging my powder coat by pinching it in a vice or hammering them in I ended up buying a harbor freight 20 tonne press and I absolutely love the thing!! Any way onto the pretty pictures!
Attachments
-
 0122171702.jpg126.2 KB · Views: 1
 -
 0121171617a.jpg193.1 KB · Views: 1
 -
 0121171618.jpg162.1 KB · Views: 1
 -
 0122171712.jpg152.3 KB · Views: 1
 -
 0122171712a.jpg128.4 KB · Views: 1
 -
 0123171606.jpg394.4 KB · Views: 2
 -
 0122171546.jpg322.9 KB · Views: 5
 -
 0123171406.jpg142.7 KB · Views: 1
 -
 0123171328.jpg158.3 KB · Views: 1
maxpower49
Member
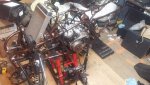
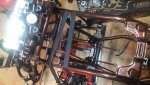
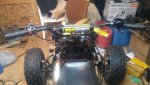
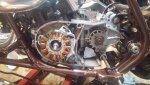
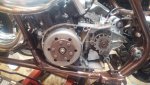
Reached a major milestone and finally got the engine installed in the frame!! Got all of the necessary bushings and stuff pressed in however I hit a minor snag.
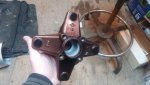
The swing arm I have uses a round house carrier that is pretty much a standard size however once I received my carrier I tried to install it and it just plain would not fit... I measured the carrier and it is in the 87mm range that it should be however after measuring my swing arm it only has a 85mm opening to slide into so I am currently stuck searching for a carrier that will fit or way to fit mine it into the swing arm. I may pick up a less expensive carrier and have it machined down to fit but I am still searching for solutions or maybe one that is the correct size without modification.
I am unable to pry the swing arm open any further because it is one solid round tube so my only choice for the most part is smaller carrier of some sort or a new swing arm to use my current carrier however the carrier would be the far less expensive option of the two unless I can find a good deal on a used one.
The swing arm I have uses a round house carrier that is pretty much a standard size however once I received my carrier I tried to install it and it just plain would not fit... I measured the carrier and it is in the 87mm range that it should be however after measuring my swing arm it only has a 85mm opening to slide into
so I am currently stuck searching for a carrier that will fit or way to fit mine it into the swing arm. I may pick up a less expensive carrier and have it machined down to fit but I am still searching for solutions or maybe one that is the correct size without modification.I am unable to pry the swing arm open any further because it is one solid round tube so my only choice for the most part is smaller carrier of some sort or a new swing arm to use my current carrier however the carrier would be the far less expensive option of the two unless I can find a good deal on a used one.
Attachments
-
 0204172156a.jpg287.1 KB · Views: 5
 -
 0205171530.jpg306.8 KB · Views: 5
 -
 0204171610.jpg330.3 KB · Views: 4
maxpower49
Member
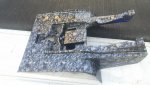
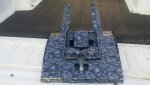
Well I picked up a used carrier to see if it would fit the swing arm in the hopes that it would be smaller and unfortunately it is still too large and it a slight bit more bad news there is no real way to cut down the carrier without hitting the bearing or the cir-clip that holds the brake stay on... So I kinda went with the nuclear option and just ran my sawzall down the middle of the carrier housing and spread the thing open so the carrier will finally fit in the dang thing. I am not overly concerned about loosing and strength pretty much any and every arm the is built these days has nothing in the center where I cut and the outer straps still hold the pinch bolts perfectly fine and I am fairly sure it will be perfectly adequate for a trail quad. The long term is still going to be buying a new swing arm and I had that plan all along any way this was just an inexpensive arm to get me up and running quicker.
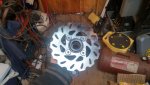
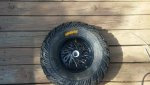
I did a tiny bit more powder coating on my wheel hubs and the wheel studs, I did a bit of a two tone effect leaving the studs in ink black and powder the hub with penny dust. I also got the front wheel bearing and seals pressed in and the brake rotors bolted and thread locked on so they are ready to mount up to the front, once I get the rear axle tossed in I can finally set it down on four wheels!
I did a tiny bit more powder coating on my wheel hubs and the wheel studs, I did a bit of a two tone effect leaving the studs in ink black and powder the hub with penny dust. I also got the front wheel bearing and seals pressed in and the brake rotors bolted and thread locked on so they are ready to mount up to the front, once I get the rear axle tossed in I can finally set it down on four wheels!
Attachments
-
 0208171646_HDR.jpg196.5 KB · Views: 3
 -
 0208171400.jpg227.1 KB · Views: 4
 -
 0211171755.jpg193.4 KB · Views: 4
 -
 0211171749.jpg234.2 KB · Views: 3
 -
 0211171745.jpg214 KB · Views: 3
Did you buy a battery for those lights also ? Cause if not with LEDs you have yourself a expensive kill switch when you turn the switch on. Which is why when you see custom banshees they still have the OEM lighting usually or no lights at all. I couldn't even run a led taillight on mine without it killing the engine when I turned it on.
maxpower49
Member
You must have got some bad led's or stator  The ignition is completely separate from the charging side and should have no effect at all on how it runs. I know several people that have ran the same leds with only a dc conversion and others on straight ac current however the led's didn't last too long. And pretty much everyone on other forums that mod their banshee pretty much hate the stock lights and change them first. However I will be buying a battery and regulator rectifier to convert the ac output to dc and I am getting a hand wound high output dc converted stator from my buddy as well so the electrical is pretty well covered.
The ignition is completely separate from the charging side and should have no effect at all on how it runs. I know several people that have ran the same leds with only a dc conversion and others on straight ac current however the led's didn't last too long. And pretty much everyone on other forums that mod their banshee pretty much hate the stock lights and change them first. However I will be buying a battery and regulator rectifier to convert the ac output to dc and I am getting a hand wound high output dc converted stator from my buddy as well so the electrical is pretty well covered.maxpower49
Member
Bansheehq is where I hang out a decent amount as well haha been a member for years but don't post much, I don't have a build thread going on because I am too lazy to upload my pics to photo bucket then link them all to the forum over there it is a major pain in the butt, plus photo bucket is always slow and laggy and tap talk doesn't work half the time so I just keep a thread here. I know you really should have a battery or some sort of capacitor system for the leds but there are a few people on the bhq facebook page running with nothing but hooking them to the hig beam wire and running the leds on that, however they only last about a season from what everyone says.
maxpower49
Member
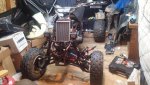
Messed around with it a little more and got all of my wheel studs, minus one... Darn shipping department haha But tossed in an old one and I was able to toss on some old wheel that I had kicking around that were the same bolt pattern and I finally have the quad sitting on four wheels!! That is the first time this banshee has sat on four wheels for over five years so it is a bit of an achievement. The person I bought it from had it for two years and it was torn apart for that entire time and I have had it for going on three yeas now so it is odd to think that it has never had an engine in it or even sat on its own wheels for half a decade.
Now that it is sitting on its wheels I was able to toss the side cover on and the kick starter for a couple quick kicks to get the compression reading and it was right on the money at 150psi right in the sweet spot for some 93 octane pump gas and now that I know the engine is in good shape I can start bolting on the rest of the big stuff like exhaust and pick up a clutch kit and water pump so I can seal up the rest of the engine and not have to worry about digging into it again for a while... Hopefully unless something disastrous happens. Also fair warning my shed is a disaster zone and the wheels are beat but they are not the ones I will be running I just wanted to sit on it and make engine noises
Now that it is sitting on its wheels I was able to toss the side cover on and the kick starter for a couple quick kicks to get the compression reading and it was right on the money at 150psi right in the sweet spot for some 93 octane pump gas and now that I know the engine is in good shape I can start bolting on the rest of the big stuff like exhaust and pick up a clutch kit and water pump so I can seal up the rest of the engine and not have to worry about digging into it again for a while... Hopefully unless something disastrous happens. Also fair warning my shed is a disaster zone and the wheels are beat but they are not the ones I will be running I just wanted to sit on it and make engine noises
Attachments
-
 0223171712.jpg305.4 KB · Views: 6
 -
 0223171711a.jpg188 KB · Views: 4
 -
 0226171644.jpg289.7 KB · Views: 7
maxpower49
Member
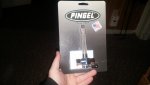
I'm Still here! I am making slow progress, but hey I waned you guys right Any way I have mostly been messing with small stuff like getting the wiring harness installed out of the way of the exhaust so I don't melt it, I got my clutch soaked and pan fried to perfection along with a new clutch cable all installed so I have a clutch. I have my throttle cable ready to go and as soon as I get my stator I should actually be able to fire it for the first time!! I picked up a pingle fuel valve that has dual fuel outlets to do away with the y fitting theat they come with stock, one thing is for sure this thing will drink plenty of fuel.
I was looking around to shops to get a quote to hydrodip my rear plastics to match my fornt and I got two quotes for between $475 and $500 After the shock had worn off I decided that I was not going to get them dipped however I decided to search around on the process of hydro dipping and I managed to find a film that the the exact match for my front plastic and I guess I am going to attempt to hydro dip my own rear plastic. For reference I paid $175 shipped for all of my front fenders, tank cover and rad shroud so $500 to coat my own plastics seemed slightly steep to me, and the dip film I picked up on ebay for $10. But who knows I guess it is like powder coating and I will just see how everything goes. Speaking of powder coating I powder coated and rebuilt a pair of yfz450 dual piston calipers that will bolt right to the front knuckles and I have a yfz master cylinder as well so I have upgraded my brake system.
But as for the status update I have a clutch installed, a billet water pump installed, crankcase filled with oil and a majority of a wiring harness installed so I am getting quite close. I need to fill with coolant and check for leaks, order up a chain and sprockets along with another decent list of stuff but who knows I may be ready to ride sometime this summer!
Any way I have mostly been messing with small stuff like getting the wiring harness installed out of the way of the exhaust so I don't melt it, I got my clutch soaked and pan fried to perfection along with a new clutch cable all installed so I have a clutch. I have my throttle cable ready to go and as soon as I get my stator I should actually be able to fire it for the first time!! I picked up a pingle fuel valve that has dual fuel outlets to do away with the y fitting theat they come with stock, one thing is for sure this thing will drink plenty of fuel.I was looking around to shops to get a quote to hydrodip my rear plastics to match my fornt and I got two quotes for between $475 and $500
After the shock had worn off I decided that I was not going to get them dipped however I decided to search around on the process of hydro dipping and I managed to find a film that the the exact match for my front plastic and I guess I am going to attempt to hydro dip my own rear plastic. For reference I paid $175 shipped for all of my front fenders, tank cover and rad shroud so $500 to coat my own plastics seemed slightly steep to me, and the dip film I picked up on ebay for $10. But who knows I guess it is like powder coating and I will just see how everything goes. Speaking of powder coating I powder coated and rebuilt a pair of yfz450 dual piston calipers that will bolt right to the front knuckles and I have a yfz master cylinder as well so I have upgraded my brake system.But as for the status update I have a clutch installed, a billet water pump installed, crankcase filled with oil and a majority of a wiring harness installed so I am getting quite close. I need to fill with coolant and check for leaks, order up a chain and sprockets along with another decent list of stuff but who knows I may be ready to ride sometime this summer!
Attachments
-
 0314171745.jpg222.3 KB · Views: 2
 -
 0406171708.jpg124.6 KB · Views: 2
 -
 0320171910.jpg204.3 KB · Views: 2
 -
 0405171933.jpg258.6 KB · Views: 2
maxpower49
Member
I'm still plodding away at this when I have the time and budget, been doing a ton of powder coating lately and I guess I don't want to flood the build thread with dozens of powder coating pictures. Any way as a major update my rims and tires finally showed up and I can get those all mounted up, and my handle bars, grips, and a majority of the electrical system is installed and almost ready to go so extremely close to a first fire! I've already been sitting on it making engine noises Now that the weather is a little more steady I am going to attempt the hydro dipping and see how that comes out. But work has been busy so time has been short, on the plus side I now have a stack of parts building up! Going to attempt to button up the brakes and get the tires mounted up and set it on its own four wheels for an alignment and should not have to jack it up again any time soon.
Now that the weather is a little more steady I am going to attempt the hydro dipping and see how that comes out. But work has been busy so time has been short, on the plus side I now have a stack of parts building up! Going to attempt to button up the brakes and get the tires mounted up and set it on its own four wheels for an alignment and should not have to jack it up again any time soon.Attachments
-
 0519171616.jpg383.5 KB · Views: 5
 -
 0519171641.jpg304.5 KB · Views: 6
 -
 0428172029.jpg291.2 KB · Views: 5
 -
 0423171651.jpg280.6 KB · Views: 5
Kartorbust
Well-known member
Whatcha pay for powder coat? I may want to do that for my Blaster unless I can find good rims already powder coated.
Bwdeaton
New member
It's looking great sitting on all 4 wheels! I'm curious to see how the hydrodip turns out because I've never thought about doing it at home. Had to catch up on quite a few posts in this thread because of how busy I've been. The banshee I had is still alive and kicking, though she felt pretty tired last time I rode her, estimating 100 pretty hard hours on the rebuild, new owner is getting ready to do it again.
maxpower49
Member
Whatcha pay for powder coat? I may want to do that for my Blaster unless I can find good rims already powder coated.
I only had the frame and swing arm coated by a professional, everything else I have been doing myself. The frame was $300 with a base price of $200 however it was an extra $100 for the penny dust top coat, the swing arm was a single stage and it was $65 so the total spent at the powder shop was $365. I picked up a kit from eastwood, and use an old propane oven I picked up from my job and run off of a 20lb BBQ tank with a grill regulator. The power I bough from Prismatic Powder and it is the exact same powder used on my frame. How ever the rims themselves were powder coated and anodized by the company I bought them from.
---------- Post added at 01:31 PM ---------- Previous post was at 01:28 PM ----------
It's looking great sitting on all 4 wheels! I'm curious to see how the hydrodip turns out because I've never thought about doing it at home. Had to catch up on quite a few posts in this thread because of how busy I've been. The banshee I had is still alive and kicking, though she felt pretty tired last time I rode her, estimating 100 pretty hard hours on the rebuild, new owner is getting ready to do it again.
I have never attempted to hydro dip either, or even spray paint from a professional gun but luckily my neighbor works for an auto body shop and is willing to spray everything for me. But the dipping is certainty going to be a trial and error type of thing that I will try on some junk plastics before going for the real deal, who know how it will come out but I will say I never powder coated anything in my life until I bought the kit so I guess hydro dipping will just be another chance to learn something new
maxpower49
Member
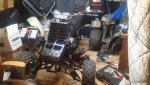
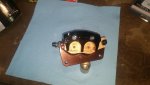
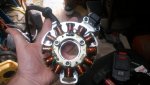
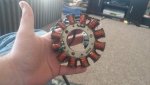
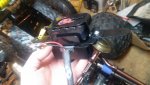
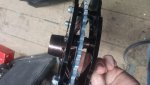
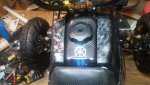
Been plugging away at the banshee, and I picked up a rotor guard and a sprocket guard that bolts to the sprocket hub and it kinda sandwiches the sprocket between two aluminum plates to substitute a skid plate and looks much better in my opinion. I have some major news as well, my stator finally showed up!!!! Hand wound high output made in the good old USA (mostly the core is Chinese but the wire, epoxy, and winding is all american) by a good friend of mine. I bolted it to a billet timing plate and used plenty of thread locked at the request of my friend, installed I lapped the flywheel to the crankshaft and installed the key bolted everything down and set the gap between the pick up coil and the flywheel. Also had my battery pack and regulator rectifier set up arrive and it is actually a pretty sweet set up that is nice and compact and mounts right behind the fuel tank, with a battery I could not resist the urge to turn the headlights on and see the thing finally make some light even if it was only battery powered.
Attachments
-
 0608171941.jpg175.7 KB · Views: 0
 -
 0608171916.jpg167.2 KB · Views: 1
 -
 0531172014.jpg293.5 KB · Views: 2
 -
 0608171951.jpg189.8 KB · Views: 1
 -
 0518171752.jpg181.6 KB · Views: 1
 -
 0610171958.jpg222.9 KB · Views: 0
 -
 0611171309.jpg286.1 KB · Views: 0
 -
 0611171332.jpg258.8 KB · Views: 0
maxpower49
Member
Oh and one more mile stone, you think I would really get everything set to fire and not actually try to fire the thing 
https://www.youtube.com/watch?v=mjf58cUnBhU&feature=youtu.be
The lights are flickering because my battery was not connected, I wanted to make sure the voltage was correct before hooking it all up.
I found a couple minor things that need to be sorted out, one of my carbs is puking fuel so I need to pick up a couple rebuild kits, and of all the strange things my key switch is wired up incorrectly, it is not making contact when the switch is in the off position and killing my spark in order to run I need to turn the key off to make contact and close the power loop to my coil, it caused some confusion when I didn't have any spark at first but I guess that is the risk you take when you buy the cheapest eBay parts haha
As far as the list to completion, I need to sort out my air box, get the seat covered, pick up a skid plate and some other odds and ends but as far as a first test drive goes, I need to get my chain on and install/bleed my front brakes and I can take it for a bit of a test ride!!!
maxpower49
Member
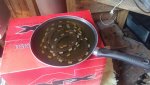
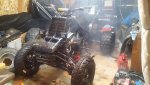
Got a few more things buttoned up, bought a front bumper got my idle issues mostly sorted out and one of the biggest things is that I actually found a guy that does professional hydro dipping. I had searched google many times looking for some one some what local that did hydro dipping and could not find any one with in 100 miles and even then they wanted insane amounts to dip plastics I already had, and by completely random chance I was at work and delivering a dryer to a guy and noticed that his truck says hydro dipping among other things and asked if he did atv plastics. Long story short he was within 20 miles from my house and he only charged $75 a panel to dip atv plastics, so instead of attempting to dip my own I just had it done professionally. Should have taken the picture before firing it up it is a bit smokey 
I am down to an extremely shot list as far as things to complete, I have an air box that requires some minor modification to make to, need to get the front brakes sorted out and toss a chain on, I have it just need to cut to length and install and I am down to test rides and fixing whatever pops up!!
I installed my water temp gauge and one minor issue with it is that it requires 12 volts not a big deal because I have the battery and dc conversion but I would have to flip a switch every time I wanted it on and ran the risk of leaving it on as well, I was able to figure out that there are two unused wires on my key switch and were a totally separate circuit and I was able to use that to give me key switched power for my temp gauge!!
Attachments
-
 0714171938b.jpg301.2 KB · Views: 3
 -
 0714171938a.jpg293 KB · Views: 3
 -
 0714171938.jpg248.8 KB · Views: 3
 -
 0627171949.jpg279.6 KB · Views: 3
 -
 0714171950.jpg282.4 KB · Views: 4
- Status
- Not open for further replies.