Off road buggy ...

Status
Not open for further replies.

rvndraju

New member
Messages
63
Reaction score
0
Location
india (bangalore)
engine mounts

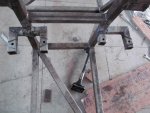
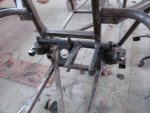
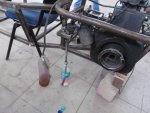
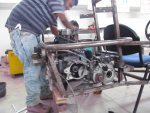
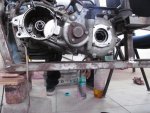
Engine mounts are welded on to the chassis and ready for the engine to be mounted.:cheers2:

The mounts on the engine and transmission is of OEM . Those mounts are designed perfectly to with stand the heavy vibrations on this diesel engine.

And this the video https://www.youtube.com/watch?v=dU8TgEmPjxIwhen we started the engine for the 1st time after mounting it on the chassis. We where actually worried about the heavy vibrations but engine mounts did the job perfectly and it run pretty good :thumbsup:
 

Attachments

  • IMG_1980 (Medium).jpg
    IMG_1980 (Medium).jpg
    92.6 KB · Views: 11
  • IMG_1981 (Medium).jpg
    IMG_1981 (Medium).jpg
    90.1 KB · Views: 12
  • IMG_1983 (Medium).jpg
    IMG_1983 (Medium).jpg
    74.8 KB · Views: 10
  • IMG_1984 (Medium).jpg
    IMG_1984 (Medium).jpg
    95.7 KB · Views: 9
  • IMG_2010 (Medium).jpg
    IMG_2010 (Medium).jpg
    74.1 KB · Views: 9
  • IMG_2015 (Medium).jpg
    IMG_2015 (Medium).jpg
    82 KB · Views: 10
  • IMG_2014 (Medium).jpg
    IMG_2014 (Medium).jpg
    93.5 KB · Views: 7
  • IMG_2013 (Medium).jpg
    IMG_2013 (Medium).jpg
    78.4 KB · Views: 10
  • IMG_2012 (Medium).jpg
    IMG_2012 (Medium).jpg
    83.3 KB · Views: 14
  • IMG_2011 (Medium).jpg
    IMG_2011 (Medium).jpg
    102.8 KB · Views: 15

OzFab

Well-known member
Messages
15,615
Reaction score
67
Location
Warwick Qld, Australia
Thanks fabroman, actually we tried that config 1st as u told like mounting it between the two rails but when we kept the pedal assembly it was touching the steering column and it was too congested for the master cylinder also, since we have 3 pedals not 2. So we had to go for this setup :(

I had to go back & check but, I forgot you're using a manual trans :oops:

I'm assuming you guys have checked & you know what you're doing but, most engines have the starter on the right where yours is on the left... or am I missing something?
 

rvndraju

New member
Messages
63
Reaction score
0
Location
india (bangalore)
I had to go back & check but, I forgot you're using a manual trans :oops:

I'm assuming you guys have checked & you know what you're doing but, most engines have the starter on the right where yours is on the left... or am I missing something?

Actually in the current setup the engine is on the left and tranny is on the right. we can make it come on the right if we place it opposite i.e. now the differential output is right behind the seat means clockwise rotation of differential but the differential will rotate in anti clock wise direction if we place the engine to right and tranny to left that means our vehicle will go reverse if we shift forward :(

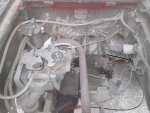
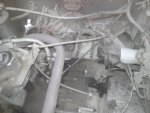
here are some pictures of the light commercial vehicle where the actual engine mounting position can be seen.
 

Attachments

  • IMG_20140219_174407.jpg
    IMG_20140219_174407.jpg
    90.2 KB · Views: 16
  • IMG_20140219_174410.jpg
    IMG_20140219_174410.jpg
    68.7 KB · Views: 14

firemanjim

Just kartin' around....
Messages
5,247
Reaction score
86
Location
Houston Texas
He just wanted to make sure your drive orientation was correct.... You guys are doing a great job! I'm jealous of your drive train. Wish I had one of those set ups.... Something like that is high $$ here.....
 

rvndraju

New member
Messages
63
Reaction score
0
Location
india (bangalore)
Rear End

Hello mates i had my 1st internal assessment so was busy studying and we did not work on Monday and Tuesday.

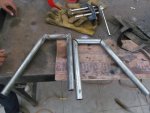
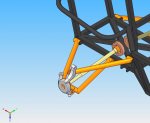
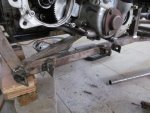
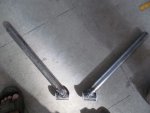
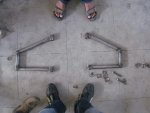
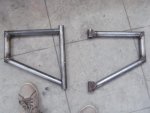
We started off yesterday and till today we completed fabricating the rear control arms, mounts & bushes. Actually we had planned to go for a trailing arm in the rear but in the CAD design we observed that CV shafts where taking too much angles in static conditions which shouldn't happen :idea2: so we decided to go for DOUBLE WISHBONE type. finally we designed a lower H arm & upper I arm setup.
 

Attachments

  • IMG_2034 (Medium).jpg
    IMG_2034 (Medium).jpg
    71.3 KB · Views: 13
  • IMG_2033 (Medium).jpg
    IMG_2033 (Medium).jpg
    71.3 KB · Views: 12
  • IMG_2032 (Medium).jpg
    IMG_2032 (Medium).jpg
    79.2 KB · Views: 13
  • 12.jpg
    12.jpg
    107.7 KB · Views: 16
  • IMG_2043 (Medium).jpg
    IMG_2043 (Medium).jpg
    85.3 KB · Views: 11
  • IMG_2042 (Medium).jpg
    IMG_2042 (Medium).jpg
    86.3 KB · Views: 11
  • IMG_2041 (Medium).jpg
    IMG_2041 (Medium).jpg
    69.5 KB · Views: 15
  • IMG_2040 (Medium).jpg
    IMG_2040 (Medium).jpg
    67.1 KB · Views: 23
Last edited by a moderator:

DaiSan76

New member
Messages
734
Reaction score
2
Location
Nixa, MO
Some of those welds are pretty sketchy. The left one where you are showing the bushing, for instance.
 

mckutzy

Well-known member
Messages
8,353
Reaction score
108
Location
bc, canada
I have been meaning to say for a while now. Now I dont like been harped on like the next guy does, but I have to say in the meaning of safety for the operator and by standers, please study up on welding and practice alot more before you guys go further.

With stick or fluxcore welding, you need to chip and/or brush consistently the weld area BEFORE and AFTER each strike of the stinger/rod holder.

For example: You want to make a tack for your parts. Make sure they are ground(If using galvanized or mill finish steel) bare, brushed to make sure, set parts and tack.. Then chip/brush area, do the same on the other side.
This is the basics of using a GMAW(stick) or FC(wire fed fluxcore) welding. Its a pain, its slow to do successfully, but its what needs to be done.


ONCE AGAIN.......USE SAFETY GLASSES...

.....Dont get me started on the open toed shoes........


Rant off....


......for now
 

OzFab

Well-known member
Messages
15,615
Reaction score
67
Location
Warwick Qld, Australia
I have to agree with both of these guys, your welding appears to be lacking something; for your own safety, as the driver, please make sure you double check all the welds

.....Dont get me started on the open toed shoes........

Many years ago, I was training as a mechanic. One day, at TAFE (trade school), a classmate & I were lifting a bare 4 cylinder engine block (no internals, just the block) when he lost his grip & dropped the block on his foot; he was wearing steel capped boots & still broke 3 toes...

Just something to think about...

I won't even start on how many trips I've made to the doctor to remove bits of metal from my eyes, even after I was wearing safety glasses...
 

DaiSan76

New member
Messages
734
Reaction score
2
Location
Nixa, MO
I won't even start on how many trips I've made to the doctor to remove bits of metal from my eyes, even after I was wearing safety glasses...

QFT.

By the way, my favorite picture in this entire thread is the one of the guy grinding, wearing a grinding hood, but having the hood pushed up.
 

exenos

Project Nut
Messages
1,217
Reaction score
0
Location
Ontario, Canada
I even use mine while buttering toast. You can never be too careful when it comes to your eyes. :lolgoku:

You really cant be to careful. I have a old friend that lost vision in one eye from a small piece of wire, an acquaintance who completely lost his eye from a grinder disk exploding and I am extremely near sighted in my right eye. Once you see first hand the the problems what being minus one eye can cause you become much more serious about safety.

Go without steel toes and hearing protection if you must but please protect your eyes. Trust me, its not something you want to have to deal with.
 

rvndraju

New member
Messages
63
Reaction score
0
Location
india (bangalore)
.....Dont get me started on the open toed shoes........

:oops: .. I wore that in a hurry when leaving home actually , i never wear sandals to work. And i am trying to inculcate and practice safety to the best after you and other members insisted on it but some times i forget :mad2:.

And about my welds i am really worried. what of it fails ?:confused::confused:. I take time melt the metal and penetrate the weld always. i get it proper 70% of the time but sometimes it gets really sketchy. I know a professional welder who told me that it takes a lot of time to get used to MAW because it is the hardest of all welding methods. since i started to weld when i started this project (since 2 months ) i don't think all the welds are safe. Can i weld again on the sketchy weld after chipping the slag Or should i get a professional and re weld on the sketchy welds.
 

DaiSan76

New member
Messages
734
Reaction score
2
Location
Nixa, MO
:oops: .. I wore that in a hurry when leaving home actually , i never wear sandals to work. And i am trying to inculcate and practice safety to the best after you and other members insisted on it but some times i forget :mad2:.

And about my welds i am really worried. what of it fails ?:confused::confused:. I take time melt the metal and penetrate the weld always. i get it proper 70% of the time but sometimes it gets really sketchy. I know a professional welder who told me that it takes a lot of time to get used to MAW because it is the hardest of all welding methods. since i started to weld when i started this project (since 2 months ) i don't think all the welds are safe. Can i weld again on the sketchy weld after chipping the slag Or should i get a professional and re weld on the sketchy welds.


Grind it down till you can't see slag anymore, then re-weld it. What kind of rods are you using? If you are using Low-Hydrogen rods, and not keeping them in an oven, you'll get moisture in the rods, and then they won't weld worth a bent penny. That might explain why some of your welds look alright, and some look like someone sneezed filler metal on the joint.
 

rvndraju

New member
Messages
63
Reaction score
0
Location
india (bangalore)
PrObLeM :(

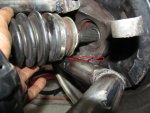
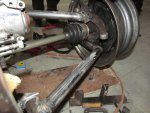
Hello mates we got into a big problem today. we where happy that the rear control arms were completed. After mounting the arms we mounted the CV shaft that is where the Bl***Y problem started. the control arm was obstructing the CV head to get into the wheel hub. :mad::mad:. After working so much today we felt so frustrated at the end of the day :mad2:.
one of my team mate suggested to go for a smaller CV but cant spend $$ again because we have lot more stuffs to buy in our limited budget.

Another team mate suggested that we modify the lower arm such that the lower pivots are raised a couple of cm's buy placing it in a inclined position so that the arm gets lower.

Tomorrow's work is to modify the lower arm and successfully mount the CV's because we are nearing the deadline and goto complete our vehicle soon :( :(
 

Attachments

  • IMG_2078.jpg
    IMG_2078.jpg
    100.1 KB · Views: 7
  • IMG_2079.jpg
    IMG_2079.jpg
    94.5 KB · Views: 8
  • IMG_2080.jpg
    IMG_2080.jpg
    104.3 KB · Views: 8
  • 12.jpg
    12.jpg
    70.8 KB · Views: 8
  • 13.jpg
    13.jpg
    72.2 KB · Views: 7

rvndraju

New member
Messages
63
Reaction score
0
Location
india (bangalore)
Grind it down till you can't see slag anymore, then re-weld it. What kind of rods are you using? If you are using Low-Hydrogen rods, and not keeping them in an oven, you'll get moisture in the rods, and then they won't weld worth a bent penny. That might explain why some of your welds look alright, and some look like someone sneezed filler metal on the joint.

I am not sure about the electrode spec i will go check it out tomorrow. So i better bring a professional welder after completing everything so that he can inspect all the welds and re weld where ever required because i don't want my buggy to be screwed due to a weld failure during trail runs :auto:.
 
Status
Not open for further replies.
Top