bigfootrules31
New member
- Messages
- 332
- Reaction score
- 2
my brain hurts from reading this thread
Ok, this makes sense now. I would think you should be able to use the thing as a drift punch, not mushrooming on the floor. I also understand picking up something that should never break on the cheap. A little extra weight, but this isn't a race car. Plus you get extra parts, sounds like a easy decision after all. Making up a housing out of a bunch of panels sounds like more engineering than I could manage to weld together.The actual trigger for all this re-engineering was my dropping the slip-in spider shaft on the floor and DENTING it. A half-inch diameter, 3" long shaft falling to the floor should not DENT upon impact. And not a little ding either. It mushroomed! I cleaned it up on the lathe and intended to put a simple washer on the end to make up the minor length difference, but that just seemed cheesy.
not mushrooming on the floor
A little extra weight, but this isn't a race car.
Making up a housing out of a bunch of panels sounds like more engineering than I could manage to weld together.
For example the roller bearings, I have no idea what we are speaking about here.
You mentioned that cub cadets might have suitable transmissions. I know my dad has a couple ancient old tractors sitting in the back yard maybe I need to go look at them now.
800 lbs dry... wow you are building a machine here. Even where wild guesstimates are involved.
may I offer you some aspirin? It's also good for the heart according to my doctor
Yes, I would have throught so. It didn't mushroom that much, just enough where I couldnt' slip the spider gear onto that end without tapping the gear on with piece of 2x4 as a hammer, or taking off the 4/1000ths of an inch of "mushroom head" as I did on the lathe.
No, it's for a four year old who eventually will be an 18 year old. This is why I'm building it larger than seems reasonable. I'm hoping to build one, hand it over, and he gets 13-14 years out of it.
")
I've built several full-size differentials for race cars and pickups in the past, so aside from making adjustments for the semi-circle pot metal differential "bushings", I just rescaled my existing templates to be sized for the peerless differential and made minor adjustments to sizing.
Where I would have spent a lot of time is jigging... I have in the attic a jig for a full size differential housing that would contain the typical racer-loved Ford 9" bits, but I don't have any jigs for something this small. The Audi diff eliminates all that work and hassle. If I had more available time for this project I'd probably have done it and used a different differential, maybe one of the Bolens/Ariens/Club Cadet ones i saw on ebay.
Most kart-sized bearings are two rings with a set of hardened steel balls in between, so the inner ring can spin freely inside the outer ring but not move around left and right and be all wobbly.
Roller bearings are essentially the same thing, except that the steel balls are replaced with steel rollers. This makes the bearing stronger.
Tapered roller bearings are similar, except the rollers are not cylinders and instead cones. This still allows the inside diameter of the bearing to be a straight hole for an axle, but the outside of the bearing is also cone shaped. This in turn has to ride in an angled collar, either pressed in or machined in.
The angled rollers can be longer than straight rollers for a given bearing width and therefore are stronger. This is why they're all over automobiles and trucks. They're used in transmissions, differentials, axles, etc. Some german cars even use tapered roller bearings in their steering columns nowadays.
Well, if one were to be "technical" one me I'm probably not really building a go-kart, but an off-road buggy.
For adults our size, it's a two seater. For children my son's age, it could be a four seater. That should give you an idea of how big it is.
I'm measuring it in trips, i.e. how many times I trip over it while working on other things. It takes up a lot of room and I've skinned my knees and ankles on it several times because it's smack right in the middle of what little open space I have in that garage bay.
See, I used to have both garage bays however a few years back the attic became infested with carpenter ants and the "antman" who came to spray made us remove everything that was in the attic. It ended up in my "project bay" temporarily, however we all know how "temporary" works out in the end.... ;-)
Don't forget a dose too, your blood will tend to clot very easily after coming off of daily aspirin aka high risk for heart attack.
Enough of my babbling.
I need to get myself a lathe, sounds like an exceedingly useful tool. I have dang near everything else in my shop to fabricate things with, minus the lathe and the mill.
Clever plan. Hopefully he will want to help you keep working on it at somepoint down the line.
I might have pictures on my old Dell laptop. The next time I see it I'll fire it up and see if they are there. If not, I'm happy to draw up a quick not-to-scale of the various pieces to illustrate how it's templated out. The templates are easy, you're essentially make a low-resolution sphere. Each "panel" in the sphere is flat and together, it's a multi-sided shape that from a distance looks sphere-like. Here is an example I leeched from the web, and my handiwork looks very similar. The carrier is inside and the pinion gear and u-joint would be facing away from you which is why it doesn't show in the picture. You can see the flat pieces that are welded together to form the "sphere" and how it's somewhat oblong rather than roundish.seeing how this is done? Have you already documented it on one of the ford 9" diffs?

I know what you are talking about now, thanks for clearing it up. Are tapered roller bearings merely harder to machine and that is why they are less prevalent? How do the tapered bearings do with side loads? Seems as though they might fail if the force was on the skinner end of the cone. Is this just my emperical mind running wild?
Sounds like your son is going to need to bring some friends along for the ride.
So are you going to be able to pull off the pulley on a shaft plan?
That is what I am coming to realize, I think a foundry would also be tremendously useful. I have most of the parts for mine.Between a lathe and a mill, you can make almost anything, and if you can't directly you can make tooling for either machine so you can make almost everything.
I put together a forge over the summer and even that has to be a very productive tool. Very nostalgic as well. I hope he keeps up the zeal for tools. That is somewhat of how I learned to wrench with things, holding bits and pieces for my pops. If he stays interested it should make for some fun projects for the two of you later. My nephew who is nearly 3 does the same thing with the safety glasses. He knows where they are and grabs a pair for himself every time he's in the garage with me. An apron might be a good plan for him he gets filthy out there.Assuming his current behavior and interests at age four continue, his interest in tools will exceed mine. My biggest concern at the moment is safety, and I've been drilling it into his head since day one. At this point he won't even set foot in my shop/garage until he puts on his heavy denim apron and his toddler sized "eyemuffs" as he calls them (safety goggles).
What are the advantages to your own housing? Lighter I imagine, is it stronger as well? Awfully spiffy looking when you are done too. I could see how that could be done with some work.The carrier is inside and the pinion gear and u-joint would be facing away from you which is why it doesn't show in the picture. You can see the flat pieces that are welded together to form the "sphere" and how it's somewhat oblong rather than roundish.
Sounds like something your kid might need to install at a later date. Let him start getting the calls from the attic. Did you decide on what you want to gear it down too yet? This motor is beastly as it is and geared so high might send your kid to the moon! Are you going to do braking in the same fashion as last time, shorting out the motor? I saw you were asking questions about torque converters. Were you thinking about trying to use one of those to not burst the motor into flames? CVT clutch from a snowmoblie perhaps?Of course I could install a bigger motor, but then that opens up more cans of worms. See, I'm trying real hard not to go overboard. I have this 11" diameter transwarp motor in the attic calling me while I sleep. I'm not listening! I'm not listening!

That is what I am coming to realize, I think a foundry would also be tremendously useful. I have most of the parts for mine.
An apron might be a good plan for him he gets filthy out there.
Speaking of machining where did you learn the practice? My dad learned to machine in the navy and if we get some equipment he is going to teach me the ins and outs of it. I don't know if we will be ready to be machining engines any time soon though.
What are the advantages to your own housing? Lighter I imagine, is it stronger as well? Awfully spiffy looking when you are done too. I could see how that could be done with some work.
The tapered bearings I was having a hard time understanding till I looked at some pictures. It all makes sense now. Thanks for explaining.
Did you decide on what you want to gear it down too yet?
Are you going to do braking in the same fashion as last time, shorting out the motor?
I saw you were asking questions about torque converters. Were you thinking about trying to use one of those to not burst the motor into flames? CVT clutch from a snowmoblie perhaps?
it. Repeat till hand tight. Stinker came out eventually.
very thin and tender.
A foundary is a very useful tool, especially for materials like aluminum which have a much lower melting point. A good friend of mine (who lives 3 hours away) made his own foundry and it's quite large - I can put four V8 cylinder heads or two 4-bbl intakes in it at a time and pour bars or blocks from the results. If he and I could get together more often than once or twice a year, I'd save every piece of aluminum I could find and return home with really useful block-shapes to make stuff out of.
I am thinking along the same lines in paying big bucks to machine shops. I feel as though I am sending some machinists kid to college on my dime. Maybe once I have my own machine they can help me learn the trade a tiny bit.A lot of my friends are a little older, and had machines like this when I was much younger, so early on I'd simply use their machines to make my stuff, with their advice, guidance, and coaching.
Over the years we've spread out so much that the commute to borrow these machines was getting crazy, so after sending stuff to local machine shops I decided it would be cheaper and more fun to own the machines myself.
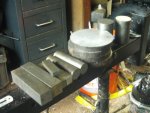
I don't have to "right now" because I'm still working on the suspension bits, hubs and spindles.
This tool could have come in handy a couple times. I've the head off of bolts snap off a couple different times now. Once inside the head of my engine. I ended up drilling it out tapping a left hand thread into it and bottoming out a bolt into the threads. Not a very good solution.They're about 4" long so I imagine they're not designed for surface breaks where the broken part is exposed, but rather bolts that snap "way down" in the threads. The bolts have a hex top but the shank is unthreaded, feels like mild 1018 or 1020 steel.
I second the request for the video if you could.
I hadn't even thought of melting things down into billet to machine. I don't think I am going to make my foundry nearly as large as the one you are talking about there. It will be a waste oil furnace and should be hot enough to melt cast iron.
I am thinking along the same lines in paying big bucks to machine shops. I feel as though I am sending some machinists kid to college on my dime. Maybe once I have my own machine they can help me learn the trade a tiny bit.
Please tell us a bit about the design of the hubs and spindles if you could. Are the wood spindles on the front permanent?
Looks like a healthy chunk of raw materials there. How big a dent did that put in your wallet?
Machine shops still have their purposes. One reasonably close to me accepts G-code by email and they'll cut and paste that into their CNC equipment, then charge based on final weight of the material plus $75 an hour. They have a 5-axis milling machine so to me that's worth spending dollars on if I really do need accuracy better than a thou.
I would have wasted a huge chunk of metal I think had you not mentioned this. What did he use for a crucible? I'm going to have start looking for some old metal. Sounds like you have quite the deal worked out with the metal shop. How did you swing that?The crucible in my friend's foundry is about the size of a 10-gallon bucket, give or take. Aluminum melts somewhat quickly but iron and steel take forever. Aluminum is much more expensive than steel so saving all your milling and lathe chips to be tossed back through the foundry makes a lot of sense.
Nice work!
Excellent video.
When you begin actually boring out the hole how are you determining how far the bit has traveled?
At one point the piece starts to automatically move on it's own, how is it that you control that automatic movement?
Is it so much larger than normal because of the soft material?
You mentioned a boring bar would you mind explaining a little bit of how that works? If You get tired of my endless questions I understand.
I had to look up how you get 5 axis out of a milling machine. Makes me want to make something overly complicated just to see it work.
$75/hour seems well like a lot of money.
I would have wasted a huge chunk of metal I think had you not mentioned this. What did he use for a crucible? I'm going to have start looking for some old metal. Sounds like you have quite the deal worked out with the metal shop. How did you swing that?