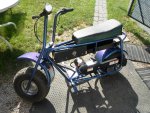
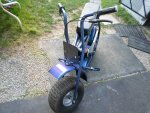
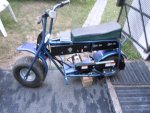
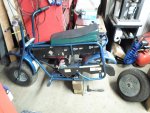
Electric Badger 450 Mini Bike

Status
Not open for further replies.

Functional Artist

Well-known member
Messages
5,519
Reaction score
3,107
Location
Toledo, Ohio
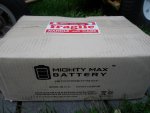
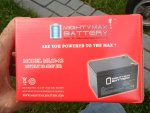
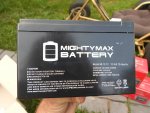
I ordered (4) 12V 12AH "Mighty Max" (SLA) batteries (~$95.00 delivered) :thumbsup:
https://www.ebay.com/itm/Mighty-Max...e=STRK:MEBIDX:IT&_trksid=p2057872.m2749.l2649

While waiting, I figured, I'll work on the seat :idea2:

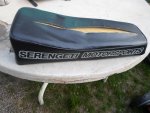
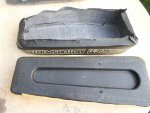
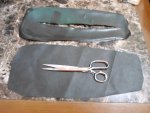
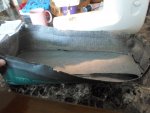
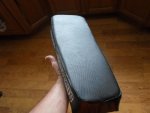
The top is cut
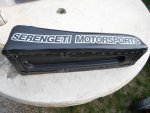
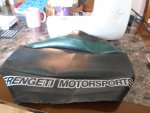
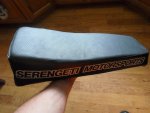
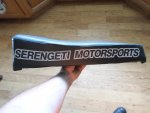
...but, the sides are in pretty good shape (except for a little paint on one side)

So, I'll try to sew in a good piece :cheers2:

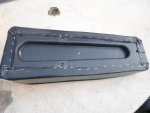
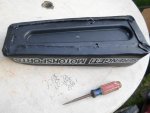
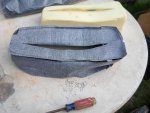
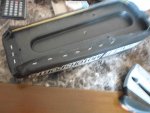
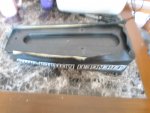
First, I removed the staples & peeled the cover off

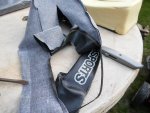
Next, I carefully cut the stitches that connect the top panel to the side

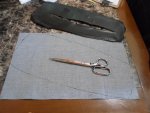
Then, I used the old top panel as a template to draw the dimensions onto the new piece. (black "pin hole" vinyl)
…& finally, cut 'er out kinda closely :2guns:
 

Attachments

  • SAM_1575.jpg
    SAM_1575.jpg
    297.1 KB · Views: 1
  • SAM_1576.jpg
    SAM_1576.jpg
    281.4 KB · Views: 1
  • SAM_1577.jpg
    SAM_1577.jpg
    232.6 KB · Views: 1
  • SAM_1580.jpg
    SAM_1580.jpg
    247.5 KB · Views: 1
  • SAM_1583.jpg
    SAM_1583.jpg
    324.7 KB · Views: 1
  • SAM_1587.jpg
    SAM_1587.jpg
    449.8 KB · Views: 1
  • SAM_1592.jpg
    SAM_1592.jpg
    418.1 KB · Views: 1
  • SAM_1597.jpg
    SAM_1597.jpg
    388 KB · Views: 1
  • SAM_1598.jpg
    SAM_1598.jpg
    285.5 KB · Views: 1
Functional Artist

Well-known member
Messages
5,519
Reaction score
3,107
Location
Toledo, Ohio
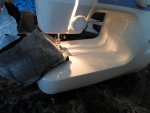
Got out the sewing machine
...aligned the top panel with the side
…& followed the "old" stich line. :thumbsup:

Seemed to come out pretty good :cheers2:

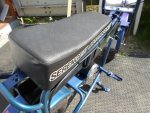
Then, I stretched 'er over the seat cushion/base
...got 'er aligned
...& stapled 'er down

Not exactly perfect
...but, way better :2guns:
 

Attachments

  • SAM_1634.jpg
    SAM_1634.jpg
    281.5 KB · Views: 1
  • SAM_1633.jpg
    SAM_1633.jpg
    244.7 KB · Views: 1
  • SAM_1628.jpg
    SAM_1628.jpg
    265.9 KB · Views: 1
  • SAM_1629.jpg
    SAM_1629.jpg
    284.2 KB · Views: 2
  • SAM_1627.jpg
    SAM_1627.jpg
    203.1 KB · Views: 2
  • SAM_1642.jpg
    SAM_1642.jpg
    455.8 KB · Views: 2
  • SAM_1640.jpg
    SAM_1640.jpg
    554.5 KB · Views: 2
  • SAM_1638.jpg
    SAM_1638.jpg
    250.8 KB · Views: 1
  • SAM_1637.jpg
    SAM_1637.jpg
    344.2 KB · Views: 1
  • SAM_1636.jpg
    SAM_1636.jpg
    247.1 KB · Views: 1

Functional Artist

Well-known member
Messages
5,519
Reaction score
3,107
Location
Toledo, Ohio
Wiring

First we'll start with the easiest connection, the throttle. :thumbsup:

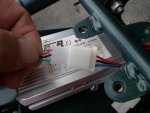
It has a (3) wire plug & the speed controller has a corresponding (3) wire plug marked "throttle"
...just gotta be sure that the wires correspond (red to red, black to black & other to other - in this situation green to blue)

Next, is the (2) wire key (on/off) switch. It has a corresponding (2) wire plug is marked "lock".
(wire order doesn't matter, as it just makes or brakes the connection/circuit)

The brake lever has a (2) wire plug that connects to the plug marked "brake"
(wire order doesn't matter on this one either)

There is a another plug marked "brake light", that is to connect to the brake light, it self (if used)
(this one must be connected properly as one wire is positive (+) & the other is negative (-)

The speed controller has a plug marked "charge" where the charge port can be connected
(I usually just connect my charge ports directly to the battery/cables)

Now, lets move on to the circuit breaker.
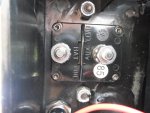
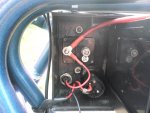
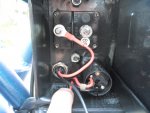
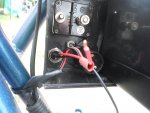
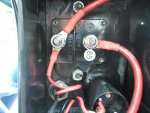
It has one side marked BATT (line), this is where the positive (+) battery cable is to be connected
(& the positive wire of the charge port too)

The other side is marked AUX (load), this is where the battery cable connects to the positive (+) side of the speed controllers "batt" plug (it sends the current to the speed controller) :cheers2:
 

Attachments

  • SAM_1626.jpg
    SAM_1626.jpg
    236.4 KB · Views: 1
  • SAM_1689.jpg
    SAM_1689.jpg
    289.7 KB · Views: 1
  • SAM_1697.jpg
    SAM_1697.jpg
    291.1 KB · Views: 1
  • SAM_1696.jpg
    SAM_1696.jpg
    284.6 KB · Views: 1
  • SAM_1695.jpg
    SAM_1695.jpg
    264.1 KB · Views: 1
  • SAM_1693.jpg
    SAM_1693.jpg
    173.4 KB · Views: 1
  • SAM_1692.jpg
    SAM_1692.jpg
    268.6 KB · Views: 1
  • SAM_1699.jpg
    SAM_1699.jpg
    286 KB · Views: 1

Functional Artist

Well-known member
Messages
5,519
Reaction score
3,107
Location
Toledo, Ohio
Battery Cables

Almost forgot, I wanted to go over some info on the battery cables :thumbsup:

* Different types, diameters & lengths of wires (& even different terminals/connectors) have different resistances
...which affects the current flowing thru 'em.

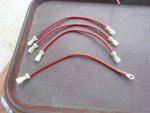
So, In an effort to maintain the same/consistant resistances, I am gonna make all (4) cables from the same material (10g. copper wire)
...& of the same length. (~6" ea.) :cheers2:

I will use (3) of them to connect the (4) batteries in series
…& the (4th) will connect the battery pack positive (+) to the Batt (load) side of the circuit breaker

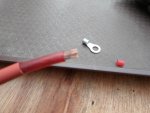
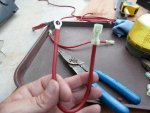
The (3) battery "connector" cables will need spade connectors on both ends. (to connect to the battery terminals)

The (4th) cable will have a spade connector on one end. (to connect to the battery terminal)
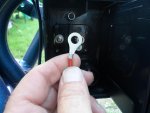
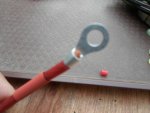
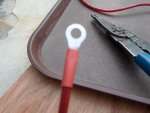
...& a 1/4" ring terminal on the other end (to connect to the CB)


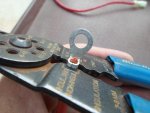
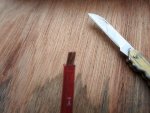
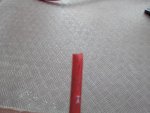
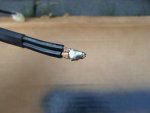
Remove ~3/16" of insulation
…(don't forget to) slide a piece of shrink wrap on
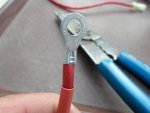
...then, insert the wire into the terminal
...crimp firmly (twice if possible)
...slide the shrink wrap into place & apply heat, to shrink

Boom, we have (4) (equally resistant) battery cables :2guns:
 

Attachments

  • SAM_1684.jpg
    SAM_1684.jpg
    202.2 KB · Views: 1
  • SAM_1679.jpg
    SAM_1679.jpg
    357.1 KB · Views: 1
  • SAM_1678.jpg
    SAM_1678.jpg
    337.1 KB · Views: 1
  • SAM_1673.jpg
    SAM_1673.jpg
    365.9 KB · Views: 1
  • SAM_1671.jpg
    SAM_1671.jpg
    401.4 KB · Views: 1
  • SAM_1691.jpg
    SAM_1691.jpg
    428.6 KB · Views: 1
  • SAM_1688.jpg
    SAM_1688.jpg
    336.6 KB · Views: 1
  • SAM_1687.jpg
    SAM_1687.jpg
    290.4 KB · Views: 1
  • SAM_1686.jpg
    SAM_1686.jpg
    162.5 KB · Views: 1
Functional Artist

Well-known member
Messages
5,519
Reaction score
3,107
Location
Toledo, Ohio
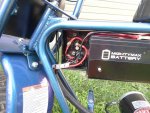
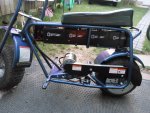
I got our "power pack" from Mighty Max
...(4) 12V 12AH SLA batteries :wai:

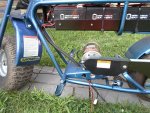
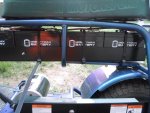
I cut & installed a rubber pad in the battery box to give 'em a little padding
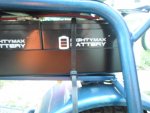
…& strapped 'em down with some extra HD wire ties :thumbsup:

I measured around the battery & tray (~16") & found some 18" HD cable ties (they seemed perfect)
...NOT, just a hare too short :ack2:

So, then I got some 36" 'er's
...strong, light weight & nice-n-secure :cheers2:
(the first battery will be secured/held in place by the plastic battery box/cover)

Yup. that'll work :2guns:
 

Attachments

  • SAM_1650.jpg
    SAM_1650.jpg
    260.9 KB · Views: 1
  • SAM_1656.jpg
    SAM_1656.jpg
    265 KB · Views: 1
  • SAM_1657.jpg
    SAM_1657.jpg
    287.8 KB · Views: 1
  • SAM_1658.jpg
    SAM_1658.jpg
    287.8 KB · Views: 1
  • SAM_1659.jpg
    SAM_1659.jpg
    268.9 KB · Views: 1
  • SAM_1744.jpg
    SAM_1744.jpg
    398.3 KB · Views: 2
  • SAM_1743.jpg
    SAM_1743.jpg
    327.4 KB · Views: 1
  • SAM_1741.jpg
    SAM_1741.jpg
    253.7 KB · Views: 1
  • SAM_1739.jpg
    SAM_1739.jpg
    210.9 KB · Views: 1
  • SAM_1702.jpg
    SAM_1702.jpg
    226.7 KB · Views: 1
Functional Artist

Well-known member
Messages
5,519
Reaction score
3,107
Location
Toledo, Ohio
Finishing 'er up

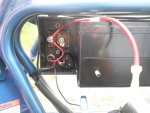
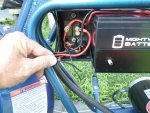
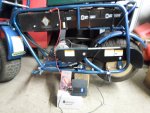
So, to finish 'er up, I ran a piece of black 10g. from the last (4th) battery thru the "control box", down to the speed controller & also a piece of black 16g. wire to complete the charge port circuit :thumbsup:

Then, I soldered the (2) black wires together to the speed controllers negative (-) input
…& coverer 'em in shrink wrap

Tidied up the wires in the "control box"
...put some protective covering over 'em
…& then, closed 'er up

Time for a test ride. :2guns:

https://www.youtube.com/watch?v=0aX...0vqgrvde5whne5xjrk0h00410&feature=em-comments
 

Attachments

  • SAM_1746.jpg
    SAM_1746.jpg
    424.3 KB · Views: 1
  • SAM_1745.jpg
    SAM_1745.jpg
    414.3 KB · Views: 1
  • SAM_1747.jpg
    SAM_1747.jpg
    520.8 KB · Views: 1
  • SAM_1750.jpg
    SAM_1750.jpg
    142.4 KB · Views: 0
  • SAM_1773.jpg
    SAM_1773.jpg
    443.9 KB · Views: 0
  • SAM_1774.jpg
    SAM_1774.jpg
    576.5 KB · Views: 0
  • SAM_1775.jpg
    SAM_1775.jpg
    328.3 KB · Views: 1
  • SAM_1758.jpg
    SAM_1758.jpg
    431.4 KB · Views: 0
  • SAM_1757.jpg
    SAM_1757.jpg
    251.8 KB · Views: 0

Functional Artist

Well-known member
Messages
5,519
Reaction score
3,107
Location
Toledo, Ohio
I used a GPS to gather some speed data :thumbsup:

It looks like with this 48V 1,000W motor, running @ a 7.5:1 gear ratio
...the top speed is ~18MPH

Not super fast :huh:
...but, she's a torque monster :smiley_omg:

So, it seems like there is plenty of power to raise/increase the gear ratio (to like 6:1 or maybe even try going down to 5.4:1)
...thus increasing our top speed :2guns:

Here is a video of the test ride :cheers2:
(the quality sucks but, it's for gathering data not entertainment purposes)

https://www.youtube.com/watch?v=TNjlG--hKFc
 

Attachments

  • SAM_2004.jpg
    SAM_2004.jpg
    327 KB · Views: 1

Functional Artist

Well-known member
Messages
5,519
Reaction score
3,107
Location
Toledo, Ohio
Reducing the gear ratio down to 6:1

The bike zips right along @ 7.5:1 (~18 MPH)
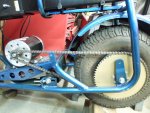
(10 tooth "drive" sprocket on the motor & a 75 tooth "driven" sprocket on the axle)
...but, it seems like it's geared too low

It takes a minute to "wind up", while coming up to speed
...then, when riding @ "top speed", the motor seems to be "racing" compared to the "actual" speed that your going
…& then when the throttle is released, it decelerates or "winds down" a lot :ack2:
(it doesn't really seem "to coast") :huh:

So, I'm thinkin' we'll try-n-drop 'er down to ~6:1 :idea2:

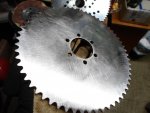
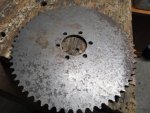
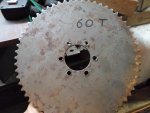
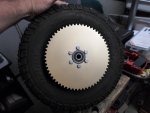
I found a 60 tooth sprocket (~$12.95) at BMI Karts
https://www.bmikarts.com/Sprocket-35-60T-No-Bolt-Holes_p_1401.html

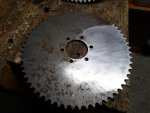
Then, lookin' further, I found one just like it for (~9.95)
https://www.bmikarts.com/Sprocket-35-60T-No-Bolt-Holes_p_11973.html

It just has some surface rust on it
...but, I'm gonna clean 'er up & paint 'er anyways :thumbsup:

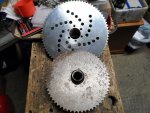
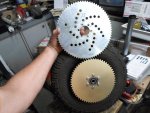
Wow, quite a difference in the price
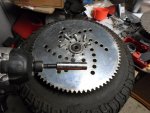
…& in the size too :smiley_omg:

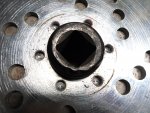
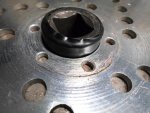
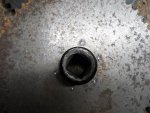
But, (luckily) the center holes were pretty dang close in size
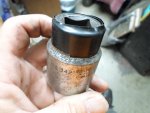
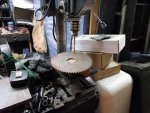
...so, I rounded up an appropriate diameter "pin" to align the (2) sprockets
(I just used an old socket with a couple wraps of vinyl tape)

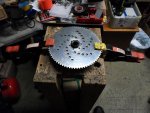
Then, I stacked 'em & clamped 'em together
...to use the "original" sprocket, as a template, to mark where the bolt holes needed to be. :cheers2:
 

Attachments

  • SAM_2690.jpg
    SAM_2690.jpg
    238.8 KB · Views: 1
  • SAM_2689.jpg
    SAM_2689.jpg
    274.3 KB · Views: 1
  • SAM_2686.jpg
    SAM_2686.jpg
    322.8 KB · Views: 1
  • SAM_2685.jpg
    SAM_2685.jpg
    277.2 KB · Views: 1
  • SAM_2684.jpg
    SAM_2684.jpg
    316 KB · Views: 1
  • SAM_2703.jpg
    SAM_2703.jpg
    358.9 KB · Views: 1
  • SAM_2701.jpg
    SAM_2701.jpg
    389.6 KB · Views: 1
  • SAM_2699.jpg
    SAM_2699.jpg
    277.1 KB · Views: 1
  • SAM_2696.jpg
    SAM_2696.jpg
    325 KB · Views: 1
  • SAM_2704.jpg
    SAM_2704.jpg
    370.1 KB · Views: 1

Functional Artist

Well-known member
Messages
5,519
Reaction score
3,107
Location
Toledo, Ohio
Finished drillin' it out
…& then, a little bit of sandin' to smooth 'er off & clean 'er up :thumbsup:

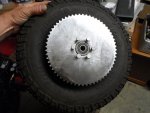
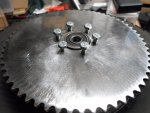
Next, a quick "test fit" (just to be sure)

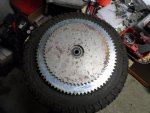
Yup, fits nice-n-snug on the center hub :cheers2:
...& all (6) bolts even threaded in "easily" by hand :wai:

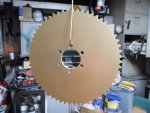
Finally, a little primer & then, some gold paint

Big difference :smiley_omg: this thing should "rock" :2guns:
 

Attachments

  • SAM_2718.jpg
    SAM_2718.jpg
    267.1 KB · Views: 1
  • SAM_2717.jpg
    SAM_2717.jpg
    296.1 KB · Views: 1
  • SAM_2716.jpg
    SAM_2716.jpg
    324.5 KB · Views: 1
  • SAM_2710.jpg
    SAM_2710.jpg
    277.3 KB · Views: 1
  • SAM_2709.jpg
    SAM_2709.jpg
    270.6 KB · Views: 1
  • SAM_2728.jpg
    SAM_2728.jpg
    281.2 KB · Views: 1
  • SAM_2727.jpg
    SAM_2727.jpg
    200 KB · Views: 1
  • SAM_2725.jpg
    SAM_2725.jpg
    273.3 KB · Views: 1
  • SAM_2719.jpg
    SAM_2719.jpg
    229.6 KB · Views: 1
  • SAM_2720.jpg
    SAM_2720.jpg
    343.1 KB · Views: 1

Functional Artist

Well-known member
Messages
5,519
Reaction score
3,107
Location
Toledo, Ohio
Reinstalled the rear wheel
….& shortened the chain a bit :thumbsup:

It was well after dark & raining when I got 'er done
...so, I just did a quick "up on blocks/let's see what she can do test"
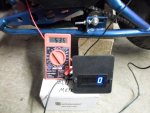
…& attached the RPM meter (just to see) :cheers2:

https://www.youtube.com/watch?v=J6nNT1aSDjw


Well, when operating @ 7.5:1 (@53V) the meter showed ~470 RPM's @ the axle
…& the motors top speed calculated out to be ~3,520 RPM's

But, when operating @ 6:1 (@53V) the meter showed ~620 RPM's @ the axle
…& the motors top speed "now" calculates out to be ~3,720 RPM's

* Was this lower (7.5:1) gear ratio "robbing" this little motor of ~200 RPM's? :huh:
 

Attachments

  • SAM_2784.jpg
    SAM_2784.jpg
    272.7 KB · Views: 1
  • SAM_2783.jpg
    SAM_2783.jpg
    285.2 KB · Views: 1
  • SAM_2777.jpg
    SAM_2777.jpg
    321.5 KB · Views: 1
  • SAM_2765.jpg
    SAM_2765.jpg
    300.6 KB · Views: 1

Functional Artist

Well-known member
Messages
5,519
Reaction score
3,107
Location
Toledo, Ohio
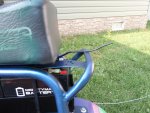
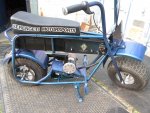
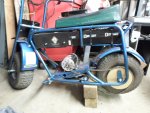
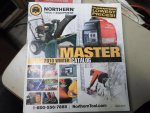
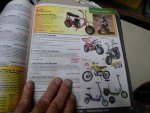
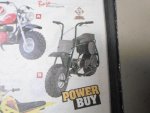
I found the 2010 Northern Tools catalog, that I bought my Serengetti Electric Badger 450 (El Mini) out of. :thumbsup:

Ad says, "speeds up to 15MPH" (a bit exaggerated)
...but, maybe with 80 lb. rider) :lolgoku:

& "up to 1 hour run time" (a lot exaggerated)
...maybe if only going down hill :smiley_omg:
 

Attachments

  • SAM_2954.jpg
    SAM_2954.jpg
    362.8 KB · Views: 1
  • SAM_2956.jpg
    SAM_2956.jpg
    338.5 KB · Views: 2
  • SAM_2957.jpg
    SAM_2957.jpg
    227.4 KB · Views: 1
  • SAM_2959.jpg
    SAM_2959.jpg
    310.3 KB · Views: 2

Kartorbust

Inmate #627
Messages
4,430
Reaction score
874
Location
Utica, NE
Man it's been that many years since NTE has sold mini bikes and go karts? Gotta love how they inflate numbers like that lol, sounds a bit familiar.
 

ezreub

New member
Messages
7
Reaction score
0
Location
Portland, Oregon
Hey Functional Artist,
I really like this upgrade, and my sons think they want to make our mini-bikes electric instead of gas. We're just wondering how big the sprocket is and also how fast the 48v/1000w set up gets this going.

Thanks a lot and nice work here.
 

Functional Artist

Well-known member
Messages
5,519
Reaction score
3,107
Location
Toledo, Ohio
Hey Functional Artist,
I really like this upgrade, and my sons think they want to make our mini-bikes electric instead of gas. We're just wondering how big the sprocket is and also how fast the 48v/1000w set up gets this going.

Thanks a lot and nice work here.

Kool! She'll go ~21 MPH with a 6:1 gear ratio :thumbsup:

10 tooth drive sprocket on the motor
…& a 60 tooth driven sprocket on the rear wheel :2guns:
 

Quinc

Member
Messages
236
Reaction score
1
Look at all that room for motor upgrades! What about 2x1000w motors?:wai:
 
Status
Not open for further replies.
Top