Another Murray Track 2

Possom Point

Active member
Messages
129
Reaction score
132
Location
Virginia
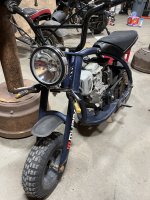
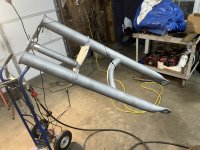
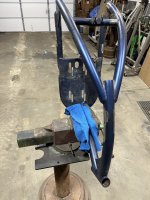
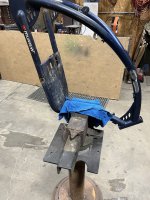
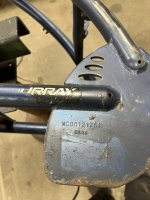
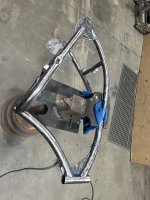
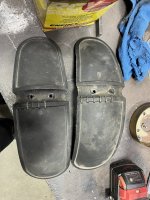
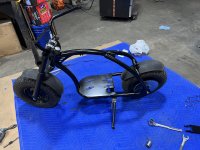
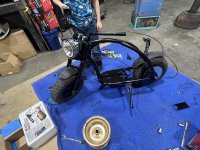
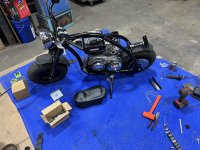
Doing another Murray mini bike build, picked up off the book of faces, and realized that it wasn’t in the best of shape till after the fact of looking at it more closely in the light.

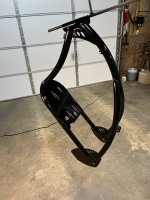
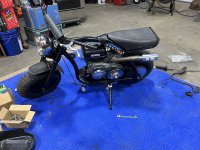
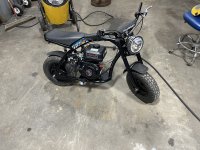
My idea on this one is going to be a solid black with some chrome accents and a headlight ran off the motor.

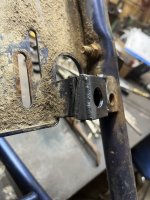
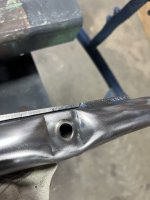
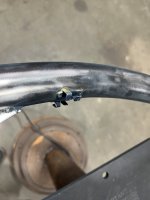
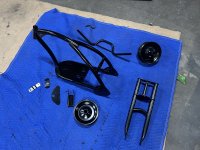
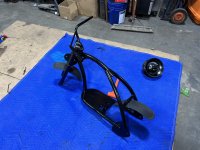
Upon disassembly I found that some of the bolts and nut had been drilled out , most likely from them being broke or stuck, this was done by previous owner.
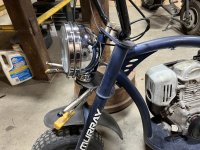
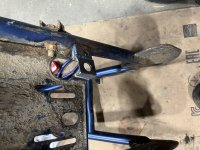
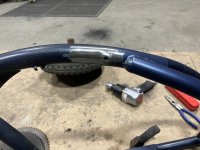
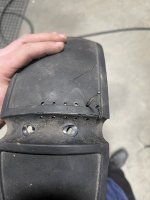
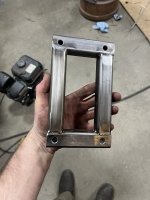
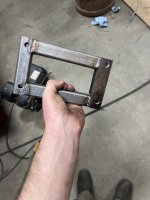
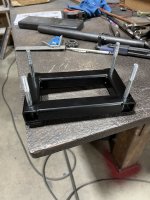
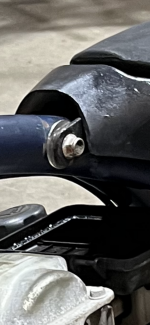
First thing where the seat bolts up to the frame had a large washer and different bolt was used , after taking it apart, it was drilled CROOKED to about 5/8 on one side then 7/8 or so on the other, and drilled the entire bolt tube out so I knew I hade to make another one. 2nd the front tire was not the original, a hand truck tire was used in place, 3rd the chain guard/kickstand mount was cut off.
 

Attachments

  • IMG_3377.jpeg
    IMG_3377.jpeg
    964.1 KB · Views: 4
  • IMG_3376.png
    IMG_3376.png
    6 MB · Views: 4

Possom Point

Active member
Messages
129
Reaction score
132
Location
Virginia
This build is guna be sand blasted and powder coated semi gloss black and the frame will be paint, the oven I use isn’t large enough to hold the frame,
 

Attachments

  • IMG_3354.jpeg
    IMG_3354.jpeg
    2.9 MB · Views: 3
  • IMG_3355.jpeg
    IMG_3355.jpeg
    3.5 MB · Views: 4
  • IMG_3363.jpeg
    IMG_3363.jpeg
    3 MB · Views: 4
  • IMG_3366.jpeg
    IMG_3366.jpeg
    2.7 MB · Views: 3
  • IMG_3364.jpeg
    IMG_3364.jpeg
    3.9 MB · Views: 3
  • IMG_3367.jpeg
    IMG_3367.jpeg
    1.6 MB · Views: 3

Possom Point

Active member
Messages
129
Reaction score
132
Location
Virginia
I’m currently working on cleaning the frame up with a wire wheel in a angle grinder then sandblasting it, seems like extra work but the paint on the frame is THICK, aside getting hit with small wires at 10k rpm’s is worth the extra time to have it cleaner for blasting.
 

BrownStainRacing

Well-known member
Messages
1,360
Reaction score
1,346
I’m currently working on cleaning the frame up with a wire wheel in a angle grinder then sandblasting it, seems like extra work but the paint on the frame is THICK, aside getting hit with small wires at 10k rpm’s is worth the extra time to have it cleaner for blasting.
Those lil bikes are fun to play with, but man they are some wheelie popping fools.

There's a couple younger teens around here that's got em with the small 79-99cc engines, and they still on the back tire all the time.
 

Possom Point

Active member
Messages
129
Reaction score
132
Location
Virginia
Those lil bikes are fun to play with, but man they are some wheelie popping fools.

There's a couple younger teens around here that's got em with the small 79-99cc engines, and they still on the back tire all the time.
Indeed, they are hard to keep the front end on the ground when you take off, especially when running a hopped up motor 🤪🤪🤪
 

Possom Point

Active member
Messages
129
Reaction score
132
Location
Virginia
Was able to work on the frame this evening, I have to appreciate the fact that this Chinese made frame was a very well made bike. Tig welded frame and brazed on a couple pieces (in pics), kinda made me grin because of the fact that they took time and thought out how to make a quality frame.
I spent a little over on hour with a cup wire wheel on my angle grinder and got a fairly good amount done, most of whats left are the tight spots that ill hit with the sandblaster. Although I really REALLY like the bare metal frame. Just appeals to me!!
 

Attachments

  • IMG_3498.jpeg
    IMG_3498.jpeg
    2 MB · Views: 4
  • IMG_3499.jpeg
    IMG_3499.jpeg
    2.3 MB · Views: 4
  • IMG_3500.jpeg
    IMG_3500.jpeg
    2.2 MB · Views: 4
  • IMG_3502.jpeg
    IMG_3502.jpeg
    1.8 MB · Views: 5
  • IMG_3503.jpeg
    IMG_3503.jpeg
    1.8 MB · Views: 5
  • IMG_3504.jpeg
    IMG_3504.jpeg
    2.1 MB · Views: 5

Possom Point

Active member
Messages
129
Reaction score
132
Location
Virginia
Starting to look like a mini bike now, had to do the old Frankenstein stitch for the fenders, these a pretty much impossible to find unless your able to find a parts bike, it does give it character though 😎😎
 

Attachments

  • IMG_3577.jpeg
    IMG_3577.jpeg
    4.4 MB · Views: 0
  • IMG_3579.jpeg
    IMG_3579.jpeg
    4.1 MB · Views: 0
  • IMG_3580.jpeg
    IMG_3580.jpeg
    2.2 MB · Views: 0
  • IMG_3583.jpeg
    IMG_3583.jpeg
    2.8 MB · Views: 0
  • 72497423075__D9405566-4623-4BDF-A4A0-22A909542154.jpeg
    72497423075__D9405566-4623-4BDF-A4A0-22A909542154.jpeg
    4.1 MB · Views: 0

Possom Point

Active member
Messages
129
Reaction score
132
Location
Virginia
ALSO HEADSET BEARINGS FOR MURRAY TRACK 2 MINI RACER
I searched far and wide and deep for these, some may know some may not. They are metric bicycle bearings The brand I bought was Sunlite as pictured with specs on the box.

if anyone needed this info…..
 

Attachments

  • IMG_3578.jpeg
    IMG_3578.jpeg
    1.5 MB · Views: 4

Possom Point

Active member
Messages
129
Reaction score
132
Location
Virginia
More progress tonight, made a riser mount for the engine. Mounted tires and wheels, installed new bearings and 54 tooth sprocket.
 

Attachments

  • IMG_3590.jpeg
    IMG_3590.jpeg
    1.6 MB · Views: 3
  • IMG_3591.jpeg
    IMG_3591.jpeg
    1.7 MB · Views: 3
  • IMG_3594.jpeg
    IMG_3594.jpeg
    1.9 MB · Views: 3
  • IMG_3593.jpeg
    IMG_3593.jpeg
    4.1 MB · Views: 3

Possom Point

Active member
Messages
129
Reaction score
132
Location
Virginia
Did a few things over the week before I ran out of parts 🙄🙄. Brake lever was broke enough where I couldn’t fix it and have it properly work, so I have some new parts coming in as well as new foot pegs, adding the light is giving it a cool look. Adding a “mad max” theme license plate again.
 

Attachments

  • IMG_3629.jpeg
    IMG_3629.jpeg
    2.9 MB · Views: 4
  • IMG_3615.jpeg
    IMG_3615.jpeg
    1.8 MB · Views: 4

Possom Point

Active member
Messages
129
Reaction score
132
Location
Virginia
Almost at the finish line. The air box did not fit in between the frame so I’m going to have to get the air filter kit, the guy that had previously painted the seat pan painted over the stickers and when I sanded the paint off the adhesive stayed “IN” the plastic. I’ve used WD40, laquer thinner, mineral spirits, goof off, and goo gone AND re-sanded several more times, I cannot for the life of me get it off. So at this time I won’t have the seat done till I get that straight. I did get the motor and torque converter partially mounted as well.
 

Attachments

  • IMG_3648.jpeg
    IMG_3648.jpeg
    4.4 MB · Views: 4

Possom Point

Active member
Messages
129
Reaction score
132
Location
Virginia
Got it almost done, the exhaust pipe even being wrapped with a fiberglass wrap is melting the seat pan, need to tweak that and install other parts when they come in.
I did get the headlight, and switches hooked up last night and the headlight shines way up in the trees so I’ll need to make a wedge of some sort to mitigate that and bring it back to earth.
 

Attachments

  • IMG_3655.jpeg
    IMG_3655.jpeg
    4.3 MB · Views: 3
  • IMG_3657.jpeg
    IMG_3657.jpeg
    4.6 MB · Views: 4
Top