2017 - El Moto

Functional Artist

Well-known member
Messages
4,372
Reaction score
1,639
Location
Toledo, Ohio
Takin' on the Anthony Wayne Bridge

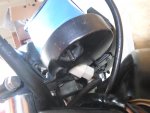
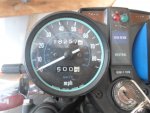
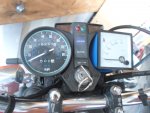
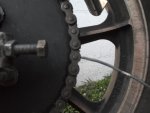
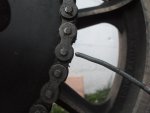
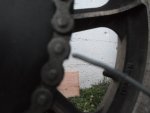
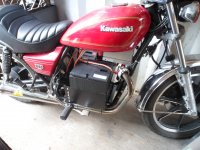
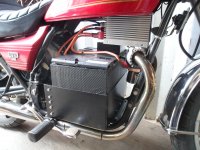
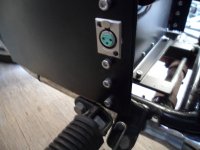
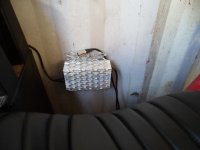
I wanted to (& my buddy Sid suggested) get some amp readings
...while goin' up/climbing a hill. :thumbsup:

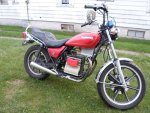
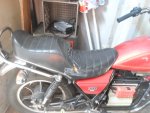
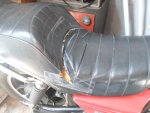
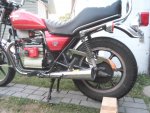
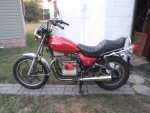
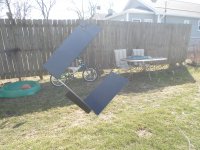
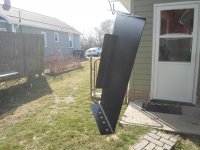
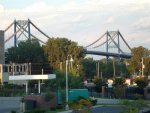
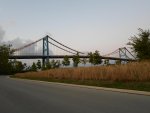
I took El Moto down to/by the Maumee River
...to find some bridges. :cool:

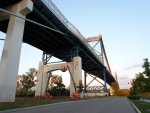
The biggest bridge that we have here in Toledo is called the "High Level Bridge"
...or officially designated the Anthony Wayne Bridge

* I believe it's named after General "Mad" Anthony Wayne
...he was supposed to be a "trail blazer" of this area back in the "pioneer days" :2guns:

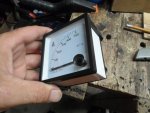
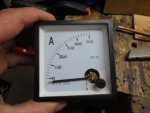
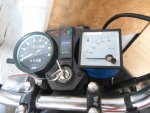
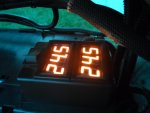
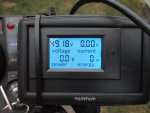
From what I'm seeing, the Max Amp draw seemed to be in the 200A-300A range
…& the constant Amps seemed to be in the 50A-60A range

Is that what you'all see? :huh:

Here is a video of the ride/data :cheers2:

https://www.youtube.com/watch?v=3cBgnbR_mPc
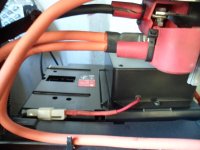
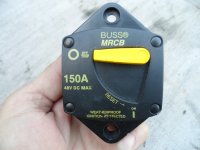
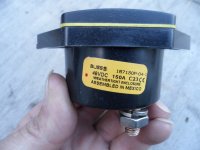
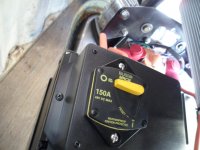
 

Attachments

  • SAM_3304.jpg
    SAM_3304.jpg
    363.9 KB · Views: 1
  • SAM_3317.jpg
    SAM_3317.jpg
    258 KB · Views: 1
  • SAM_3309.jpg
    SAM_3309.jpg
    283.6 KB · Views: 1

Functional Artist

Well-known member
Messages
4,372
Reaction score
1,639
Location
Toledo, Ohio
Gonna try something different :thumbsup:
...to get some Amp readings from a different type/style of instrument

So, I picked up an analog Amp meter (~$23.00)

https://www.ebay.com/itm/401274659319

New DC 0 ~ 500A Analog AMP Current Needle Panel Meter Ammeter
XT-72 & Shunt
Type: Analog AMP Meter
Scale Range: DC 500A
Accuracy: Class 1.5
Size: 72 mm x 72 mm x 45 mm
Package included:
1 x Meter
1 x Shunt
2 x Nuts
2 x Spring Washers
4 x Flat Washers
 

Attachments

  • SAM_4575.JPG
    SAM_4575.JPG
    1.3 MB · Views: 1
  • SAM_4574.JPG
    SAM_4574.JPG
    1.3 MB · Views: 1
  • s-l64.jpg
    s-l64.jpg
    1.3 KB · Views: 47
  • s-l642.jpg
    s-l642.jpg
    1.4 KB · Views: 47
  • SAM_4576.JPG
    SAM_4576.JPG
    1.3 MB · Views: 1

Functional Artist

Well-known member
Messages
4,372
Reaction score
1,639
Location
Toledo, Ohio
I've been lookin', seems like, forever for a "base" or box to mount this Amp meter into.

The top or opening, of the container, had to be able to hold the (4" x 4" x 2") "square" meter
…& the bottom had to be (~3 1/2") round, to mount on the bike :huh:

Well, lookin' around & thinkin' "outside of the box", I found a 1qt. Brake Fluid bottle that had a ~3 1/2" circular bottom
…& flexible enough to conform to a 4" x 4" square :thumbsup:
(fits nice-n-snug)

So, I drilled some holes, in the bottom, for the wires & bolts
…& then, added some mounting "studs" :cheers2:

The wiring is super simple (doesn't even need a power supply)
...only has (2) signal/sensor terminals

It didn't come with directions or a wiring diagram so, I figured the (1) marked (-) must go to the battery pack negative (B-) side of the shunt (black wire)
…& the other (1) must go to "power draw" (P-) side of the shunt (yellow wire)
 

Attachments

  • SAM_4589.JPG
    SAM_4589.JPG
    1.3 MB · Views: 1
  • SAM_4587.JPG
    SAM_4587.JPG
    1.3 MB · Views: 1
  • SAM_4573.JPG
    SAM_4573.JPG
    1.3 MB · Views: 1
  • SAM_4572.JPG
    SAM_4572.JPG
    1.3 MB · Views: 1
  • SAM_4574.JPG
    SAM_4574.JPG
    1.3 MB · Views: 1
  • SAM_4592.JPG
    SAM_4592.JPG
    1.3 MB · Views: 1
  • SAM_4578.JPG
    SAM_4578.JPG
    1.3 MB · Views: 1
  • SAM_1642.jpg
    SAM_1642.jpg
    274 KB · Views: 2
  • SAM_4613.JPG
    SAM_4613.JPG
    1.3 MB · Views: 1
  • SAM_4612.JPG
    SAM_4612.JPG
    1.2 MB · Views: 1

Tpdingo

Member
Messages
903
Reaction score
1
Location
Bellmore, NY
I've been lookin', seems like, forever for a "base" or box to mount this Amp meter into.

The top or opening, of the container, had to be able to hold the (4" x 4" x 2") "square" meter
…& the bottom had to be (~3 1/2") round, to mount on the bike :huh:

Well, lookin' around & thinkin' "outside of the box", I found a 1qt. Brake Fluid bottle that had a ~3 1/2" circular bottom
…& flexible enough to conform to a 4" x 4" square :thumbsup:
(fits nice-n-snug)

So, I drilled some holes, in the bottom, for the wires & bolts
…& then, added some mounting "studs" :cheers2:

The wiring is super simple (doesn't even need a power supply)
...only has (2) signal/sensor terminals

It didn't come with directions or a wiring diagram so, I figured the (1) marked (-) must go to the battery pack negative (B-) side of the shunt (black wire)
…& the other (1) must go to "power draw" (P-) side of the shunt (yellow wire)

Outside of the fact that you should paint the can black, that fit is sick!
 

Functional Artist

Well-known member
Messages
4,372
Reaction score
1,639
Location
Toledo, Ohio
250 e-mile update

Well, I've got over 250 miles on 'er since the conversion to electric :thumbsup:
…& I'm happy to report that (knock on wood) everything seems to be goin' good. :cheers2:

The bike runs great, is very nimble & has great acceleration
...like 0 to top speed (35MPH) in ~4 seconds :2guns:

I gave everything a good "lookin' over"
...went around double checkin' the bolts
…greased the idler sprocket bearings
...& the inspected the sprockets (they still aren't showing any wear) :wai:

Then, I took 'er for a ride to get some data with the analog Amp meter. :cool:

https://www.youtube.com/watch?v=5CpeS5ENA18
 

Attachments

  • SAM_1212.jpg
    SAM_1212.jpg
    432.3 KB · Views: 4

Functional Artist

Well-known member
Messages
4,372
Reaction score
1,639
Location
Toledo, Ohio
El Moto has been running great. :thumbsup:
...& I've got 'er up to almost 500 miles since the conversion :cheers2:
...but, the seat is well worn & cracked up a bit :huh:

So, I got a new seat cover (~$30.00 + ~$10.00 sh = ~$40.00)
...& gonna share/show you'all how I changed 'er :2guns:

It's "hand made" (right here in the USA) :cool:
...& even comes with installation instructions :wai: (unlike MOST Chinese stuff) :mad2:


1.) Removed the seat from the bike
2.) Removed the hardware (hinges, latch & tool kit)
3.) Removed the chrome "trim ring"
4.) Pried-up the triangle "tabs"
5.) Pulled the original cover up-n-off of the "tabs"
6.) Removed old cover :cheers2:

Then, simply reverse procedure :lolgoku:

A couple of details

According to the "directions"
...it's best to "glue" the top surface of the seat cover, to the foam
(to help avoid shifting during installation)

I did a "dry fit" first, just to be sure everything "looked good" :thumbsup:

I did a video to help explain the entire procedure :2guns:

https://www.youtube.com/watch?v=C8zSyVT2M4g
 

Attachments

  • SAM_5861.JPG
    SAM_5861.JPG
    314.5 KB · Views: 2
  • SAM_5862.JPG
    SAM_5862.JPG
    312.6 KB · Views: 2
  • SAM_5863.JPG
    SAM_5863.JPG
    312 KB · Views: 1
  • SAM_5889.JPG
    SAM_5889.JPG
    304.5 KB · Views: 1
  • SAM_5891.JPG
    SAM_5891.JPG
    298.1 KB · Views: 2
  • SAM_5892.JPG
    SAM_5892.JPG
    305.2 KB · Views: 2
  • SAM_5884.JPG
    SAM_5884.JPG
    307.2 KB · Views: 0
  • SAM_5887.JPG
    SAM_5887.JPG
    312.9 KB · Views: 0
  • SAM_5886.JPG
    SAM_5886.JPG
    312.5 KB · Views: 0
  • SAM_6000.JPG
    SAM_6000.JPG
    310.7 KB · Views: 0
  • SAM_5992.JPG
    SAM_5992.JPG
    309.2 KB · Views: 0
  • SAM_5980.JPG
    SAM_5980.JPG
    310.3 KB · Views: 0
  • SAM_5935.JPG
    SAM_5935.JPG
    315.1 KB · Views: 0
  • SAM_5895.JPG
    SAM_5895.JPG
    309.9 KB · Views: 0
  • SAM_6004.JPG
    SAM_6004.JPG
    316.3 KB · Views: 0
  • SAM_6001.JPG
    SAM_6001.JPG
    310.3 KB · Views: 0
  • SAM_5998.JPG
    SAM_5998.JPG
    311 KB · Views: 2
Last edited:

Functional Artist

Well-known member
Messages
4,372
Reaction score
1,639
Location
Toledo, Ohio
500 E-mile update

Been doin' some ridin' :cool:
...& have now put ~500 miles on 'er since the conversion :thumbsup:

She rolls out really well :wai:
...& the seat is a nice/comfortable upgrade :2guns:

The batt pack has consistently stayed very well balanced
...& the sprockets are still not showing hardly any wear :)

Lately, I've noticed a bit of chain "slap" (against the chain guard) upon deceleration

So, I gave 'er a little adjustment
...& took 'er for a ride
...but, something didn't seem right

Took 'er back & did some investigating :stir:

Now, there seems to be a "tight" spot in the chain :huh:

Was it the chain?
...or maybe my DIY sprocket :popcorn:

Did some more investigating
...& the chain seemed fine

So, I turned my attention to the 45T sprocket on the rear wheel ;)

When I spun it, everything looked fine (by eye)

I figured, let's get a bit more scientific about this

So, I set up a "pointer" type gauge (just a piece of coat hangar wire)
...& started off by setting the "point" right "flush" against the chain
...then, slowly rotated the tire

Sure enough, the gauge showed where my DIY sprocket was off (at the worst point) by maybe ~3/32" :mad2:
 

Attachments

  • SAM_6127.JPG
    SAM_6127.JPG
    310.7 KB · Views: 2
  • SAM_6125.JPG
    SAM_6125.JPG
    319.9 KB · Views: 4
  • SAM_6137.JPG
    SAM_6137.JPG
    316.5 KB · Views: 2
  • SAM_6119.JPG
    SAM_6119.JPG
    314.7 KB · Views: 1
  • SAM_6118.JPG
    SAM_6118.JPG
    313.7 KB · Views: 1
  • SAM_6128.JPG
    SAM_6128.JPG
    309.5 KB · Views: 1
  • SAM_6129.JPG
    SAM_6129.JPG
    310 KB · Views: 1
  • SAM_6131.JPG
    SAM_6131.JPG
    308.7 KB · Views: 1
  • SAM_6132.JPG
    SAM_6132.JPG
    303.8 KB · Views: 1
  • SAM_6141.JPG
    SAM_6141.JPG
    316.2 KB · Views: 1

Brianator

Gettin' er done!
Messages
860
Reaction score
12
Location
Barrie, Ontario, Canada
Ya it's tough to get it perfectly centered eh!? I did one for The Ditchbanger all by hand without any precision equipment and got it within 1/8" which hasn't caused me any headaches but I'm also not going the speeds you are!

El Moto is awesome! Another great job man! :cheers2:
 

Functional Artist

Well-known member
Messages
4,372
Reaction score
1,639
Location
Toledo, Ohio
Ya it's tough to get it perfectly centered eh!? I did one for The Ditchbanger all by hand without any precision equipment and got it within 1/8" which hasn't caused me any headaches but I'm also not going the speeds you are!

El Moto is awesome! Another great job man! :cheers2:

Thanks! :thumbsup:

It (sprocket) worked well for 500 miles
...but, now I'm tryin' to "fine tune" things a bit :cheers2:
...& maybe go a bit faster too :2guns:

So, I ordered a new sprocket :cool:

I got it from Surplus Center ($25.00)
https://www.surpluscenter.com/Power...X50B-40-Pitch-50-Tooth-Sprocket-1-1979-50.axd

HUBLESS 40 PITCH SPROCKET
Brand new, roller chain sprocket with center bore to fit weld on hubs.

SPECIFICATIONS
Pitch 40
Teeth 50
Outside Dia. 8.25"
Fits X series hubs (2" bore in sprocket)
Shpg 4 lbs.


So, this sprocket will lower my GR a bit (54T to a 50T) which should give me a bit more speed
...without sacrificing much acceleration or torque :sifone:

Also, I'm gonna "pic my battles" with this :eek:

The center needs to be bored out
...& it also, needs the (4) mounting holes drilled

So, I'ma going to go ahead & have it professionally machined at a local shop ;)

Below are some pics of the stock Kawasaki sprocket (45T 50 pitch)
...& my new (50T 40 pitch) sprocket :bannana:
 

Attachments

  • SAM_6136.JPG
    SAM_6136.JPG
    305.8 KB · Views: 1
  • SAM_6124.JPG
    SAM_6124.JPG
    307.9 KB · Views: 2
  • SAM_6123.JPG
    SAM_6123.JPG
    310.1 KB · Views: 1
  • SAM_6122.JPG
    SAM_6122.JPG
    308.2 KB · Views: 1

Functional Artist

Well-known member
Messages
4,372
Reaction score
1,639
Location
Toledo, Ohio
I picked up my "new" sprocket from O-Bars Machine & Tool :wai:

Went ahead & sealed 'er up before installation :cheers2:

A couple coats of silver
...& then, a couple of coats of clear :thumbsup:

After a good day of dryin', I switched 'em out
...but, the chain was pretty yucky
...& I can't put 'er back on like that :huh:
 

Attachments

  • SAM_6196.JPG
    SAM_6196.JPG
    303.6 KB · Views: 0
  • SAM_6205.JPG
    SAM_6205.JPG
    312.6 KB · Views: 0
  • SAM_6212.JPG
    SAM_6212.JPG
    312.7 KB · Views: 1
  • SAM_6213.JPG
    SAM_6213.JPG
    301.9 KB · Views: 0
  • SAM_6224.JPG
    SAM_6224.JPG
    306.9 KB · Views: 1
  • SAM_6227.JPG
    SAM_6227.JPG
    313.9 KB · Views: 0
  • SAM_6229.JPG
    SAM_6229.JPG
    312 KB · Views: 0
  • SAM_6234.JPG
    SAM_6234.JPG
    310 KB · Views: 0
  • SAM_6237.JPG
    SAM_6237.JPG
    312.3 KB · Views: 0
  • SAM_6243.JPG
    SAM_6243.JPG
    311.2 KB · Views: 2

Functional Artist

Well-known member
Messages
4,372
Reaction score
1,639
Location
Toledo, Ohio
The chain looks to be in good condition
...& only has ~500 miles on it :thumbsup:

So, I gave 'er a "bath" in some standard, petroleum "cleaner" :rolleyes:
(I guess, gas is good for something) :stir:

Let 'er "bask" in the sunshine for a while
(to allow most of the petroleum to evaporate" away")

I had ta remove (2) links to accommodate the smaller sprocket before re-installing it back on the bike
...then, got 'er on & adjusted up properly
...& finally, "lubed" 'er up with some PJ1 Blue Label Chain Lube :2guns:

* This stuff is supposed to spray on kinda "liquidy"
(to penetrate in-between everything & up under the "rollers")
...& then kinda "thicken up"
(to act as a "seal" to block moisture, dirt & debris from gettin' "in the gaps")
 

Attachments

  • SAM_6257.JPG
    SAM_6257.JPG
    310.8 KB · Views: 1
  • SAM_6253.JPG
    SAM_6253.JPG
    313.8 KB · Views: 1
  • SAM_6250.JPG
    SAM_6250.JPG
    306.3 KB · Views: 1
  • SAM_6247.JPG
    SAM_6247.JPG
    314.6 KB · Views: 1
  • SAM_6246.JPG
    SAM_6246.JPG
    314.3 KB · Views: 1
  • SAM_6258.JPG
    SAM_6258.JPG
    296 KB · Views: 1
  • SAM_6259.JPG
    SAM_6259.JPG
    298 KB · Views: 1
  • SAM_6260.JPG
    SAM_6260.JPG
    301.5 KB · Views: 1
  • SAM_6262.JPG
    SAM_6262.JPG
    310.7 KB · Views: 1
  • SAM_6263.JPG
    SAM_6263.JPG
    312.5 KB · Views: 2

Functional Artist

Well-known member
Messages
4,372
Reaction score
1,639
Location
Toledo, Ohio
I am interested to see/test the capacity of the battery pack.

So, I figured I'd try a PZEM-051 meter (worked gook on Excalibur)
:thumbsup:
https://www.diygokarts.com/vb/showthread.php?t=42102

My only concern is that this meter is labeled/rated @ 100V/100A

The batt pack is ~48V so, were good there
...but, this motor can pull well over 200A so,...:popcorn:

* I don't think it will "fry" the meter, as no current actually flows thru it (it's just reads a signal)
...maybe it'll "blank out" or just show an 0 :huh:

Here is the video :2guns:
https://www.youtube.com/watch?v=tidjlTRojEo
 

Attachments

  • SAM_6427.JPG
    SAM_6427.JPG
    305.4 KB · Views: 1
  • SAM_6418.JPG
    SAM_6418.JPG
    310.4 KB · Views: 1
  • SAM_6417.JPG
    SAM_6417.JPG
    309 KB · Views: 1
  • SAM_6419.JPG
    SAM_6419.JPG
    313.8 KB · Views: 1

Functional Artist

Well-known member
Messages
4,372
Reaction score
1,639
Location
Toledo, Ohio
This year I want to step 'er up a bit & double the battery pack on my El Moto
...so, I acquired a nicely matched set of (2) 45V 50Ah modules from a 2014 Chevy Volt with ~62K miles on it.

Before I could get 'em mounted, I had to do some "body work"
...cause their just a bit too big (in their present form)

So first, I trimmed the coolant passages off of each side of both modules
...next, I did some measurin' & markin' & cuttin
...& then, made an "outer wrap" out of a piece of 16g steel to "strap" 'em together (with some "feet" for mounting)
 

Attachments

  • SAM_7212.JPG
    SAM_7212.JPG
    3.4 MB · Views: 1
  • SAM_7211.JPG
    SAM_7211.JPG
    3.1 MB · Views: 1
  • SAM_7220.JPG
    SAM_7220.JPG
    3.5 MB · Views: 1
  • SAM_7223.JPG
    SAM_7223.JPG
    3.4 MB · Views: 1
  • SAM_7224.JPG
    SAM_7224.JPG
    3.5 MB · Views: 2
  • SAM_7218.JPG
    SAM_7218.JPG
    3.4 MB · Views: 2
  • SAM_7219.JPG
    SAM_7219.JPG
    3.4 MB · Views: 2
  • SAM_7229.JPG
    SAM_7229.JPG
    3.4 MB · Views: 2
  • SAM_7230.JPG
    SAM_7230.JPG
    3.4 MB · Views: 2

Functional Artist

Well-known member
Messages
4,372
Reaction score
1,639
Location
Toledo, Ohio
I wrapped each trimmed module with some carbon fiber "looking" vinyl wrap to seal/insulate them individually
...next, sat 'em next to each other & wrapped 'em together
...then, "strapped 'em together with the steel "outer wrap"

They seem to fit nicely :)

They nestle well in between the foot peg mounts
...there's plenty of room in the front & back
...& ya still can't hardly seem 'em when sitting on the bike :cool:

* The engine/trans was ~125 lbs. plus, ~25 lbs. for oil/fuel & battery (~150 total, removed)
...& now, I have ~100 lbs. of battery pack & ~50 lbs. motor/accessories (~150 total, added)
...so, I'd say were now @ about the same weight, as when it was stock

** Also, my original battery mounting brackets were made outta heavy 1/4" angle iron
...so, I made up a lighter set, out of some 1/8" steel bed rails

He...he, I finally, found a use for "bed rails"
...no welding, just a couple of straight runs, that are bolted together ;)
 

Attachments

  • SAM_1376.JPG
    SAM_1376.JPG
    3.1 MB · Views: 2
  • SAM_1377.JPG
    SAM_1377.JPG
    3.1 MB · Views: 2
  • SAM_1378.JPG
    SAM_1378.JPG
    3.2 MB · Views: 2
  • SAM_1379.JPG
    SAM_1379.JPG
    3.1 MB · Views: 1
  • SAM_1382.JPG
    SAM_1382.JPG
    3.1 MB · Views: 1

EpsilonZero

...still cheaper than a boat!
Messages
395
Reaction score
182
* The engine/trans was ~125 lbs. plus, ~25 lbs. for oil/fuel & battery (~150 total, removed)
...& now, I have ~100 lbs. of battery pack & ~50 lbs. motor/accessories (~150 total, added)
...so, I'd say were now @ about the same weight, as when it was stock

** Also, my original battery mounting brackets were made outta heavy 1/4" angle iron
...so, I made up a lighter set, out of some 1/8" steel bed rails

See, you thought I was pushing too much weight with the one Volt battery and you went and did two. These things are heavy, but nothing like SLAs and are easily an alternative to heavy engines. In ten years, we'll be looking at current lithium batteries like we look at SLAs now.
 

Functional Artist

Well-known member
Messages
4,372
Reaction score
1,639
Location
Toledo, Ohio
Well, I'm still concerned about you overweighting & over powering your kart (just keep an eye on them stress points)
Bad Azz little kart, by the way :)

That's kinda why I made a point to specify that I "kept 'er within the manufacturers specs"
...by not adding anymore weight, than I removed
...& the modifications (conversion to electric) didn't produce more power/speed, than before the mods :cool:

IMO SLA's are still useful & have their place
...just not for advanced set-ups ;)
 

EpsilonZero

...still cheaper than a boat!
Messages
395
Reaction score
182
Well, I'm still concerned about you overweighting & over powering your kart (just keep an eye on them stress points)
Bad Azz little kart, by the way :)

That's kinda why I made a point to specify that I "kept 'er within the manufacturers specs"
...by not adding anymore weight, than I removed
...& the modifications (conversion to electric) didn't produce more power/speed, than before the mods :cool:

IMO SLA's are still useful & have their place
...just not for advanced set-ups ;)
I am 100lbs under rated load still. Just enough for a couple more Volt batteries or for my buddy who weighs 100lbs more than me to ride it in a few minutes. :LOL:

The mods made quite a difference on mine though since it was just a bare frame that didn't even roll. Took it from 0mph to 60+mph.
 

Functional Artist

Well-known member
Messages
4,372
Reaction score
1,639
Location
Toledo, Ohio
The Chevy Volt's battery uses 4g orange "doubled up" the battery cables. (to help carry the 300V+ that run thru 'em)

So, after mounting/securing these battery modules, on the bike, I replaced all of the battery cables, with some of them kool lookin', orange cables.

A couple of the "doubled up" cable/terminals came in handy (especially, connecting my (2) modules together "in parallel".
(they should provide better connections, by not having to use multiple lugs & then "stacking" 'em up, on the terminals)

I also, installed a Buss MRCB 48V 150A circuit breaker on the battery pack, "in line" with the positive (+) cable, to use as a main cut-off & to provide some circuit protection
...a 100A shunt "in line" with the negative (-) cable, to provide the info, for the power monitor (PZEM-051 meter)
...& a "good-n-solid" charge port too

* I mounted my battery charger on the wall next to where I park the bike for quick/easy charging :cool:
 

Attachments

  • SAM_1428.JPG
    SAM_1428.JPG
    2.9 MB · Views: 2
  • SAM_1429.JPG
    SAM_1429.JPG
    3 MB · Views: 1
  • SAM_1426.JPG
    SAM_1426.JPG
    3.1 MB · Views: 1
  • SAM_1467.JPG
    SAM_1467.JPG
    3 MB · Views: 1
  • SAM_1468.JPG
    SAM_1468.JPG
    3 MB · Views: 1
  • SAM_1430.JPG
    SAM_1430.JPG
    3.1 MB · Views: 1
  • SAM_1435.JPG
    SAM_1435.JPG
    3 MB · Views: 2
  • SAM_1431.JPG
    SAM_1431.JPG
    3 MB · Views: 2
  • SAM_1433.JPG
    SAM_1433.JPG
    3.1 MB · Views: 2
Top