2017 - 2-Stroke Minibike

Status
Not open for further replies.

David Ham

Member
Messages
297
Reaction score
11
Location
Melbourne
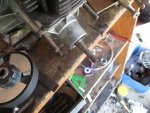
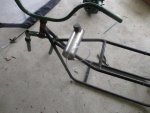
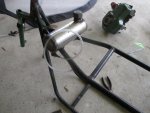
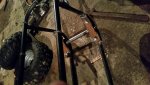
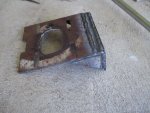
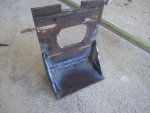
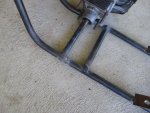
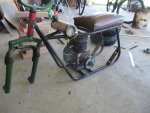
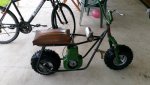
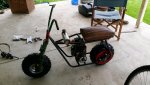
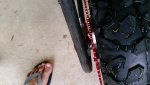
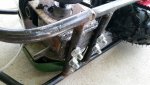
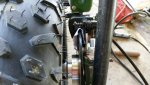
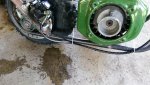
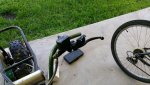
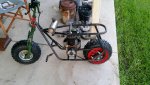
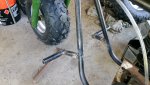
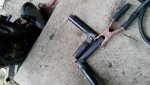
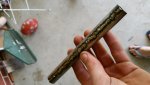
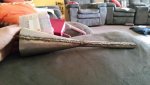
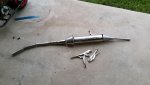
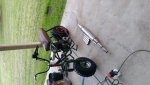
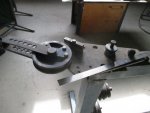
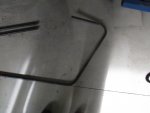
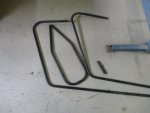
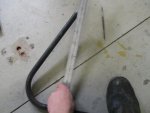
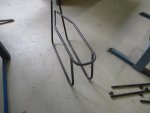
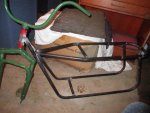
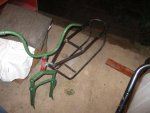
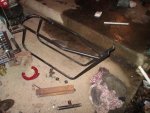
got my hands on a pipe bender and got to work on the frame:
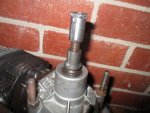
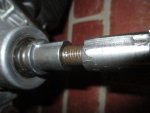
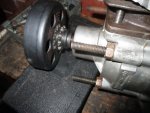
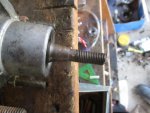
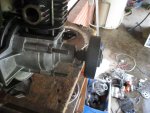
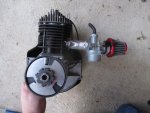
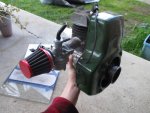
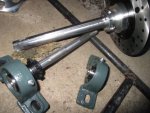
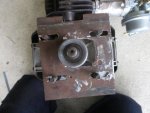
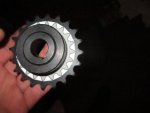
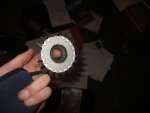
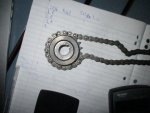
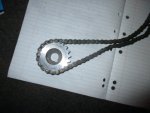
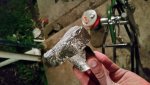
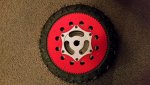
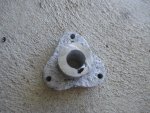
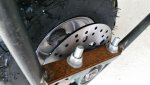
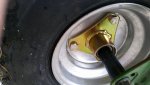
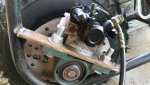
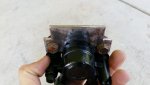
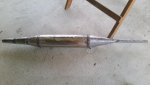
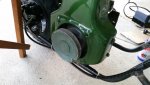
I also got a clutch adapter for my engine, so I can put a cent. clutch on it. it didn't come with a keyway on it so I milled that out. I'll post pics of those when I can.
 

Attachments

  • IMG_0078.jpg
    IMG_0078.jpg
    226.2 KB · Views: 1
  • IMG_0079.jpg
    IMG_0079.jpg
    198.9 KB · Views: 0
  • IMG_0080.jpg
    IMG_0080.jpg
    216.3 KB · Views: 0
  • IMG_0081.jpg
    IMG_0081.jpg
    220.5 KB · Views: 0
  • IMG_0082.jpg
    IMG_0082.jpg
    223.9 KB · Views: 0
  • IMG_0107.jpg
    IMG_0107.jpg
    286.5 KB · Views: 2
  • IMG_0106.jpg
    IMG_0106.jpg
    261.5 KB · Views: 1
  • IMG_0083.jpg
    IMG_0083.jpg
    303.2 KB · Views: 0

David Ham

Member
Messages
297
Reaction score
11
Location
Melbourne
Looks good.

thanks:thumbsup:

there was a bit of work to do on the adapter, the half furthest from the engine was smaller in diameter than 3/4" and was not properly centred. So I welded onto it and lathed it down after securing it by the inside so that it would end up accurate. then I milled a keyway onto them both.

I must say it was a relief to find that the clutch spun true after putting it on!

I did try to make an adapter myself before, but I didn't have the right tap and I couldn't buy it. I also had no way of machining a taper into the end
 

Attachments

  • IMG_0108.jpg
    IMG_0108.jpg
    260 KB · Views: 0
  • IMG_0109.jpg
    IMG_0109.jpg
    203.3 KB · Views: 0
  • IMG_0110.jpg
    IMG_0110.jpg
    290.3 KB · Views: 0
  • IMG_0111.jpg
    IMG_0111.jpg
    300.5 KB · Views: 0
  • IMG_0112.jpg
    IMG_0112.jpg
    256.9 KB · Views: 0
  • IMG_0113.jpg
    IMG_0113.jpg
    281.4 KB · Views: 0

David Ham

Member
Messages
297
Reaction score
11
Location
Melbourne
I cast and ground an adapter for the carburettor. its a 22mm for now
I've lathed a jackshaft and axle, still working on putting a keyway into them.
 

Attachments

  • IMG_0119.jpg
    IMG_0119.jpg
    341.5 KB · Views: 6
  • IMG_0118.jpg
    IMG_0118.jpg
    307.7 KB · Views: 4

David Ham

Member
Messages
297
Reaction score
11
Location
Melbourne
Lookin' good

No description on casting & grinding the carb adapter?

Enquiring minds wanna know :thumbsup:

ah ok, I'll make a video or something when I cast the wheel hubs. its basically, make a foam cast, bury it in sand with a bit of oil to hold it together, then pour aluminium in. then I sanded the ends perfectly flat using a sheet of glass.
 

Ltdkc

New member
Messages
31
Reaction score
0
Lookin good mate. Have you done the port mods on that cylinder yet?
 

David Ham

Member
Messages
297
Reaction score
11
Location
Melbourne
Lookin good mate. Have you done the port mods on that cylinder yet?

yep, exhaust port is larger, couldn't take the inlet out quite to 22mm but as much as I can. I've got some sheet stainless steel and I ordered some 1.6mm rods so I can start to get the pipe happening. I think I'll go with your idea for mounting the exhaust because it'll get a lot hotter there and aluminium won't work.
 

Ltdkc

New member
Messages
31
Reaction score
0
Cool. So I say the port timings will be more or less the same as the ones you started off with for the power torque. I wouldn't stress too much about the intake dia. Standard they're like 16mm, If you can widen the port would probly help a bit which would help compensate for the intake looking half blocked at the top if you get what I mean. It's coming along good mate. You should be proud of yourself for having a crack at it. I'm real interested in finding out how your ally intake adaptation goes after it gets some heat into it. Don't mean to sound pessimistic but i have a funny feeling you'll be hunting for another barrel at some stage. Lol. But none the less, I'll cross my fingers for ya bro. You don't know til you try. I like your way around the clutch adapter too. Good thinking. Ave you seen those torque converters? I'm probly gonna run one on a Victa powered bike or mini bike but I'm unsure weather they like high ish rpm.
 

David Ham

Member
Messages
297
Reaction score
11
Location
Melbourne
I've finished the rear axle and jackshaft, still got to do the front axle.
keyways in both of them. also started working on a mounting plate for the engine.


Cool. So I say the port timings will be more or less the same as the ones you started off with for the power torque. I wouldn't stress too much about the intake dia. Standard they're like 16mm, If you can widen the port would probly help a bit which would help compensate for the intake looking half blocked at the top if you get what I mean. It's coming along good mate. You should be proud of yourself for having a crack at it. I'm real interested in finding out how your ally intake adaptation goes after it gets some heat into it. Don't mean to sound pessimistic but i have a funny feeling you'll be hunting for another barrel at some stage. Lol. But none the less, I'll cross my fingers for ya bro. You don't know til you try. I like your way around the clutch adapter too. Good thinking. Ave you seen those torque converters? I'm probly gonna run one on a Victa powered bike or mini bike but I'm unsure weather they like high ish rpm.

I've got an intake on my lawnmower that I cast, it hasn't failed yet but its probably not running as hard as the minibike will. yeh I probably will end up wanting another cylinder lol. I have a torque converter on my go kart, it goes really well. I don't know about high rpms either though
 

Attachments

  • IMG_0004.jpg
    IMG_0004.jpg
    294.2 KB · Views: 2
  • IMG_0005.jpg
    IMG_0005.jpg
    260.7 KB · Views: 1

David Ham

Member
Messages
297
Reaction score
11
Location
Melbourne
fuel tank is mounted, and motor plate is finished, but before I weld it on, I want to make sure everything'll line up, so I want to mount the back axle and jackshaft. I'll probably use some right angle or sheet to do that. Just to make sure the chains and brake plate both have enough room.

edit:
just finished making the 420p sprocket down to a #35. I made up a the design on cad, then printed it off and used that as a template to grind the sprocket to, then finish off with some files. since it was also too thick, I faced it off n the lathe to the correct thickness. time will tell if it destroys chains or clutches.
 

Attachments

  • IMG_0025.jpg
    IMG_0025.jpg
    227.2 KB · Views: 4
  • IMG_0024.jpg
    IMG_0024.jpg
    407.6 KB · Views: 4
  • IMG_0023.jpg
    IMG_0023.jpg
    321.1 KB · Views: 4
  • IMG_0022.jpg
    IMG_0022.jpg
    249 KB · Views: 4
  • IMG_0021.jpg
    IMG_0021.jpg
    312.6 KB · Views: 6
  • IMG_0073.jpg
    IMG_0073.jpg
    167 KB · Views: 4
  • IMG_0074.jpg
    IMG_0074.jpg
    172.7 KB · Views: 5
  • IMG_0001.jpg
    IMG_0001.jpg
    166 KB · Views: 5
  • IMG_0002.jpg
    IMG_0002.jpg
    213 KB · Views: 4
  • IMG_0004.jpg
    IMG_0004.jpg
    200.3 KB · Views: 5
Last edited:

David Ham

Member
Messages
297
Reaction score
11
Location
Melbourne
so I've been having some exams lately and haven't been able to work on this, but I've gotten back into it. so far I've cast the first wheel hub, and made up some mounts for the axle bearings.
I've ordered a larger rear sprocket so I don't have to worry about a jackshaft and I can make the frame smaller.
 

Attachments

  • 20170903_182804.jpg
    20170903_182804.jpg
    246.3 KB · Views: 5

David Ham

Member
Messages
297
Reaction score
11
Location
Melbourne
here's a pic of the hub I cast, still need to make the two fort the minibike and one more for the go kart.
and this is what the new sprocket looks like, its 83 teeth so the gearing will be a little less than 1:7 to give a top speed of 60 kph (36 mph), at 6000 rpm. still a fair bit of ground clearance.
 

Attachments

  • 20170907_184612.jpg
    20170907_184612.jpg
    199.9 KB · Views: 5
  • 20170907_184722.jpg
    20170907_184722.jpg
    303.7 KB · Views: 3

David Ham

Member
Messages
297
Reaction score
11
Location
Melbourne
alright I got a bit more work done on this, I've been studying and whatnot but school will be over in a few weeks so after that I should be able to finish this.
So I've made the hubs, but I ended up ordering one for the front wheel.
also basically finished the engine mount besides drilling holes in it, shortened the frame and welded another cross member to support the engine mount. theres a seat there as well which I made but its not so good.
 

Attachments

  • IMG_0007.jpg
    IMG_0007.jpg
    357.3 KB · Views: 8
  • IMG_0008.jpg
    IMG_0008.jpg
    348.6 KB · Views: 5
  • IMG_0009.jpg
    IMG_0009.jpg
    415.1 KB · Views: 5
  • IMG_0010.jpg
    IMG_0010.jpg
    393.5 KB · Views: 6
  • IMG_0011.jpg
    IMG_0011.jpg
    333.1 KB · Views: 6
  • IMG_0012.jpg
    IMG_0012.jpg
    350.8 KB · Views: 5

David Ham

Member
Messages
297
Reaction score
11
Location
Melbourne
I have a roller! I found a bit of metal and lathed down on one side to 15mm for the front hub, then welded some threaded bits of metal from some bolts onto the ends so it connects to the forks nicely. Then theres a bit of pipe on the other side so the wheel doesn't slide that way.

Also drilled out the frame and engine mounting plate so it can bolt on. Its really good how the engine bolts onto that because I can adjust it any direction I want.

Got the back wheel on as well, only thing thats not properly attached in the picture is the seat.

So now I can weld on foot pegs, and a bracket for the brake calliper which should be pretty straightforward.

I might try and get a little more clearance between the sprocket and wheel as well...
 

Attachments

  • 20171019_164222.jpg
    20171019_164222.jpg
    165.1 KB · Views: 4
  • 20171019_164238.jpg
    20171019_164238.jpg
    226.1 KB · Views: 4
  • 20171019_164302.jpg
    20171019_164302.jpg
    303.8 KB · Views: 4
  • 20171019_164317.jpg
    20171019_164317.jpg
    330 KB · Views: 5
  • 20171019_164333.jpg
    20171019_164333.jpg
    165.7 KB · Views: 5
  • 20171019_164215.jpg
    20171019_164215.jpg
    204.2 KB · Views: 4
  • 20171019_164159.jpg
    20171019_164159.jpg
    249.3 KB · Views: 5

David Ham

Member
Messages
297
Reaction score
11
Location
Melbourne
so I made up some foot pegs and a bracket for the brake caliper and welded those on. brakes work well:thumbsup:

Also moved the wheel slightly away form the sprocket so theres more room for the chain. One chain wasn't enough so I added some links.

I've marked on some stainless steel the parts for the expansion chamber so I can get that moving along as well.:cheers2:
now I need to make a new adapter for the carby so it doesn't hit the back wheel...
 

Attachments

  • 20171020_152228.jpg
    20171020_152228.jpg
    216.1 KB · Views: 3
  • 20171020_153414.jpg
    20171020_153414.jpg
    348.8 KB · Views: 6
  • 20171020_155444.jpg
    20171020_155444.jpg
    482.8 KB · Views: 8
  • 20171020_191935.jpg
    20171020_191935.jpg
    339.4 KB · Views: 16
  • 20171020_191943.jpg
    20171020_191943.jpg
    288.7 KB · Views: 5
  • 20171020_152205.jpg
    20171020_152205.jpg
    286.8 KB · Views: 4
  • 20171020_151805.jpg
    20171020_151805.jpg
    250.4 KB · Views: 4
  • 20171020_151329.jpg
    20171020_151329.jpg
    133.3 KB · Views: 4
  • 20171019_185506.jpg
    20171019_185506.jpg
    216.4 KB · Views: 5

David Ham

Member
Messages
297
Reaction score
11
Location
Melbourne
So schools over for me:wai: and I've started on the exhaust.
also got a pulley for the engine so I can actually start it.
 

Attachments

  • 20171024_132534.jpg
    20171024_132534.jpg
    146.3 KB · Views: 3
  • 20171024_171327.jpg
    20171024_171327.jpg
    184.6 KB · Views: 1
  • 20171025_110600.jpg
    20171025_110600.jpg
    432.1 KB · Views: 1
  • 20171025_184404.jpg
    20171025_184404.jpg
    310.1 KB · Views: 1
  • 20171025_191704.jpg
    20171025_191704.jpg
    323.4 KB · Views: 1
  • 20171024_083209.jpg
    20171024_083209.jpg
    327.6 KB · Views: 3
  • 20171023_191037.jpg
    20171023_191037.jpg
    150 KB · Views: 3
  • 20171103_192836.jpg
    20171103_192836.jpg
    262.6 KB · Views: 2
Status
Not open for further replies.
Top