2017 - 2-Stroke Minibike

Status
Not open for further replies.

David Ham

Member
Messages
297
Reaction score
11
Location
Melbourne
So I finished the exhaust, and welded up some tabs to hold the seat and exhaust. Also welded a bit of pipe on the engine and I'll probably use a hose clamp or something to secure the exhaust. Then I took everything off so I can paint it tomorrow:thumbsup:
started cleaning up the engine mount plate, I'll fix all the dodgy welds as well before I paint.
 

Attachments

  • 20171108_185731.jpg
    20171108_185731.jpg
    144.7 KB · Views: 3
  • 20171108_185721.jpg
    20171108_185721.jpg
    304.1 KB · Views: 4
  • 20171108_161524.jpg
    20171108_161524.jpg
    176.6 KB · Views: 4
  • 20171108_154442.jpg
    20171108_154442.jpg
    273.5 KB · Views: 6
  • 20171108_154429.jpg
    20171108_154429.jpg
    377.7 KB · Views: 4
  • 20171107_185736.jpg
    20171107_185736.jpg
    382.9 KB · Views: 6
  • 20171107_185741.jpg
    20171107_185741.jpg
    193.2 KB · Views: 6
  • 20171108_121218.jpg
    20171108_121218.jpg
    165.2 KB · Views: 5
  • 20171108_151236.jpg
    20171108_151236.jpg
    313.4 KB · Views: 4
  • 20171108_154425.jpg
    20171108_154425.jpg
    374.9 KB · Views: 4

David Ham

Member
Messages
297
Reaction score
11
Location
Melbourne
I have been doing a fair bit of work on this, cleaned up the frame and painted it, and the engine mount. also repainted the engine cover with a primer coat this time:thumbsup:
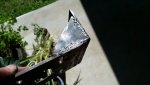
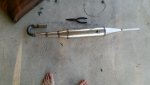
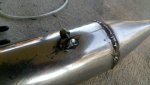
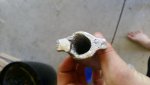
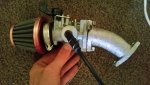
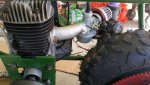
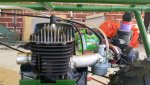
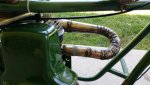
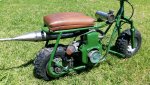
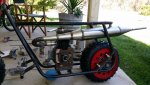
. I shaped up a new adapter for the carby out of foam and cast that as well. now I'm just working on putting it all back together and fixing all the little holes in the exhaust.
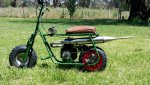
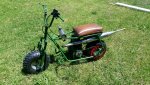
with everything I needed cast for the minibike, and three empty paint cans, I though why not chuck em in the furnace...:cornut:
https://www.youtube.com/watch?v=LJkzWZL-PAE
kinda regret that though because one side of the adapter didn't cast right so I'll have to fill it in with silicon or something:rolleyes:

and yeah I realise the welds on the inside of the engine mount are shocking but without bigger rods and higher current I can't do much about that...
 

Attachments

  • 20171119_134821.jpg
    20171119_134821.jpg
    128.1 KB · Views: 5
  • 20171118_145134.jpg
    20171118_145134.jpg
    245.7 KB · Views: 4
  • 20171118_134228.jpg
    20171118_134228.jpg
    502.6 KB · Views: 5
  • 20171117_195451.jpg
    20171117_195451.jpg
    517.6 KB · Views: 4
  • 20171117_181400.jpg
    20171117_181400.jpg
    686.8 KB · Views: 4
  • 20171109_094309.jpg
    20171109_094309.jpg
    223.4 KB · Views: 5
  • 20171120_160810.jpg
    20171120_160810.jpg
    99.5 KB · Views: 7
  • 20171109_101849.jpg
    20171109_101849.jpg
    226.8 KB · Views: 5
  • 20171117_174438.jpg
    20171117_174438.jpg
    399 KB · Views: 4
  • 20171117_175311.jpg
    20171117_175311.jpg
    788.6 KB · Views: 4

David Ham

Member
Messages
297
Reaction score
11
Location
Melbourne
okay so I've put it all back together.
some other things I did:
welded up all the holes in the exhaust
attached the carby and throttle to the engine
and I made a kill switch.
the kill switch is just something from a pc so its not the best but it should do the job :D
I put some exhaust putty on it before I put it in so that doesn't leak hopefully.
 

Attachments

  • 20171121_085422.jpg
    20171121_085422.jpg
    198.5 KB · Views: 4
  • 20171121_092733.jpg
    20171121_092733.jpg
    262.9 KB · Views: 4
  • 20171121_092747.jpg
    20171121_092747.jpg
    301.8 KB · Views: 2
  • 20171121_093549.jpg
    20171121_093549.jpg
    237.4 KB · Views: 2
  • 20171121_094655.jpg
    20171121_094655.jpg
    167.3 KB · Views: 2
  • 20171122_135025.jpg
    20171122_135025.jpg
    186.8 KB · Views: 2
  • 20171122_134859.jpg
    20171122_134859.jpg
    279.6 KB · Views: 3
  • 20171122_134614.jpg
    20171122_134614.jpg
    214.7 KB · Views: 2
  • 20171122_123746.jpg
    20171122_123746.jpg
    166.8 KB · Views: 3
  • 20171122_123737.jpg
    20171122_123737.jpg
    132.8 KB · Views: 3

David Ham

Member
Messages
297
Reaction score
11
Location
Melbourne
aaaaannd... well I'd say its finished but I don't know if I will have to do anymore work on it because I haven't tried starting it yet. But this is how it will look anyway.
hopefully though I'll give it a run today
 

Attachments

  • 20171122_135516.jpg
    20171122_135516.jpg
    666.2 KB · Views: 10
  • 20171122_135522.jpg
    20171122_135522.jpg
    860 KB · Views: 6
  • 20171122_135615.jpg
    20171122_135615.jpg
    625 KB · Views: 6
  • 20171122_135624.jpg
    20171122_135624.jpg
    680.3 KB · Views: 6
  • 20171122_135629.jpg
    20171122_135629.jpg
    823.8 KB · Views: 7
Status
Not open for further replies.
Top