2017 - 2-Stroke Minibike

Status
Not open for further replies.

Ltdkc

New member
Messages
31
Reaction score
0
Victa performance mods

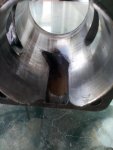
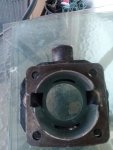
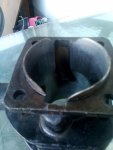
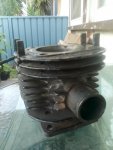
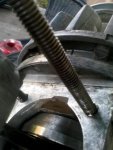
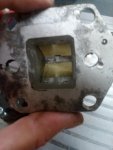
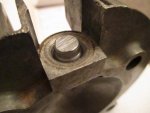
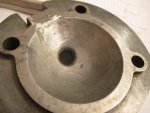
Here's some pics of the cylinder port and crankcase mods I've done. I've also risen by 5mm and the width of the port, a section on the inlet side of the piston skirt for a longer inlet duration. But only because it's running a reed valve. I didn't bother taking pics of that as it might not be advisable for you to do that particular mod if your not gonna run a reed valve.
 

Attachments

  • IMG_20170423_165429.jpg
    IMG_20170423_165429.jpg
    253.5 KB · Views: 13
  • IMG_20170423_165459.jpg
    IMG_20170423_165459.jpg
    259.7 KB · Views: 11
  • IMG_20170423_165511.jpg
    IMG_20170423_165511.jpg
    214.8 KB · Views: 9
  • IMG_20170423_165554.jpg
    IMG_20170423_165554.jpg
    237.8 KB · Views: 10
  • IMG_20170423_165657.jpg
    IMG_20170423_165657.jpg
    239.4 KB · Views: 10
Ltdkc

New member
Messages
31
Reaction score
0
Yeah sure have. It screams. That is until the inlet broke off due to engine heat, vibration and the weight of the reed block. Despite being aluminum, the reed block is deceptively weighty. But the setup did work well. I'd predict better performance again with the filled in crank and expansion chamber

---------- Post added at 06:35 PM ---------- Previous post was at 06:32 PM ----------

I'm gunna have to do another cylinder now with those mods and make up some support brackets for the reed block. It should be fine the
 

Ltdkc

New member
Messages
31
Reaction score
0
Victa performance mods

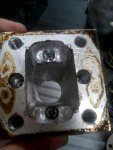
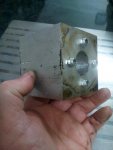
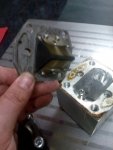
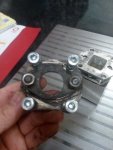
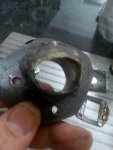
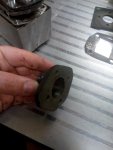
Here's the reed block I made. I got a mate to machine a 25mm hole through the guts of the solid aluminum block and drill all the smaller holes and tap threads. From there I shaped the inside of the block to accept the reed valve and made the plates for the carby to mount to the reed block and for the reed block to mount to the cylinder. many hours of frigging around in the shed with the missus getting upset at my lack of presence in the house of a night. Lol
 

Attachments

  • IMG_20170423_185145.jpg
    IMG_20170423_185145.jpg
    253.3 KB · Views: 8
  • IMG_20170423_185219.jpg
    IMG_20170423_185219.jpg
    309.5 KB · Views: 7
  • IMG_20170423_185347.jpg
    IMG_20170423_185347.jpg
    241.1 KB · Views: 8
  • IMG_20170423_185409.jpg
    IMG_20170423_185409.jpg
    237.7 KB · Views: 7
  • IMG_20170423_185449.jpg
    IMG_20170423_185449.jpg
    283.3 KB · Views: 8
  • IMG_20170423_185719.jpg
    IMG_20170423_185719.jpg
    294.4 KB · Views: 7
  • IMG_20170423_185748.jpg
    IMG_20170423_185748.jpg
    276.9 KB · Views: 8

David Ham

Member
Messages
297
Reaction score
11
Location
Melbourne
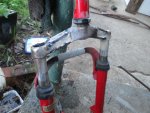
I'm thinking about cutting these up and making them wider to fit a bigger front wheel...
Don't know whether this is a good idea though...
 

Attachments

  • IMG_0010.jpg
    IMG_0010.jpg
    347.3 KB · Views: 10

David Ham

Member
Messages
297
Reaction score
11
Location
Melbourne
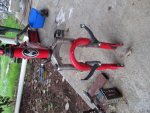
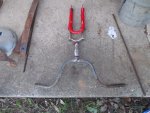
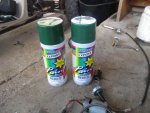
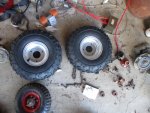
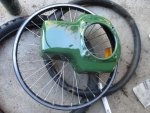
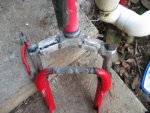
so I got some wheels, paint, and all the gaskets and things for the engine.
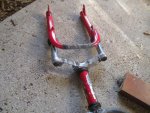
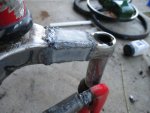
I went ahead and widened up the bike fork after putting my handlebars on it. Also painted the engine shroud.
 

Attachments

  • IMG_0001.jpg
    IMG_0001.jpg
    385.4 KB · Views: 7
  • IMG_0002.jpg
    IMG_0002.jpg
    305.7 KB · Views: 6
  • IMG_0003.jpg
    IMG_0003.jpg
    356.3 KB · Views: 9
  • IMG_0004.jpg
    IMG_0004.jpg
    363.2 KB · Views: 8
  • IMG_0005.jpg
    IMG_0005.jpg
    416.2 KB · Views: 9
  • IMG_0022.jpg
    IMG_0022.jpg
    475.6 KB · Views: 9
  • IMG_0021.jpg
    IMG_0021.jpg
    251.9 KB · Views: 11
  • IMG_0020.jpg
    IMG_0020.jpg
    331.1 KB · Views: 9
  • IMG_0006.jpg
    IMG_0006.jpg
    289.5 KB · Views: 9

David Ham

Member
Messages
297
Reaction score
11
Location
Melbourne
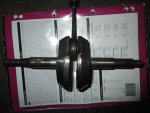
So I've noticed the flywheel was scratching against the ignition coil, had a close look and it looks like the crankshaft is bent. I guess I'll have to look around for another...
 

David Ham

Member
Messages
297
Reaction score
11
Location
Melbourne
it doesn't look bent to me, I think it is maybe offset in the middle somewhere...
I'll put it on lathe to make sure. I think I've got a spare crankshaft lying around anyway...
 

Attachments

  • IMG_0050.jpg
    IMG_0050.jpg
    279.3 KB · Views: 6

David Ham

Member
Messages
297
Reaction score
11
Location
Melbourne
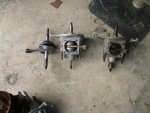
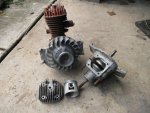
super happy that I was able to get this lot for $5. A crankcase with the crankshaft I needed, an complete 125cc victa that someones taken good care of, a new head and piston. Wangaratta drive in salvage is the place to go...
the next picture has the crank I was thinking of trying to use on the right. its hard to see, but its full of rust and completely frozen up.
 

Attachments

  • IMG_0051.jpg
    IMG_0051.jpg
    333.8 KB · Views: 8
  • IMG_0052.jpg
    IMG_0052.jpg
    327 KB · Views: 6

Ltdkc

New member
Messages
31
Reaction score
0
Easy fix with the crankshaft mate, just get an engine machine shop to dial it up for you. 2stroke Victa cranks I've been told can apparently be up to 2 thou out without major issue. But it's always nice to have it all running all zeroed up nice and true.
 

David Ham

Member
Messages
297
Reaction score
11
Location
Melbourne
yeah mate, I'll do that for sure if I need to, I know a guy in Benalla...
that piston I got is oversize so if I do that I might even get him to overbore my cylinder as well...
 

David Ham

Member
Messages
297
Reaction score
11
Location
Melbourne
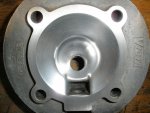
got a aluminium foundry working pretty well so I filled up the decompression valve hole in the cylinder head. just a picture of what it looks like without being filled in:
 

Attachments

  • IMG_0014.jpg
    IMG_0014.jpg
    221.4 KB · Views: 7
  • IMG_0017.jpg
    IMG_0017.jpg
    252.3 KB · Views: 9
  • full-7837-17050-p7060748.jpg
    full-7837-17050-p7060748.jpg
    152.1 KB · Views: 10

Ltdkc

New member
Messages
31
Reaction score
0
That looks good mate. Having the decomp hole filled in should help give more compression. If you have access to a foundry, maybe try and cast your own heads. Very early 160's had no decomp valve but those heads are very thin to the ground. If you can get a hold of a victa 160 vc sports, they have a high compression squish band head. So do the victa super 600 slasher mowers. But again, they both still have the decomp valve which sucks. That 125 you have would be a good thing to modify. A good start with that would be to cut off the existing inlet, open it up to 25mm and get a peice of 25mm id pipe heavily bronze welded on, and get a heap of bronze on the top and sides of the exhaust port, then do your port timings from there.
 

David Ham

Member
Messages
297
Reaction score
11
Location
Melbourne
That looks good mate. Having the decomp hole filled in should help give more compression. If you have access to a foundry, maybe try and cast your own heads.

I probably could, but I wouldn't be able to make a stronger one than what I've got, homemade castings tend to be very soft.

Lookin' good! :thumbsup:

How's the rest of the bike coming?

I bought some pipe yesterday, so I'll draw up some diagrams and get it bent as soon as possible:thumbsup:
 

David Ham

Member
Messages
297
Reaction score
11
Location
Melbourne
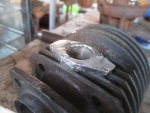
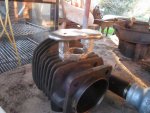
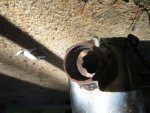
did a bit more on the engine, cast some aluminium around the inlet port and will drill and tap holes in it. the aluminium sets in place when it cools, my only problem with this is that it could become loose as the engine heats up.

also, heres what happened to the mower...;)
http://www.diygokarts.com/vb/showthread.php?t=36768
 

Attachments

  • IMG_0024.jpg
    IMG_0024.jpg
    243.1 KB · Views: 9
  • IMG_0022.jpg
    IMG_0022.jpg
    309 KB · Views: 8

Ltdkc

New member
Messages
31
Reaction score
0
Victa

Thats a good idea making the inlet base bigger. But casting aluminium onto it mite be setting you up for vaccum leaks with the different expansion rates of the 2 different metals. Most of the vintage kart guys usually heat the entire cylinder then bronze /braze onto the cast iron and that usually works well. What you've done may very well work . But chances are youll get vaccum leaks i recon. Id definitely like to know what happens either way. Keep us posted champ.
 

David Ham

Member
Messages
297
Reaction score
11
Location
Melbourne
Thats a good idea making the inlet base bigger. But casting aluminium onto it mite be setting you up for vaccum leaks with the different expansion rates of the 2 different metals. Most of the vintage kart guys usually heat the entire cylinder then bronze /braze onto the cast iron and that usually works well. What you've done may very well work . But chances are youll get vaccum leaks i recon. Id definitely like to know what happens either way. Keep us posted champ.

so what exactly do you mean by vacuum leaks? If you mean the gap between the engine and aluminium, I think it'll be alright. I can fill it with epoxy or something if its a problem

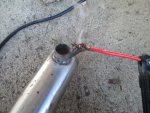
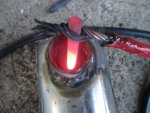
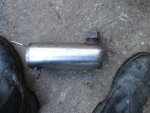
finished up the fuel tank:
I didn't have a drill bit big enough so I burned out the hole with a carbon rod from a battery.
 

Attachments

  • IMG_0006.jpg
    IMG_0006.jpg
    284.6 KB · Views: 6
  • IMG_0007.jpg
    IMG_0007.jpg
    391.8 KB · Views: 7
  • IMG_0008.jpg
    IMG_0008.jpg
    258 KB · Views: 8
  • IMG_0009.jpg
    IMG_0009.jpg
    304 KB · Views: 6

David Ham

Member
Messages
297
Reaction score
11
Location
Melbourne
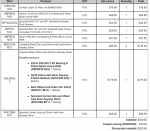
big order
its got everything I think I'll need for the minibike including brake disc, sprocket carrier, extra chain, jackshaft setup and bearings, plus some other bits and pieces for the go kart
I also ordered a brake calliper separately
cut price racing usually ships pretty quick so we should see all this soon...
 

Attachments

  • Screen Shot 2017-07-11 at 11.22.52 am.png
    Screen Shot 2017-07-11 at 11.22.52 am.png
    103.7 KB · Views: 9

David Ham

Member
Messages
297
Reaction score
11
Location
Melbourne
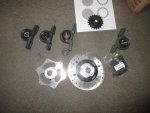
here's everything I got for the minibike... but dammit I got a 420 pitch sprocket instead of a 35.. so I'll probably machine that down:cornut:
 

Attachments

  • IMG_0070.jpg
    IMG_0070.jpg
    300.1 KB · Views: 5
Status
Not open for further replies.
Top