Desertduler
Active member
- Messages
- 1,736
- Reaction score
- 11
You must be a mind reader.Yellow it will be.Racing yellow!
Sent from my iPhone using Tapatalk
You must be a mind reader.Yellow it will be.Racing yellow!
Sent from my iPhone using Tapatalk
 Has the wife driven it yet?
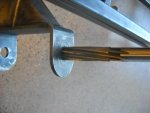
Thanks a lot Tony,my wife has not drove it yet because I still have to put the floor pan on the front and I have it all tore back apart finishing up some details and then I will paint it and put it back together and post a video of the operation of the kart and I will show the brakes and kill switch in operation. I remember that you were questioned about yours at the time and I most certainly will make sure that it is indeed shown working,I learned along time ago that it is easier to have a kill switch within reach then try to reach and pull off a spark plug lead in order to shut down an engine with a stuck throttle,not cool!I am all for the kill switch rule,that is an important safety device.Bret, that looks & goes awesome, great job
One thing though, as per the rules, we need vid of that kill switch in action before you can qualify...
How's the progress with the paint?


Yeah....really....it's been almost 4 hours.....
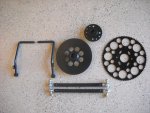
I have some of the components painted and I will be detailing and painting for the next few days,she is all tore apart.Perfect amount of time for the paint to dry!
Sent from my iPhone using Tapatalk


Thanks for the support Dirty, the parts that I have painted turned out great, tedious work from here on out and attention to detail.Excited to see how it comes out,Bret. Should look nice
Sent from my iPhone using Tapatalk
Well if I do I have plenty of time to fix my screw ups I hope!Just don't mess up now
Sent from my iPhone using Tapatalk

Well if I do I have plenty of time to fix my screw ups I hope!
Yup Poboy,that is true!That's what everybody thinks when they're born.....
Thanks man! and we all are waiting to see your kart completed.Really really nice stuff DD.
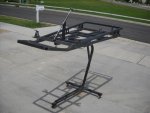
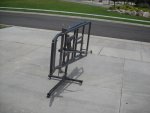
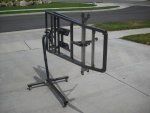
That stand is too slick.
Very anxious to see it all put back together after the paint.