TheInspiredFool
Member
- Messages
- 143
- Reaction score
- 10
Hey everyone! Welcome to my engine build thread. As the title implies my goals are to take a Predator 212 Hemi and try to improve the low and mid range power while not giving up very much (hopefully none) power in the higher rpms. The plan is to keep the stock cam, rod, piston, flywheel, valve springs... Basically all of the internals will be stock. Governor will be completely removed. Stock intake and exhaust will be removed and replaced with custom made scrap and carberator will be replaced with a el'cheapo 21mm Continuous Velocity unit. Various aspects of the engine will be reworked in order to try to achieve more low and mid range power and improve throttle responsiveness. This is an experiment to gain efficiency so I would not recommend doing so until it is proven to actually work. I have not seen anyone else try much of the things I am planning and there is probably a good reason for it. So just you understand, that was your warning! So don't blame me if you screw your stuff up.
The kart that we are going to use this on is a heavy old homebuilt unit. Since we have a small yard and the kart has to not only repeatedly take off from very slow speeds very often, but will have to do so with heavy adult riders as well children and teens. The maxium speed that our yard can hold is about 20mph taking into consideration some distance to slow down to turn. So even if we give up a tiny bit of power up top it won't really be noticeable 95% of the time since we probably won't see rpms above 4,500 too often. We could gear the kart to max out the rpms until the valves float just near the end of our longest stretch but it would be a very jerky kart that would likely not be able to get traction, would be very hard on the torque conver and be very difficult and pretty unsafe for younger riders. We will build it so that the clutch can engage properly with minimal wear, have smooth acceleration and wherever the top speed falls is where it falls. Probably about 28-32mph or a little more. As long as it pulls hard but smooth in our yard we don't really care about top speed.
A bit more about the engine. I am going to try to incorporate a few "speed secrets" to gain more power in the low and mid rpm range where this engine will be used the most. Some of these things might be beneficial and some or all may be detrimental to the overall efficiency and reliability of the engine. I am just experimenting with what I think will work... It may not. Time will tell. There are as many opinions of what is right or wrong as much as there are theories about what works and what doesn't. I am just going to test my own theories and see if I am right or wrong.
Some of the things I will be trying to successfully incorporating include:
-Proper velocity intake and exhaust ports for the stock engine combination
-Tuned intake runner to make better use of the higher velocity ports
-Tuned exhaust
-Possibly a plenum design
-Polished piston, combustion chamber, valve faces and exhaust port
-Anti-reversion ports
-Lapped valves to ensure proper valve sealing
-Some light mods for better cooling/oil penetration and oil return
-Might do some other polishing just because it's so satisfying to see shiny stuff! Lol
There are other things that I will probably do that I forgot to mention but that gives you an idea. Now the proper way of trying new things out and seeing if each one actually has a positive effect is to test the base model, record tge results and then change one thing, test, record and repeat the procedure. A dyno and flow bench with repeatable results would be a great way to fully examine each step of the process and help fine tune things as I go along but I don't have them so I'm just going to jump in, try my best and see what happens. Afterwards I will purchase another brand new 212 hemi, replace the intake and exhaust with the very popular off-the-shelf kit, remove the governor, and switch out both engines on the same kart with the same clutch and keep everything the same and see if there was any gains or losses in doing all that I did.
Stay tuned!
[/SIZE]
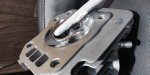
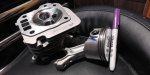
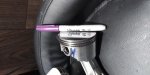
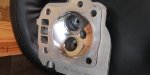
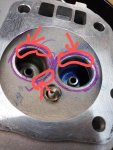
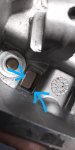
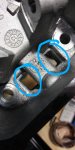
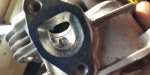
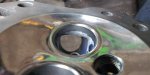
Here is some of the port work so far. It's not done but it gives you an idea of what I am doing at this stage. I have removed material from the short side radius bend and around the valve stem to increase laminar flow to the valve seat. The removal of the material increases the cross-sectional port area adding more total volume for air to flow through it. However, the larger volume of space for the air/fuel mixture to move through can be beneficial at allowing more total cubic feet of air per minute (CFM), it also lowers how fast the air/fuel mixture will sweep through (Velocity) given the same amount of low pressure/high pressure differential during all phases of the valve and piston events (movements).
The exact spot where I removed material from the short side radius and valve stem shouding was the smallest cross-sectional area in the port, effectively making it the "choke point". At that point when the air/fuel mixture went through it would speed up and increase velocity. The reduction of cross-sectional area causing the air to speed up is refered as the Bernoulli Effect if you want to look it up. Be cautious not to remove too much material if you try to do port work because it can lower the port velocity, which in turn can cause seperation of the fuel dropplets from the air (because fuel is heavier and harder to effectively move from one place to another suspended in an air current) and you will loose efficiency. The fuel must remain seperated in small dropplets with the correct amount of air in between the fuel dropplets so that when they reach the combustion chamber, become compressed and a spark is introduced, the dropplets of fuel can ignite very quickly. Since fuel is a liquid it has surface tension and the bigger the dropplet is the more surface tension it has and is slower to ignite and burn (That's just one reason, there are more but this is already too much too read for most people). If many little dropplets are allowed to bump into one another in the journey to the combustion chamber they will collect together into larger, harder to ignite dropplets and slower burning dropplets. So faster air currents are more effective at keeping fuel dropplets suspended in the air and seperated than slower currents are. Hence, keeping proper port velocity is important. There is more to it than that but it should be enough to get the point across as to one reason why lower velocity air flow usually leads to a less efficient fuel/air mixture. Also, a higher velocity current is much more efficient (faster and packs more air in per timescale) filling a space than a slower air current. More air, more fuel, more POWER! It is more pronounced at lower rpms but can affect efficiency at all rpms.
Ok, it was at this point in my imagination when I was contemplating doing some port work that I thought "Well if I do that then I am removing the "choke point" and I may end up severly reducing velocity. These ports look to big as they are, especially the valve bowl.. so if I do this I may want to add material to improve velocity." That's when I started searching around for what others have done to prevent too low of velocity. I couldn't find anyone who had tried to tighten the ports up to improve velocity. So I thought "Well, maybe I will try it and see if I can gain some performance in the low and middle rpm range where it seems like this engine is lacking power. Maybe thats the reason? Or I'm wrong and I screw it up."
So, second guessing myself, I got the engine event specs and sizing of the various parts to determine valve events, piston speed, port cross-sectional areas at various spots, CFM needed, etc, etc, etc math-formulas-theories, blah blah blah and it seemed like the numbers agreed with me. That's when I made my other post on here asking others for advice and answers. I think the consensus is that these little engines don't quite play with the same rules that other engines do... But then, maaaaaybe they do.
So here we are. I guess I'm going for it!
Port work progress
The kart that we are going to use this on is a heavy old homebuilt unit. Since we have a small yard and the kart has to not only repeatedly take off from very slow speeds very often, but will have to do so with heavy adult riders as well children and teens. The maxium speed that our yard can hold is about 20mph taking into consideration some distance to slow down to turn. So even if we give up a tiny bit of power up top it won't really be noticeable 95% of the time since we probably won't see rpms above 4,500 too often. We could gear the kart to max out the rpms until the valves float just near the end of our longest stretch but it would be a very jerky kart that would likely not be able to get traction, would be very hard on the torque conver and be very difficult and pretty unsafe for younger riders. We will build it so that the clutch can engage properly with minimal wear, have smooth acceleration and wherever the top speed falls is where it falls. Probably about 28-32mph or a little more. As long as it pulls hard but smooth in our yard we don't really care about top speed.
A bit more about the engine. I am going to try to incorporate a few "speed secrets" to gain more power in the low and mid rpm range where this engine will be used the most. Some of these things might be beneficial and some or all may be detrimental to the overall efficiency and reliability of the engine. I am just experimenting with what I think will work... It may not. Time will tell. There are as many opinions of what is right or wrong as much as there are theories about what works and what doesn't. I am just going to test my own theories and see if I am right or wrong.
Some of the things I will be trying to successfully incorporating include:
-Proper velocity intake and exhaust ports for the stock engine combination
-Tuned intake runner to make better use of the higher velocity ports
-Tuned exhaust
-Possibly a plenum design
-Polished piston, combustion chamber, valve faces and exhaust port
-Anti-reversion ports
-Lapped valves to ensure proper valve sealing
-Some light mods for better cooling/oil penetration and oil return
-Might do some other polishing just because it's so satisfying to see shiny stuff! Lol
There are other things that I will probably do that I forgot to mention but that gives you an idea. Now the proper way of trying new things out and seeing if each one actually has a positive effect is to test the base model, record tge results and then change one thing, test, record and repeat the procedure. A dyno and flow bench with repeatable results would be a great way to fully examine each step of the process and help fine tune things as I go along but I don't have them so I'm just going to jump in, try my best and see what happens. Afterwards I will purchase another brand new 212 hemi, replace the intake and exhaust with the very popular off-the-shelf kit, remove the governor, and switch out both engines on the same kart with the same clutch and keep everything the same and see if there was any gains or losses in doing all that I did.
Stay tuned!
[/SIZE]
Here is some of the port work so far. It's not done but it gives you an idea of what I am doing at this stage. I have removed material from the short side radius bend and around the valve stem to increase laminar flow to the valve seat. The removal of the material increases the cross-sectional port area adding more total volume for air to flow through it. However, the larger volume of space for the air/fuel mixture to move through can be beneficial at allowing more total cubic feet of air per minute (CFM), it also lowers how fast the air/fuel mixture will sweep through (Velocity) given the same amount of low pressure/high pressure differential during all phases of the valve and piston events (movements).
The exact spot where I removed material from the short side radius and valve stem shouding was the smallest cross-sectional area in the port, effectively making it the "choke point". At that point when the air/fuel mixture went through it would speed up and increase velocity. The reduction of cross-sectional area causing the air to speed up is refered as the Bernoulli Effect if you want to look it up. Be cautious not to remove too much material if you try to do port work because it can lower the port velocity, which in turn can cause seperation of the fuel dropplets from the air (because fuel is heavier and harder to effectively move from one place to another suspended in an air current) and you will loose efficiency. The fuel must remain seperated in small dropplets with the correct amount of air in between the fuel dropplets so that when they reach the combustion chamber, become compressed and a spark is introduced, the dropplets of fuel can ignite very quickly. Since fuel is a liquid it has surface tension and the bigger the dropplet is the more surface tension it has and is slower to ignite and burn (That's just one reason, there are more but this is already too much too read for most people). If many little dropplets are allowed to bump into one another in the journey to the combustion chamber they will collect together into larger, harder to ignite dropplets and slower burning dropplets. So faster air currents are more effective at keeping fuel dropplets suspended in the air and seperated than slower currents are. Hence, keeping proper port velocity is important. There is more to it than that but it should be enough to get the point across as to one reason why lower velocity air flow usually leads to a less efficient fuel/air mixture. Also, a higher velocity current is much more efficient (faster and packs more air in per timescale) filling a space than a slower air current. More air, more fuel, more POWER! It is more pronounced at lower rpms but can affect efficiency at all rpms.
Ok, it was at this point in my imagination when I was contemplating doing some port work that I thought "Well if I do that then I am removing the "choke point" and I may end up severly reducing velocity. These ports look to big as they are, especially the valve bowl.. so if I do this I may want to add material to improve velocity." That's when I started searching around for what others have done to prevent too low of velocity. I couldn't find anyone who had tried to tighten the ports up to improve velocity. So I thought "Well, maybe I will try it and see if I can gain some performance in the low and middle rpm range where it seems like this engine is lacking power. Maybe thats the reason? Or I'm wrong and I screw it up."
So, second guessing myself, I got the engine event specs and sizing of the various parts to determine valve events, piston speed, port cross-sectional areas at various spots, CFM needed, etc, etc, etc math-formulas-theories, blah blah blah and it seemed like the numbers agreed with me. That's when I made my other post on here asking others for advice and answers. I think the consensus is that these little engines don't quite play with the same rules that other engines do... But then, maaaaaybe they do.
So here we are. I guess I'm going for it!
Port work progress
Attachments
-
 20200626_021052_HDR.jpg163.9 KB · Views: 31
 -
 20200626_002213.jpg158.3 KB · Views: 30
 -
 20200626_002201.jpg120.5 KB · Views: 25
Last edited by a moderator: