You are using an out of date browser. It may not display this or other websites correctly.
You should upgrade or use an alternative browser.
You should upgrade or use an alternative browser.
Spider carts Grand Daddy build
- Thread starter LightningTeg
- Start date
- Status
- Not open for further replies.
LightningTeg
Member
- Messages
- 105
- Reaction score
- 14
Ya, nice buggy...But dang, your shop!! Call me jelly. But it looks good, nice job.
Hah thanks. I had to live without one for a few years before this was built working in my gravel driveway and tools in the spare bedroom

LightningTeg
Member
- Messages
- 105
- Reaction score
- 14
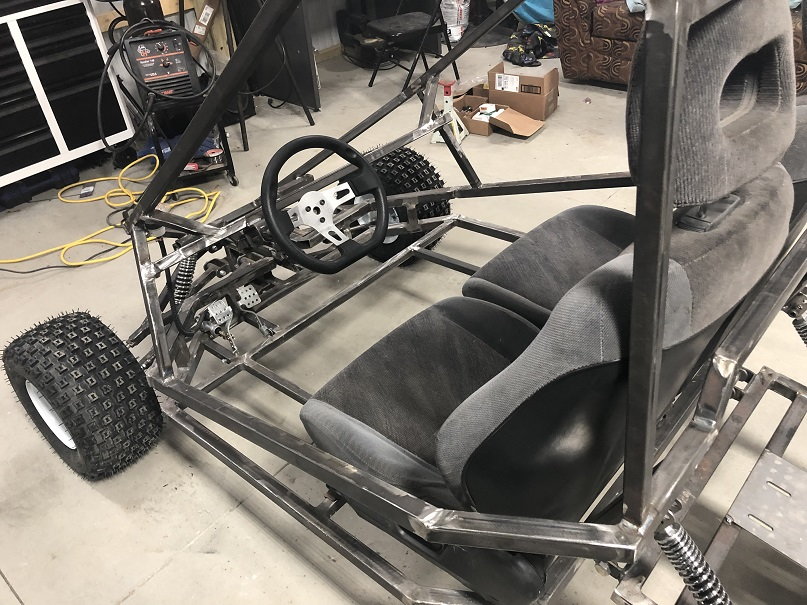
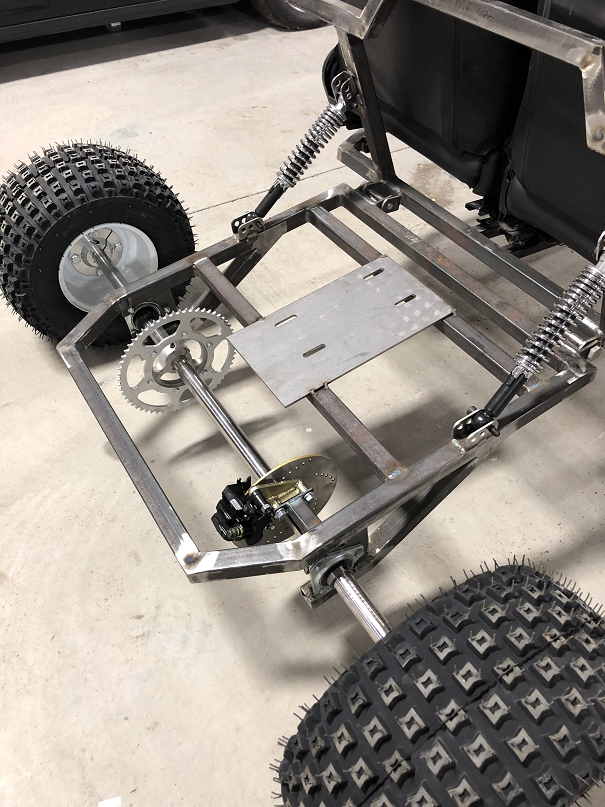
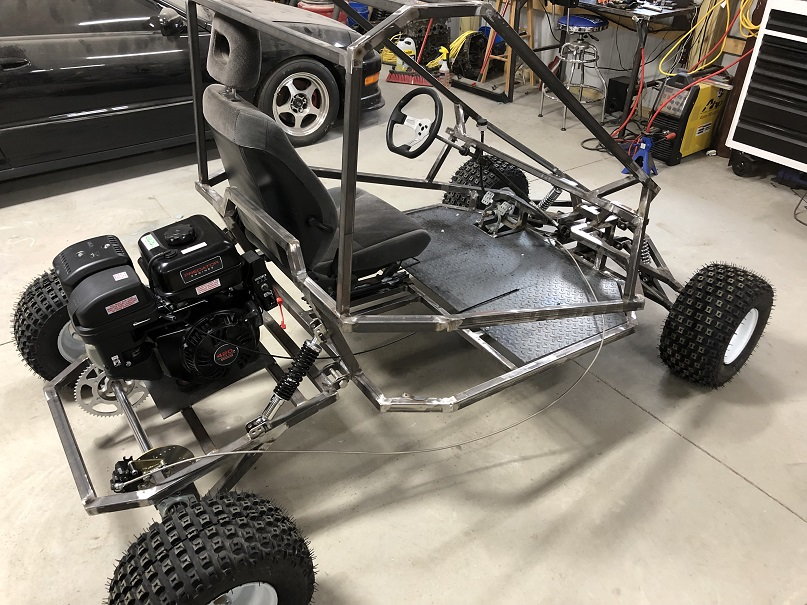
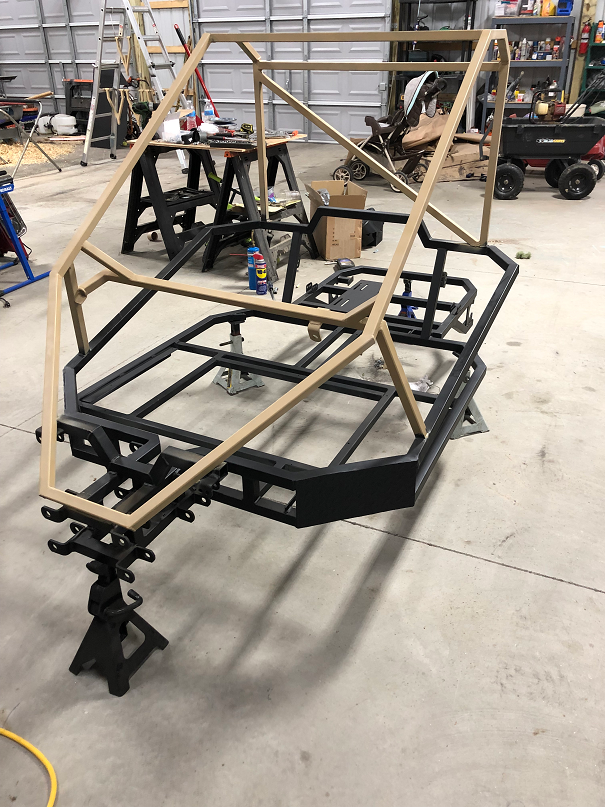
Got a lot done this weekend. Basically just the floor left and I can start painting.
Tied in the dash and put some more braces in.
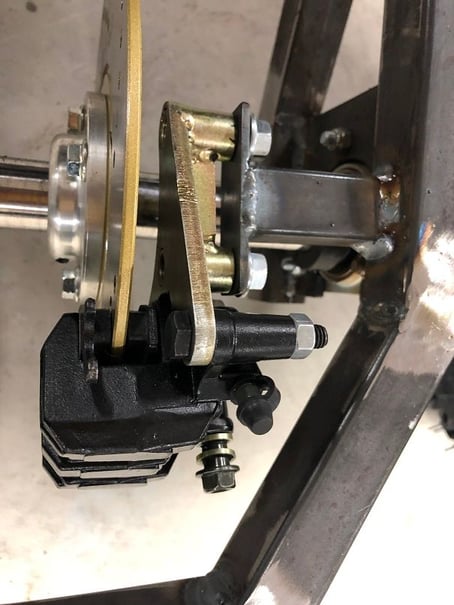
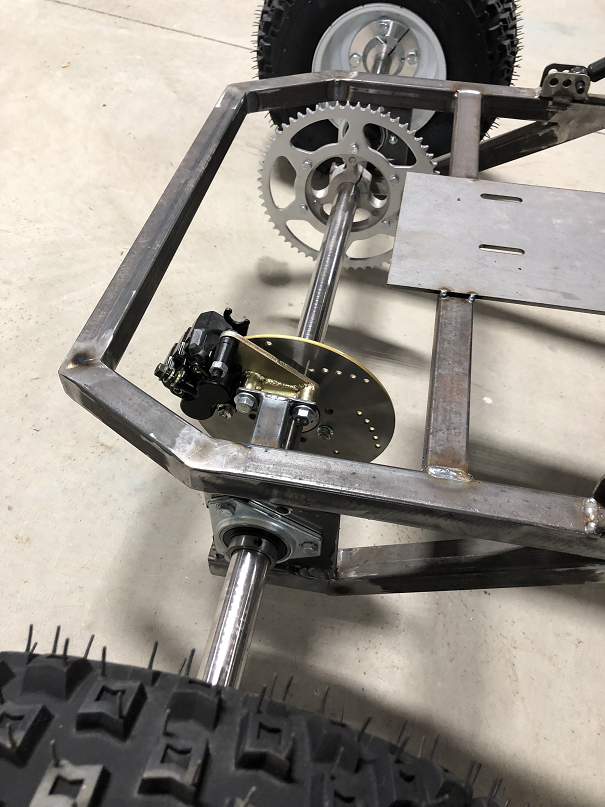
Make bracket for caliper
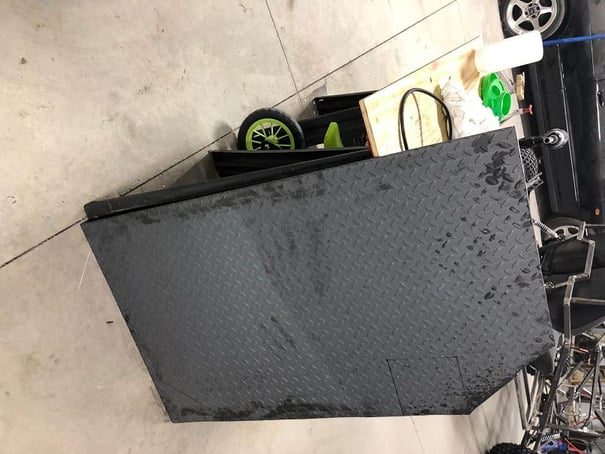
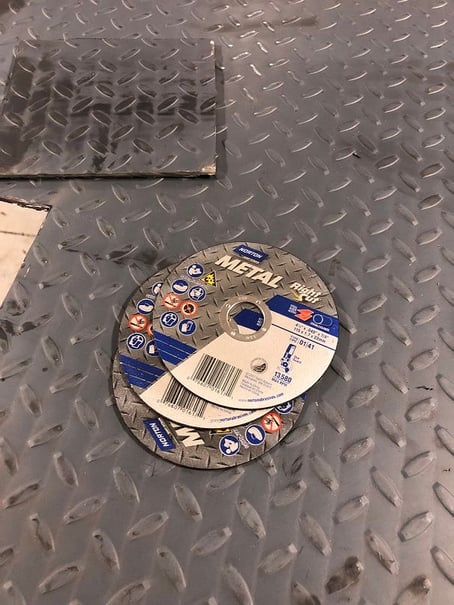
Starting cutting up floor and broke all my cutoff wheels in the process. (12ga diamond plate)
I moved the shock brackets lower for the rear suspension but they are still too soft. Going to need to get some beefier shocks.
Tied in the dash and put some more braces in.
Make bracket for caliper
Starting cutting up floor and broke all my cutoff wheels in the process. (12ga diamond plate)
I moved the shock brackets lower for the rear suspension but they are still too soft. Going to need to get some beefier shocks.
andrecht
Jup, picture = me
Consider to do the floor land in Aluminium, it will weigh a quarter of the amount.....
LightningTeg
Member
- Messages
- 105
- Reaction score
- 14
Consider to do the floor land in Aluminium, it will weigh a quarter of the amount.....
Too late lol. Its only about 25lbs. I also didnt want that shiny metal look that I would have to paint...
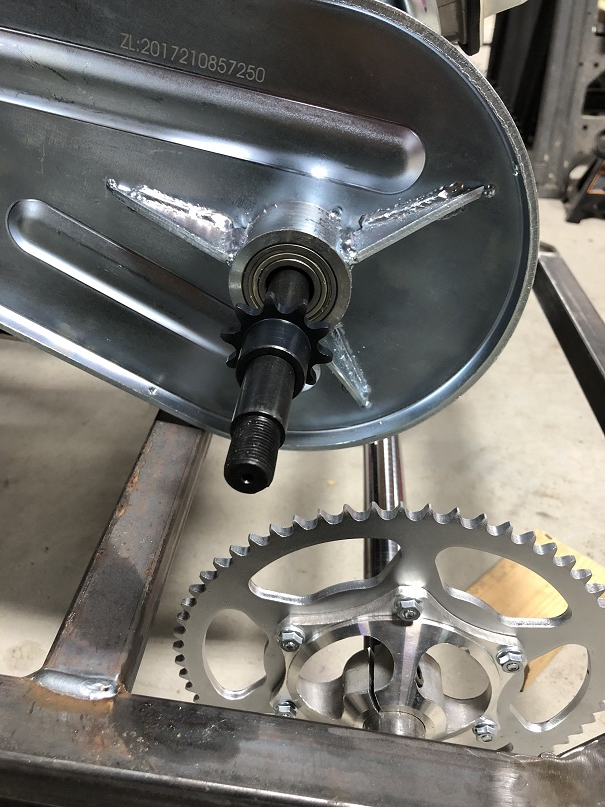
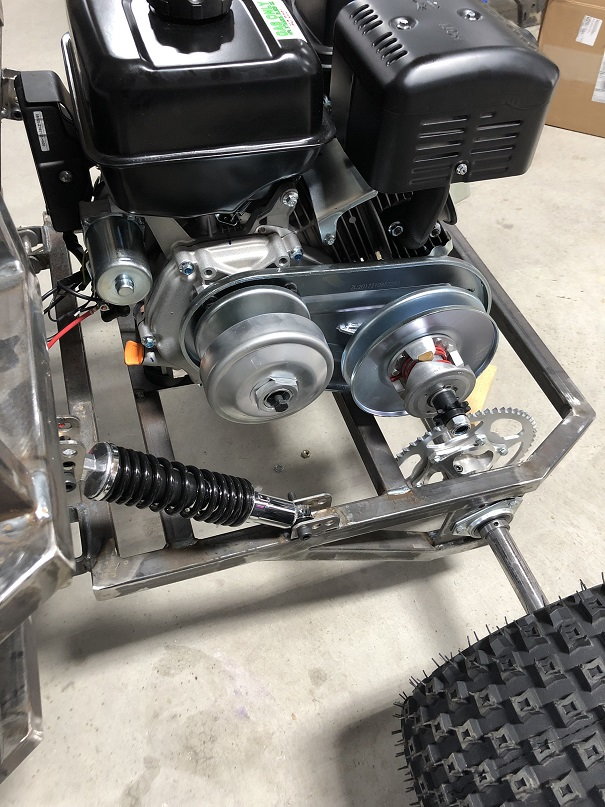
Engine stuff.
Gonna have to move it over a little bit to get the driven sprocket lined up, have to jack it up about an inch to get the TC plate to not interfere with the frame and I'll probably have to move that rear bar forward or notch it to clear the chain. Thoughts?.
I've got the motor sitting on rubber isolators to help with vibration to the cab (not because I have to but I thought it would be a nice touch). Definitely makes it feel more refined and less vibration in the steering.
LightningTeg
Member
- Messages
- 105
- Reaction score
- 14
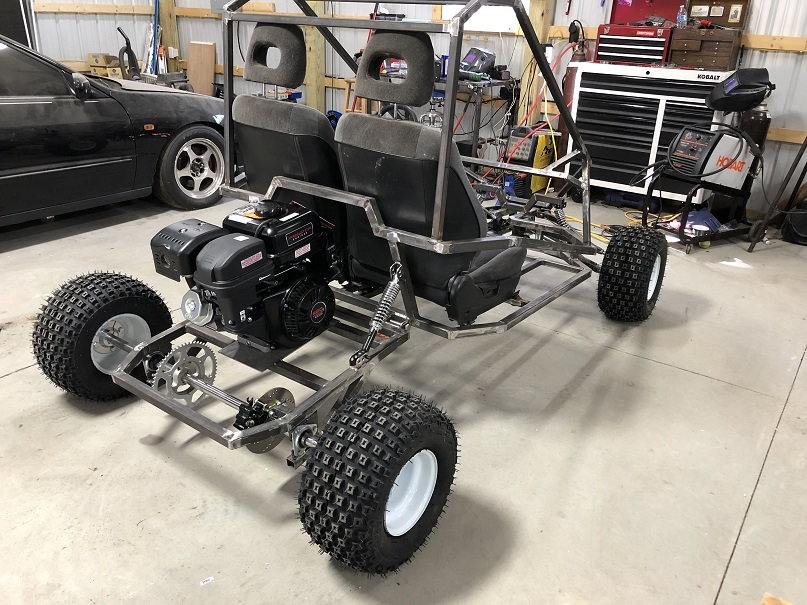
Got the floor done. Really happy with these cut off wheels I got from Menards. Did all the cutting with one of them and it got caught a couple times and jerk the grinder real hard and it didn't crack or anything
Going to replace those hex bolts with countersunk screws and add some angle to the inside and a brace across the middle close to the seats. I cut it short there because I didn't want to make all the notches for the seat brackets / tool clearance
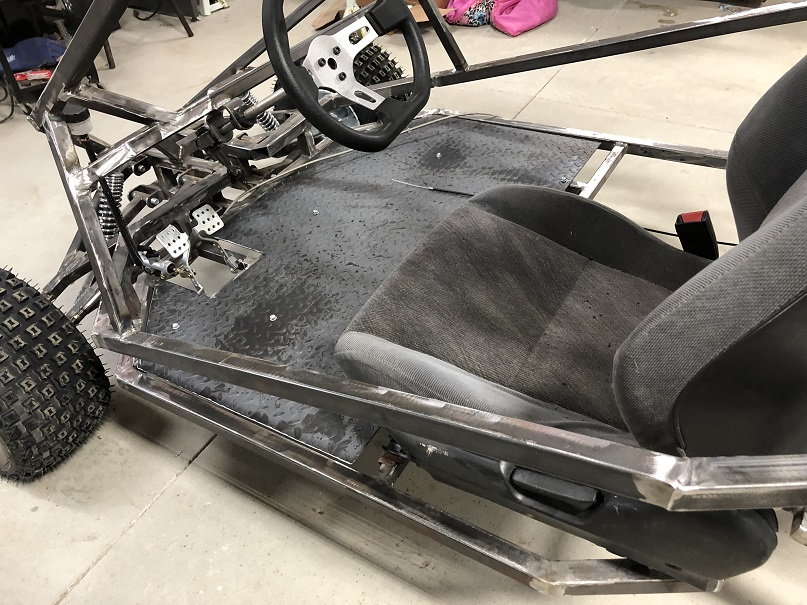
Going to replace those hex bolts with countersunk screws and add some angle to the inside and a brace across the middle close to the seats. I cut it short there because I didn't want to make all the notches for the seat brackets / tool clearance
Sexy!!
karte_m0lim
Birds Aren't Real
Denny
Canned Monster
Rubber mounting the engine never works out because you can't keep the proper tension on the chain. Looks good other wise. 
Denny
Denny
LightningTeg
Member
- Messages
- 105
- Reaction score
- 14
Rubber mounting the engine never works out because you can't keep the proper tension on the chain. Looks good other wise.
Denny
Yeah I abandoned the idea. Too much work lol.
Busted *** this weekend and mother in law is staying so should have the free time to finish! Should be driving it today.

LightningTeg
Member
- Messages
- 105
- Reaction score
- 14
Been working through some troubleshooting and finishing up. Ran it for about 30 minutes yesterday hauling the wife and kid around. Got lazy with the ignition and just moved the one bolted to the motor for now lol
Really happy with it though. The engine has gobs of torque, didn't even feel much of a difference between just myself and then my wife and kid riding. It just wants to pull stuff!


---------- Post added at 07:26 AM ---------- Previous post was at 07:24 AM ----------
Also,
I cant get the motor started even after its been warm, without using the choke. Any thoughts? Is there a low mixture adjustment somewhere?
Really happy with it though. The engine has gobs of torque, didn't even feel much of a difference between just myself and then my wife and kid riding. It just wants to pull stuff!
---------- Post added at 07:26 AM ---------- Previous post was at 07:24 AM ----------
Also,
I cant get the motor started even after its been warm, without using the choke. Any thoughts? Is there a low mixture adjustment somewhere?
LightningTeg
Member
- Messages
- 105
- Reaction score
- 14
Got to really get on it yesterday and I’m pretty happy how it turned out ��. Some minor issues up at front suspension otherwise great! Engine has gobs of torque and gets it sideways when you want to ����
https://youtu.be/uO9LtIXhG8w
https://youtu.be/uO9LtIXhG8w
karte_m0lim
Birds Aren't Real
LightningTeg
Member
- Messages
- 105
- Reaction score
- 14
oo having to redo the entire steering section after I bent the tie rod end. I knew it was going to happen but thought it might last a little longer lol
The rack for whatever dumb reason has 5/16 threads which are way tiny for the application. So redrilling to 1/2-20 and beefing up all of it big time.
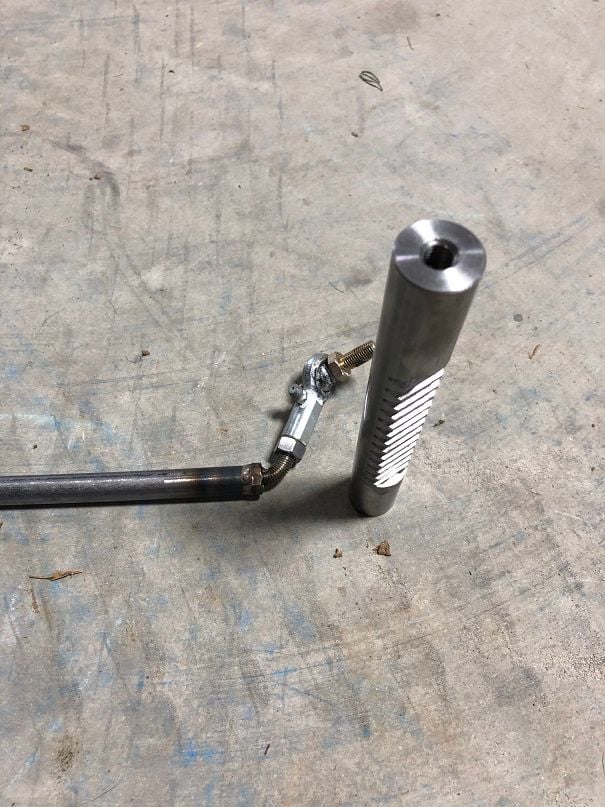
The rack for whatever dumb reason has 5/16 threads which are way tiny for the application. So redrilling to 1/2-20 and beefing up all of it big time.
B.M.800
TheBeal.
1/4 20 still seems a bit small?
Buggy looks like a blast.
Buggy looks like a blast.
LightningTeg
Member
- Messages
- 105
- Reaction score
- 14
1/4 20 still seems a bit small?
Buggy looks like a blast.
1/2-20*
Its substantial now lol
Budget GoKart
Aka a kenbar
Dude if i had a shop like yours i would never have money, but i would have karts and mini bikes.
LightningTeg
Member
- Messages
- 105
- Reaction score
- 14
Dude if i had a shop like yours i would never have money, but i would have karts and mini bikes.
I dont have money either anymore
JTSpeedDemon
2019 Build Off Winner!
Yay! Welcome to the Poor Kart Club!
LightningTeg
Member
- Messages
- 105
- Reaction score
- 14
Much better

I plan on only using that inner position where the nut was welded so ignore the total lack of material left at the end of the spindle arm. It got a little bendy
Also learned throuhg this process having once side RH thread and the other LH makes adjustments ALOT easier lol
I plan on only using that inner position where the nut was welded so ignore the total lack of material left at the end of the spindle arm. It got a little bendy
Also learned throuhg this process having once side RH thread and the other LH makes adjustments ALOT easier lol
- Status
- Not open for further replies.