Hemi Predator Build #2

Status
Not open for further replies.

bob58o

SuckSqueezeBangBlow
Messages
9,646
Reaction score
1,851
Location
Chicago-town USA
ARC said the +0.040 Rod with 0.015" piston pop out and the 0.045" stock gasket should be fine as long as I keep 0.030" Piston to Head clearance and 0.050" Piston to Valve Clearance.

They said they prefer the piston in the hole, as opposed to poppped out, for better flow, but I don't see the difference. The air should see it the same either way, or no? To me it seems as if it would flow the same.


909 minibikes said I'd have to raise the engine 1.25" to fit the torque converter. No news there. Pretty common with minibikes and TCs. So no stock gas tank at least not in the stock location.

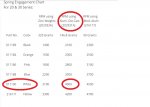
Think I decided the 285-0211 with 26 lb springs and stock valves, rockers, pushrods,....
That cam will still require me to get different weights and garter springs for the TC driver.
NR said it will pull from 4k-7.5k rpm (7000 with 26lb springs). I want like a 4000 engagement correct???
 

Attachments

  • 30 series weights and springs.jpg
    30 series weights and springs.jpg
    64.2 KB · Views: 8
bob58o

SuckSqueezeBangBlow
Messages
9,646
Reaction score
1,851
Location
Chicago-town USA
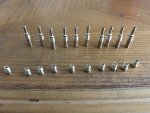
Should of bought the jets last, but I got them first to ensure I loose them before I need to use them.
 

Attachments

  • IMG_0755.jpg
    IMG_0755.jpg
    269.7 KB · Views: 5

bob58o

SuckSqueezeBangBlow
Messages
9,646
Reaction score
1,851
Location
Chicago-town USA
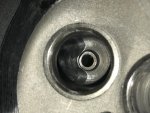
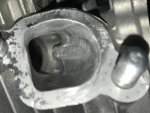
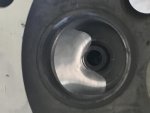
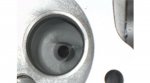
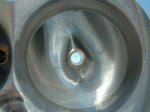
I woke up at 5:30 so I started porting the head. I still don't really know what I'm doing. Lol
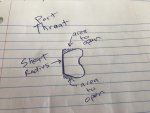
My goals are to open the throat a bit, remove most of the "extra" material around the valve guides (without thinning the guides themselves too much - I always seem to hit the guides), and take any edges off of the short radius.

Cam likes big carbs and big ports. Hopefully these ports will end up big enough.

I don't want to pay for a valve job, so I used duct tape to protect the valve seats. As many layers as I could pile on. If nothing else, it reminded me to stay away from the seats.
 

Attachments

  • IMG_0756.jpg
    IMG_0756.jpg
    300.1 KB · Views: 6
  • IMG_0758.jpg
    IMG_0758.jpg
    170.6 KB · Views: 9
  • image.jpg
    image.jpg
    222.2 KB · Views: 6

bob58o

SuckSqueezeBangBlow
Messages
9,646
Reaction score
1,851
Location
Chicago-town USA
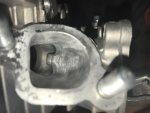
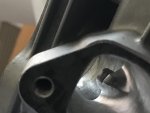
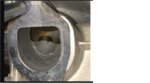
This is what I mean by hitting and thinning out the guides.
 

Attachments

  • IMG_0757.jpg
    IMG_0757.jpg
    132.5 KB · Views: 12

bob58o

SuckSqueezeBangBlow
Messages
9,646
Reaction score
1,851
Location
Chicago-town USA
NR Parts On the Way

Parts ordered. I hope I didn't forget any thing, besides the minibike. Exhaust will be later. This should be most of what I need save a few small items.

WARNING: You should probably upgrade to a billet flywheel when turning 7k+ RPM. I'm stupid, and cheap, and like to live dangerously. The valve springs should limit me to around 7,000 -7,200 RPM I'm gearing for 7k RPM to be 60 mph.
Should probably upgrade the valve train too, but for the same reasons, I did not.
 

Attachments

  • NR Racing Parts.jpg
    NR Racing Parts.jpg
    170.1 KB · Views: 12

bob58o

SuckSqueezeBangBlow
Messages
9,646
Reaction score
1,851
Location
Chicago-town USA
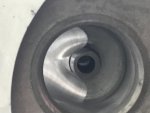
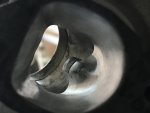
More port work. Here's the exhaust side. Getting closer.
 

Attachments

  • IMG_0761.jpg
    IMG_0761.jpg
    374.5 KB · Views: 4
  • IMG_0763.jpg
    IMG_0763.jpg
    152.9 KB · Views: 9
  • IMG_0768.jpg
    IMG_0768.jpg
    267.5 KB · Views: 8

bob58o

SuckSqueezeBangBlow
Messages
9,646
Reaction score
1,851
Location
Chicago-town USA
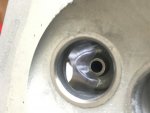
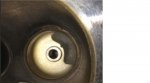
Intake side. More carnage to the valve guide.
 

Attachments

  • IMG_0773.jpg
    IMG_0773.jpg
    145.8 KB · Views: 4
  • IMG_0774.jpg
    IMG_0774.jpg
    165.4 KB · Views: 5
  • IMG_0771.jpg
    IMG_0771.jpg
    173.2 KB · Views: 5
  • IMG_0770.jpg
    IMG_0770.jpg
    153.8 KB · Views: 6

bob58o

SuckSqueezeBangBlow
Messages
9,646
Reaction score
1,851
Location
Chicago-town USA
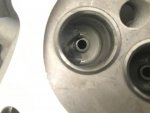
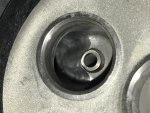
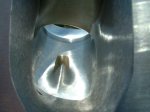
stock ports, from my old hemi head.
 

Attachments

  • stock intake.jpg
    stock intake.jpg
    93.2 KB · Views: 5
  • stock intake2.jpg
    stock intake2.jpg
    91.9 KB · Views: 5

bob58o

SuckSqueezeBangBlow
Messages
9,646
Reaction score
1,851
Location
Chicago-town USA
Just so I don't make a dumb mistake....

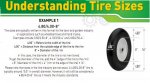
"410 x 350 x 6" rear tire and wheel"

This tire is 4.1" wide, 3.5" from outside of rim to outside of tire on a 6" rim, right?
So it should be roughly 6+3.5+3.5=13" tall, right? Maybe 12.5" in real life?
 

Attachments

  • tire size.jpg
    tire size.jpg
    200.4 KB · Views: 3

karl

Well-known member
Messages
2,447
Reaction score
715
Location
North east Ohio
Just so I don't make a dumb mistake....

"410 x 350 x 6" rear tire and wheel"

This tire is 4.1" wide, 3.5" from outside of rim to outside of tire on a 6" rim, right?
So it should be roughly 6+3.5+3.5=13" tall, right? Maybe 12.5" in real life?

Yes they are a bit under 13in.

The 2 tires on the right are 410x350x6,
Left 2 are 13x5x6
On the bike are 15x6x6,
All can fit on the same rim.
 

mckutzy

Well-known member
Messages
8,353
Reaction score
108
Location
bc, canada
I'm not familiar with this process at all... But couldn't you get replacement guides... The use the ones installed as a sacrificial part for the port....then replace with the new ones...
 

bob58o

SuckSqueezeBangBlow
Messages
9,646
Reaction score
1,851
Location
Chicago-town USA
I'm not familiar with this process at all... But couldn't you get replacement guides... The use the ones installed as a sacrificial part for the port....then replace with the new ones...

I'm not sure I have the tools / capability to remove or reinstall valve guides. I'm not really sure how it's done. A press?
 

Whitetrashrocker

Inmate #952016
Messages
4,873
Reaction score
4,126
Location
Southern New Mexico
Press out guides with a stepped pin. Usually just made to fit on the lathe. Nothing hi tech.

And as far as the p&p, what are you using?
Burr grinders and stones for rough work then finer cutting tools. Then polishing tips. Electric Dremel or rotary air tools.
Take some practice and finesse, but pretty straight forward.
Don't worry too much about the guides. You can trim them down flush with the port curve.
 

bob58o

SuckSqueezeBangBlow
Messages
9,646
Reaction score
1,851
Location
Chicago-town USA
Press out guides with a stepped pin. Usually just made to fit on the lathe. Nothing hi tech.

And as far as the p&p, what are you using?
Burr grinders and stones for rough work then finer cutting tools. Then polishing tips. Electric Dremel or rotary air tools.
Take some practice and finesse, but pretty straight forward.
Don't worry too much about the guides. You can trim them down flush with the port curve.

I use tapered and cylindrical abrasive rolls with 4" or 6" mandrels with my die grinder. I have a micro die grinder too for 1/8" shanks. I have carbide burrs but haven't used them yet.

How do I trim them down? grind them down with the die grinder? from the port side?, or from the combustion chamber side? Im not sure how flat and flush I'd be able to get it.
 

Whitetrashrocker

Inmate #952016
Messages
4,873
Reaction score
4,126
Location
Southern New Mexico
How ever you can get there is the right way. The long shank bits really help. Or a mandrel extension.

The idea is to have a smooth port. Any steps and sharp edges effect the flow.
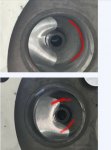
I'm not saying grind the whole guide supports out just make a nice transision from valve stem to port wall.

I snagged these pics of the web for a visual. You don't have to get that agressive.

Watch those carbide bits, they work great!
 

Attachments

  • IMG_20170705_000422.jpg
    IMG_20170705_000422.jpg
    236.2 KB · Views: 4
  • IMG_20170705_000439.jpg
    IMG_20170705_000439.jpg
    184.8 KB · Views: 3

Whitetrashrocker

Inmate #952016
Messages
4,873
Reaction score
4,126
Location
Southern New Mexico
Get the lip on the edge I marked and the rest of the floor there can be worked on some more.

It took me probably 6-8hours to do both ports on my head.
Gotta use your finger with some sandpaper sometimes.
 

Attachments

  • IMG_20170705_001707.jpg
    IMG_20170705_001707.jpg
    183.6 KB · Views: 4

bob58o

SuckSqueezeBangBlow
Messages
9,646
Reaction score
1,851
Location
Chicago-town USA
I was watching some crazy long videos by Jody at ARC. They are long but full of good info.
Want to know something about which springs to use....
https://www.youtube.com/watch?v=-jWR2078D5I

A very interesting piece of info I stumbled across about an hr (50min) into this video is about the ignition timing..
https://www.youtube.com/watch?v=C1kQM1tzjnM


He says for modified engines (7000 RPM+) on gas that 32* BTDC is the most advance he likes to run. Mostly 30*-32*.
For engines turning 7000 RPM or less on gas that 32*BTDC is the least advance he likes to run. Mostly 32* - 38* BTDC.
He claims this is why 32*BTDC is the timing with their flywheels. It is the bottom of the 7000 or below engines ignition timing range and the top of the 7000+ engines ignition timing range. It is a happy medium.

It seems a little backwards to me, but he said that that when turning 7000+ RPM the engine might start to lean out and that too much timing cause power loss and causes the engine to run hot. Under 7000 RPM and you can run more timing. He said his Dyno confirms that this is correct.
Hmmmmm...

Also talks about matching valve size with carb size. No need to run a huge carb with 25/24 mm valves. No reason to get 32mm valve with the stock carb. He prefers the carb a few mm smaller than the intake valve, so if you have 25mm intake valve, then nothing bigger than a 24mm carb.
If you have a 27mm intake valve, then nothing bigger than a 26mm carb.
 
Status
Not open for further replies.
Top