Hemi Predator Build #2

Status
Not open for further replies.

Whitetrashrocker

Inmate #952016
Messages
4,871
Reaction score
4,122
Location
Southern New Mexico
Correct on the valve carb sizing. Just slightly smaller carb to help the air rush through it. Better Venturi.

But we built a short rod stroker and had to put 2 bored 850s on it. That 550ci really wanted the air! After it blew it went down a little but long rods and had to go back to just one carb and it still was a little much. It didn't flow the same. It's neat how little changes make a big difference.
 

KartFab

Active member
Messages
3,381
Reaction score
57
Location
Dallas, TX
I had a few people confirm to me that as a rule of thumb that the carb venturi should be 2 mm smaller than the intake valve diameter, so that is right in line with that.

I wonder what effect that far of advance has on lower/engagement rpms. I was under the impression that the further you advance the timing, the higher in the rpm range the power curve shifts (in conjunction with the cam obviously). Id rather keep timing within the range that the cam card specifies.

Also, a lot of the performance parts and modifications Jody references are applicable for racing, where an engine may live in the 5-7k rpm range, and anything under 4k rpms is irrelevant.

For a yard kart or mini bike, 2200-3600 rpms is usually where you spend most of your time, with short bursts of speed to whatever max rpm youve got, so that is something to keep in mind with timing. Esp if you advance timing too much, you may not even be able to idle at low rpms..... or so i thought.
 

bob58o

SuckSqueezeBangBlow
Messages
9,646
Reaction score
1,851
Location
Chicago-town USA
Right, I thought the same on the timing. I'm assuming when he says 34-36 for gas engines Turing less than 7k, he means turning 6k -7k constantly the entire race. I just found it interesting, cause it was contradicting what I had previously believed.
 

bob58o

SuckSqueezeBangBlow
Messages
9,646
Reaction score
1,851
Location
Chicago-town USA
Getting rid of the lip.
Looking better. Hopefully I don't destroy this head trying to save a few dollars by making the pony powers myself.

But this is the fun part for me.:wai:
 

Attachments

  • IMG_0816.jpg
    IMG_0816.jpg
    200.4 KB · Views: 3

bob58o

SuckSqueezeBangBlow
Messages
9,646
Reaction score
1,851
Location
Chicago-town USA
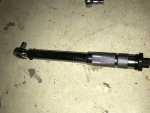
NR shipment on its way. Going to have to find the 1/4" drive ft-lb torque wrench. I'll use plastiguage to install the rod, but not really sure I'm comfortable surfacing the journal by hand if the oil gap is too tight. And what if it's too big? Send the rod back?
 

bob58o

SuckSqueezeBangBlow
Messages
9,646
Reaction score
1,851
Location
Chicago-town USA
looks like I'll be paying for a valve job after all.

Really want this Neway Valve Seat Cutter...

CU103 - Cutter Body 1.125" (28.575mm)
Dual Cutting Angles
31* for 25mm - 30.5mm valves
46* for 25mm - 32.0mm valves

$123
http://www.ebay.com/itm/Neway-Small...03-/192150973031?_trksid=p2349526.m2548.l4275

60* for 22- 32.5mm valves
http://www.ebay.com/itm/Neway-Small...ash=item2cbd1b74f0:g:hpkAAOSwhQhY54SY&vxp=mtr

$12 for the 5.52mm Pilot (100 or 120 series to fit the cutter top size 0.297)
$17 for the 3/8" T Handle

$150ish gets you 30 / 45 two angle valve jobs on hemi and 3rd gen non hemi heads with the 27/25mm valves.

A bit over two hundo gets you all three angles.
 

Attachments

  • seat cutter 103.jpg
    seat cutter 103.jpg
    168.8 KB · Views: 2

tinamcjittles

ello m8
Messages
391
Reaction score
0
Location
Allovau
looks like I'll be paying for a valve job after all.

Really want this Neway Valve Seat Cutter...

CU103 - Cutter Body 1.125" (28.575mm)
Dual Cutting Angles
31* for 25mm - 30.5mm valves
46* for 25mm - 32.0mm valves

$123
http://www.ebay.com/itm/Neway-Small...03-/192150973031?_trksid=p2349526.m2548.l4275

60* for 22- 32.5mm valves
http://www.ebay.com/itm/Neway-Small...ash=item2cbd1b74f0:g:hpkAAOSwhQhY54SY&vxp=mtr

$12 for the 5.52mm Pilot (100 or 120 series to fit the cutter top size 0.297)
$17 for the 3/8" T Handle

$150ish gets you 30 / 45 two angle valve jobs on hemi and 3rd gen non hemi heads with the 27/25mm valves.

A bit over two hundo gets you all three angles.

Do you have a lathe to make your own tool for it? If you could make your own insert tooling for the drill press that could work pretty well!
 

bob58o

SuckSqueezeBangBlow
Messages
9,646
Reaction score
1,851
Location
Chicago-town USA
Do you have a lathe to make your own tool for it? If you could make your own insert tooling for the drill press that could work pretty well!

Nope no lathe, I got a cheap drill press from HF and that's about my biggest piece of shop equipment. LOL

It is sold with a T Handle or one of these speed handle ez turn wrench things. I liked it cause I could do it by hand.
 

Attachments

  • speed handle.jpg
    speed handle.jpg
    117.3 KB · Views: 2

bob58o

SuckSqueezeBangBlow
Messages
9,646
Reaction score
1,851
Location
Chicago-town USA
Sitting at home waiting for the mailman. Waiting for my buzzer to ring. Will it ring? I called to ask if the guy was going to buzz me or just leave a note. He better buzz. Ugghhh. I hate waiting here.
 

bob58o

SuckSqueezeBangBlow
Messages
9,646
Reaction score
1,851
Location
Chicago-town USA
So I check my tracking and it says it was delivered 2 hrs ago. I check and there it is. My box with $250 worth of junk in it sitting on the ground. No buzz. I've been here for 2 hours for nothing.
 

bob58o

SuckSqueezeBangBlow
Messages
9,646
Reaction score
1,851
Location
Chicago-town USA
Thank you Russel for shipping me my stuff fast as heck for cheap as can be. I think I ordered Monday it it's here for now for less than $4 shipping.

Faster than the return phone calls but :thumbsup:
 

Attachments

  • IMG_0817.jpg
    IMG_0817.jpg
    424.7 KB · Views: 4

bob58o

SuckSqueezeBangBlow
Messages
9,646
Reaction score
1,851
Location
Chicago-town USA
285-0211

No Cam Card???
Stock vs .285" 250* duration
 

Attachments

  • IMG_0825.jpg
    IMG_0825.jpg
    99.7 KB · Views: 4
  • IMG_0824.jpg
    IMG_0824.jpg
    73 KB · Views: 4
  • IMG_0823.jpg
    IMG_0823.jpg
    63.4 KB · Views: 6

bob58o

SuckSqueezeBangBlow
Messages
9,646
Reaction score
1,851
Location
Chicago-town USA
Intake lobe barely clears the bottom of the cylinder. How much clearance does it need?

Hard to get a good pic. If you know what your looking at, you might be able to see the intake lobe as it is passing the bottom of the cylinder.
 

Attachments

  • IMG_0832.jpg
    IMG_0832.jpg
    49.3 KB · Views: 9

tinamcjittles

ello m8
Messages
391
Reaction score
0
Location
Allovau
Idk, that seems too close.. Could you get a tiny file in there and take some of the cylinder down? Shouldn't do any damage to remove material there right?
 

Whitetrashrocker

Inmate #952016
Messages
4,871
Reaction score
4,122
Location
Southern New Mexico
Is the piston and crank installed? Gotta put the engine together and tear it apart a few times for things like this.

I'm gonna say you would be safe to clearance that out. Even if the skirt came down that far, you would be fine.
 

bob58o

SuckSqueezeBangBlow
Messages
9,646
Reaction score
1,851
Location
Chicago-town USA
Crank yes. Piston no. Actually the cam wasn't all the way in. More clearance when it is all the way in. Lol. But not too much more.

---------- Post added at 07:12 PM ---------- Previous post was at 06:33 PM ----------

So time to start to reassemble.

Connecting rod first.
Watch this video...
https://www.youtube.com/watch?v=owahpOeLYaw

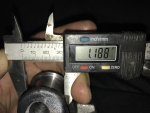
Measuring the rod journal on the crankshaft with the digital HF calipers gives ~1.188"

Reading the ARC instructions afterwards... It says it should be 1.188":thumbsup:
 

Attachments

  • IMG_0833.jpg
    IMG_0833.jpg
    272.4 KB · Views: 2

bob58o

SuckSqueezeBangBlow
Messages
9,646
Reaction score
1,851
Location
Chicago-town USA
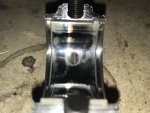
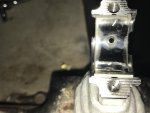
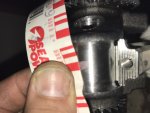
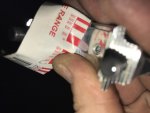
0.002" Oil Clearence measured by plastiguage.
Shooting for 0.0025" to 0.0030", but no less than 0.002" and no greater than 0.004"
 

Attachments

  • IMG_0851.jpg
    IMG_0851.jpg
    249.8 KB · Views: 0
  • IMG_0850.jpg
    IMG_0850.jpg
    271.8 KB · Views: 0
  • IMG_0848.jpg
    IMG_0848.jpg
    196.2 KB · Views: 0
  • IMG_0846.jpg
    IMG_0846.jpg
    159.1 KB · Views: 1
  • IMG_0837.jpg
    IMG_0837.jpg
    255.9 KB · Views: 0
  • IMG_0852.jpg
    IMG_0852.jpg
    249.7 KB · Views: 0
  • IMG_0853.jpg
    IMG_0853.jpg
    200.6 KB · Views: 0
  • IMG_0854.jpg
    IMG_0854.jpg
    325.3 KB · Views: 0
  • IMG_0855.jpg
    IMG_0855.jpg
    223.4 KB · Views: 2
  • IMG_0858.jpg
    IMG_0858.jpg
    150.1 KB · Views: 1

bob58o

SuckSqueezeBangBlow
Messages
9,646
Reaction score
1,851
Location
Chicago-town USA
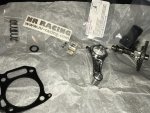
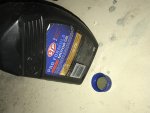
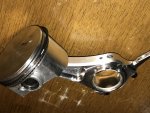
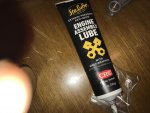
Piston on Connecting Rod. Wrist pin and ring clips installed. Arrow on piston points towards push rods. Holes on con rod are on the arrow side.
Used this assembly lube.
 

Attachments

  • IMG_0859.jpg
    IMG_0859.jpg
    410.6 KB · Views: 0
  • image.jpg
    image.jpg
    308.9 KB · Views: 0

bob58o

SuckSqueezeBangBlow
Messages
9,646
Reaction score
1,851
Location
Chicago-town USA
0.030" tween the cam lobe and the cylinder is the minimum clearance according to AKG.

"You can use a feeler gauge between the block and cam lobe to make sure you have at least .030" of clearance. It's difficult to see in this picture, but we added a little extra clearance so we can install a bigger cam in the future."

http://www.affordablegokarts.com/Cam Installation.php

---------- Post added at 09:07 PM ---------- Previous post was at 09:04 PM ----------

Installing Piston Rings and Piston.

Watch this video by KartFab.
https://www.youtube.com/watch?v=vpZcbFXUIQ0
 
Status
Not open for further replies.
Top