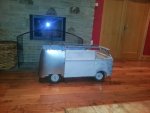
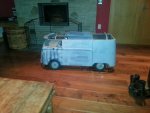
VW panel van replica kart build

Status
Not open for further replies.

Doc Sprocket

*********
Messages
15,677
Reaction score
151
Location
Ontario, Canada
Sheet metal is not as difficult to work with as you seem to think; with the correct hand tools (no machines) & a bit of knowledge, you can turn a flat piece of steel into a bowl...

Says the professional panel-beater...

I'm with sid. If we were closer, we could get together and hammer perfectly good sheetmetal into total uselessness... :lolgoku:
 

machinist@large

Active member
Messages
2,865
Reaction score
32
Location
West Michigan, 49331
agreed..

making a bowl out of a flat sheet..

Tony, you're talking about that leather-bag-mallet-thing, right?

I think I could make a perfectly useless chunk of scrap metal with those tools and a sheet of steel, not much more ;)

'sid

Says the professional panel-beater...

I'm with sid. If we were closer, we could get together and hammer perfectly good sheetmetal into total uselessness... :lolgoku:

OK, here's where I'm going to hang the flag :)surrender:) as far as any claims of advanced knowledge of this stuff is concerned. However, having spent my stint of time in tool & die (as a machinist, not a die maker) I got to work for a short time with a prototyper. He was a guy that could take an engineering print and create a prototype part, as well as the temporary tooling to crank out a short run of body parts so the engineers could start fleshing out other parts of the assembly process.

The video that fattony has linked for reference covers some of the basic things that I helped the old timer do; what I didn't have at the time was the detailed back story. All I was told was "Clamp that!!!", "Hold this while I hit it!!!", or "Weld these blocks where I tell you to!!!!".

I don't claim to know how to do a lot of this; what I do know is that it can be done, and even more ghetto hacked than what we're seeing the OP doing here with good to great results.

As Wesley Snipes character says in "Blade" 1, "TRY IT; YOU MIGHT LIKE IT.....":thumbsup::cheers2::popcorn:
 

fattony

Member
Messages
62
Reaction score
6
Location
Wicklow, Ireland
Glad to see I'm fostering some debate.
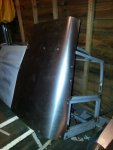
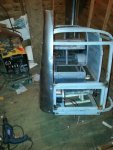
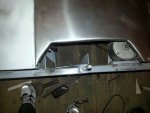
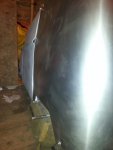
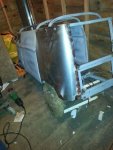
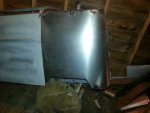
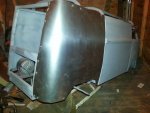
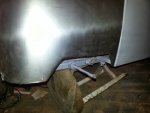
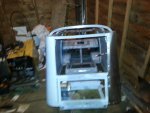
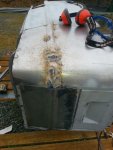
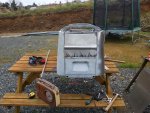
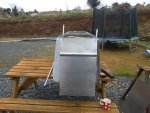
After a little rest I started back in to the kids kart. I wasn't sure how to go about the rear corners. In the end I decided to make the corner with out the rib then fab the rib and weld it on after.

I will fab the second corner then move on to making up the ribs and tacking them on.
 

Attachments

  • 20131105_171319.jpg
    20131105_171319.jpg
    34.9 KB · Views: 19
  • 20131105_171347.jpg
    20131105_171347.jpg
    49.3 KB · Views: 18
  • 20131105_200359.jpg
    20131105_200359.jpg
    55.6 KB · Views: 20
  • 20131105_202012.jpg
    20131105_202012.jpg
    23.3 KB · Views: 16
  • 20131105_202024.jpg
    20131105_202024.jpg
    46.7 KB · Views: 18
  • 20131106_212423.jpg
    20131106_212423.jpg
    39.3 KB · Views: 20
  • 20131106_212418.jpg
    20131106_212418.jpg
    33.3 KB · Views: 15
  • 20131106_212411.jpg
    20131106_212411.jpg
    49 KB · Views: 18
  • 20131106_212155.jpg
    20131106_212155.jpg
    44.6 KB · Views: 18
  • 20131106_212144.jpg
    20131106_212144.jpg
    44.6 KB · Views: 16

fattony

Member
Messages
62
Reaction score
6
Location
Wicklow, Ireland
Second corner almost sorted:wai:
 

Attachments

  • 20131107_205513.jpg
    20131107_205513.jpg
    93.3 KB · Views: 13
  • 20131107_205518.jpg
    20131107_205518.jpg
    66.5 KB · Views: 12
  • 20131107_205542.jpg
    20131107_205542.jpg
    89 KB · Views: 17

fattony

Member
Messages
62
Reaction score
6
Location
Wicklow, Ireland
Thanks for the kind words folks.

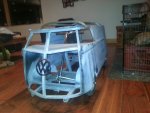
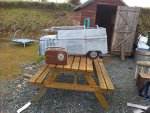
A few little bits done. I put the wheels back on to have a look at the stance.
I'd like it a little lower but wouldn't be getting the wheels on any lower. I have been thinking about air bags but that can be an upgrade later.

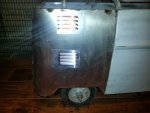
I'm trying out a few vent options. I will probably be cutting up some aluminium vents and gluing them on before prep.
Engine lid cardboard template done just a matter of making from sheet now.
 

Attachments

  • 20131110_204129.jpg
    20131110_204129.jpg
    85.2 KB · Views: 28
  • 20131110_203536.jpg
    20131110_203536.jpg
    65.4 KB · Views: 31
  • 20131110_201736.jpg
    20131110_201736.jpg
    89.9 KB · Views: 31
  • 20131110_200030.jpg
    20131110_200030.jpg
    73.1 KB · Views: 26
  • 20131110_195928.jpg
    20131110_195928.jpg
    82.9 KB · Views: 30

itsid

Moderator
Staff member
Messages
11,563
Reaction score
245
Location
Ruhrpott [Germany]
opened this thread.. starting to drool again...
So.. let's find a 'bad' thing in your built ;)

hm...


....

*uhm*
....

Okay, I give up!
on a side note:
I think the louvers are inside out, upside down on a T1 and only below the rib...
(10? right next to the fuel flap)

'sid
 

fattony

Member
Messages
62
Reaction score
6
Location
Wicklow, Ireland
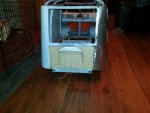
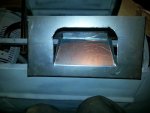
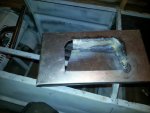
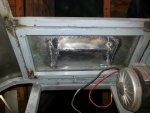
Engine lid pretty much done. I need to dress the welds and fill a few small holes but happy enough with the results.
 

Attachments

  • 20131111_201344.jpg
    20131111_201344.jpg
    57.3 KB · Views: 17
  • 20131111_212208.jpg
    20131111_212208.jpg
    60.5 KB · Views: 19
  • 20131111_215244.jpg
    20131111_215244.jpg
    51 KB · Views: 22
  • 20131111_215253.jpg
    20131111_215253.jpg
    68.1 KB · Views: 20

fattony

Member
Messages
62
Reaction score
6
Location
Wicklow, Ireland
thanks fabroman, I haven't really done much metal work but I do like vw,s which means I have to own a welder as vw,s in Irish weather are not a great mix. I like to post this stuff so others can see how it comes together. That there is no trick just figure it out as you go. I started a restoration a few years back still unfinished but I had never used a welder or grinder really until that point.

I post the link here but please be kind as I know it was way past restoring but as I started it I will have to finish it now.

I hope you have had your tetanus shots!

http://www.thesamba.com/vw/forum/viewtopic.php?t=277674&highlight=
 

fattony

Member
Messages
62
Reaction score
6
Location
Wicklow, Ireland
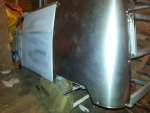
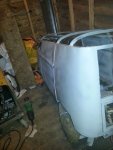
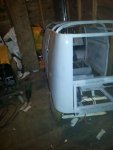
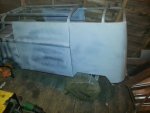
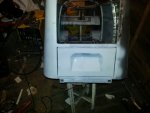
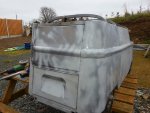
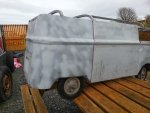
I have now make the rear door and welded the ribs on to the rear corners. some good some bad.


The far side has turned out very badly. I knew the rib in the center panel was tilted slightly but I thought I might get a way with it. BUt it now looks like I will have to remove the rib and redo the side panel and then fab the rib again. Oh well two steps forward one step back.
 

Attachments

  • 20131115_131955.jpg
    20131115_131955.jpg
    112.9 KB · Views: 25
  • 20131115_121652.jpg
    20131115_121652.jpg
    78.6 KB · Views: 25
  • 20131115_120442.jpg
    20131115_120442.jpg
    45.3 KB · Views: 29
  • 20131115_111927.jpg
    20131115_111927.jpg
    109 KB · Views: 19
  • 20131115_094624.jpg
    20131115_094624.jpg
    98.2 KB · Views: 20
  • 20131115_132003.jpg
    20131115_132003.jpg
    74.6 KB · Views: 24

OzFab

Well-known member
Messages
15,615
Reaction score
69
Location
Warwick Qld, Australia
It's not easy forming multiple contours from flat sheet metal so, you've done well...

As for the "tilted" rib, if you're really worried about it, go ahead & fix it but, you shouldn't be:
1. you can't look at both sides at the same time
2. nobody's gonna notice that a few lines aren't straight, they'll be too amazed by the overall picture (if you know what I mean)...

I know what you're gonna say, "but I'll know". I get it but, dude, look at what you created! Be proud of it no matter how it turns out...
 

itsid

Moderator
Staff member
Messages
11,563
Reaction score
245
Location
Ruhrpott [Germany]
I'm eager to see it with the rear bumper;
without even real ones look odd from behind somehow *shrugs*
(to me only perhaps)
For now the body looks like its too wide at the bottom.

The curved rib needs a bit of filler (tin! ;)); other than that it's just like I see no flaw.
Yes the rear panel is slightly tilted.. true, but honestly: if you haven't said so I probably wouldn't have noticed at all.
If it's not too much work you should change that... mainly because you know!

It doesn't harm your microbus at all, but if there is something you think needs to be improved, you should, just because you know you can :D

'sid

PS still marvellous.. even with this minor flaw there.
 

fattony

Member
Messages
62
Reaction score
6
Location
Wicklow, Ireland
Thanks Guys, and Sid you are correct again. The rear corners should be curved at the bottom but I cut staright to match the frame so it will always look a little wrong.It is slightly wider on the bottom than the top but I think that will look right once the gutters go on.

Dont get me started on the bumpers. I have spent quite a while working on the front one and it still looks crap. I haven't looked at the rear one yet but its not going to be easy. As alwasy thanks for the feed back.

A question inrelation to the motor /controler. Can I slow the trottle down by adding a resister inline with it. Also if I am going to add a sensor to cut the power when too close to something should I add relay/sensor inline with the trottle to cut it off or inline with the motor cable?

Also I have lights and indicator buttons on the handle bars from the origianl scooter. I checked last night and they output 24 volts. As the lights and indicators I'm going to use are 12 volt whats my best option here.
1.Replace bulbs with 24 volt not sure if there are available?
2. or buy a 24 volt to 12 volt convertor to run lights etc.
3. use 24 volt relays and put in 1 extra battery to run 12 volt lights etc. problem here is how to I charge the 12 volt battery assuming I was going to fit 24 volt charger for the main batterys. fit 2 chargers.?
I had intended having the charger onboard as I have lots of space then just plug in a flex and turn a switch to start charging.

Thanks For your help.

Cheers
Tony
 
Status
Not open for further replies.
Top