Torq-a-Verter won’t Disengage at Idle

MancoAddict

New member
Messages
13
Reaction score
0
Location
Sycamore, IL
Thanks for looking. I’m not on much but when I am you guys help me always. I searched before posting but with no avail.

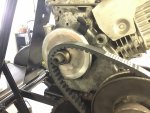
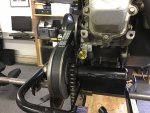
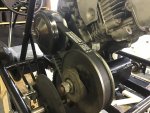
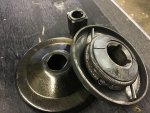
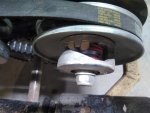
Problem: The Comet 20 TAV unit will not disengage at idle. It’s so bad that I can not safely start the Dingo. Side note: it does function properly as I increase throttle to wide open.

My attempted solutions: Disassembled. Cleaned and polished the driver pulley (as best as I could). Dry Lubed and reassembled. Checked center to center distance from driver clutch shaft to pulley shaft to make sure the ‘new belt’ has the correct circumference. Aligned the driver clutch plate with the driver pulley.

Thoughts? Thank you.
 

Attachments

  • B375E373-88D6-4C95-97B5-AC1E4C643E81.jpg
    B375E373-88D6-4C95-97B5-AC1E4C643E81.jpg
    291 KB · Views: 16
  • 62DEB158-81B5-4106-86C9-7AB156E6F802.jpg
    62DEB158-81B5-4106-86C9-7AB156E6F802.jpg
    316.3 KB · Views: 14
  • 9CF4AA6D-A643-41D1-8A4C-37B48905F7AF.jpg
    9CF4AA6D-A643-41D1-8A4C-37B48905F7AF.jpg
    426.2 KB · Views: 9
  • 42806DDD-5B76-4F3F-92D2-1EEC42648F6B.jpg
    42806DDD-5B76-4F3F-92D2-1EEC42648F6B.jpg
    280.3 KB · Views: 14
  • 2BCAE5C2-C010-4C50-BD6B-2F0BF1A5B6B1.jpg
    2BCAE5C2-C010-4C50-BD6B-2F0BF1A5B6B1.jpg
    332.7 KB · Views: 28

Brianator

Gettin' er done!
Messages
860
Reaction score
18
Location
Barrie, Ontario, Canada
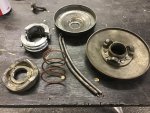
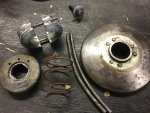
It all looks decent but you haven't shown us the clutch pack, do the pucks open/close smoothly? Maybe the springs are worn out? Have you made sure the flat discs (closest to the motor) are lined up perfectly with each other?
 

MancoAddict

New member
Messages
13
Reaction score
0
Location
Sycamore, IL
The ideas are very welcome. Please see these other photos.
 

Attachments

  • C633F7B6-D0DC-4905-91C7-967BA2C6AC56.jpg
    C633F7B6-D0DC-4905-91C7-967BA2C6AC56.jpg
    380.6 KB · Views: 16
  • A52D9555-1690-430E-9DFA-9C01DC1B2B73.jpg
    A52D9555-1690-430E-9DFA-9C01DC1B2B73.jpg
    384.6 KB · Views: 14

anickode

Active member
Messages
2,296
Reaction score
74
Location
S.E. Michigan
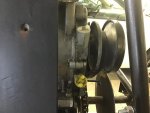
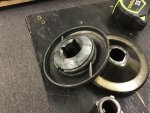
Something looks wrong with your driven pulley.

Like the lobes have cammed over and aren't resting on the buttons.

Also, you said 20 series, which is a symmetrical sheave unit... If that's true, I think you have the wrong belt on it. I'm guessing it's a 30 series. (Same as a Tav2, but minus the backplate).
 

MancoAddict

New member
Messages
13
Reaction score
0
Location
Sycamore, IL
Shoot, forgive my ignorance, “loves have cammed over and aren’t resting on the buttons” what does that mean?

It has a 20 printed on the drive pulley so I assumed it was a 20. I don’t know much about these I’ll admit.

I’m wondering if someone pieced this together with other parts. I bought it as a rebuild for the kids. If the system doesn’t engage and I put my kid on it, I fear comments like “that dingo’s got your baby” ;)
 

Brianator

Gettin' er done!
Messages
860
Reaction score
18
Location
Barrie, Ontario, Canada
If you look at pic 5 of 5 you'll see what anickode is talking about. The outer part of the cam with the angled cuts (or ramps) should be rested against the black "button" of the inner part of the cam, looks like it needs to be set back up. Depending on the spring of the driven depends on which way it needs to be wound, quick question though, are the inner pulleys nearest the motor basically flat? They look like it from the picture, indicating a 30 series. I'll be back with a link.

http://www.diygokarts.com/vb/showthread.php?t=1850

The last post has disassembly/ reassembly instructions. if your spring doesn't have any color and you're unsure which way to wind it keep in mind that as you tighten the spring it should get smaller in diameter, if it starts to expand you're winding it the wrong way.

Also, if you have the room to work on it you don't have to remove it from the cart. You can back off the large nut without removing it so the spring and cam cant fly off when you remove the retaining ring (snap ring pliers are a HUGE help but not required).
 

anickode

Active member
Messages
2,296
Reaction score
74
Location
S.E. Michigan
Yes sorry, my auto-correct doesn't like the word lobes for whatever reason. I realized and corrected it.

The spring in the driven should be pre-loaded so the lobes or ramps are tight up against the rubber stoppers (buttons) on one side. Looking down at it from the left side of the kart, the lobes should be to the right of the buttons (I think... I might have that backwards), but they should not be centered like they are now.

And as Brianator said, if the bevel angle on the inner and outer faces of the pulley are not the same (asymmetrical), it's a 30 series. It's hard to tell from the pics, but that's what it looks like to me.

If you put an asymmetrical belt on a symmetrical clutch, (or vice versa) it can also cause issues like excessive rubbing at idle (which would act like it's not disengaging), or excessive slip under load.

But I think your issue is probably (or at least partially) in the driven.
 

anickode

Active member
Messages
2,296
Reaction score
74
Location
S.E. Michigan
I just double checked, and I had it backwards for a 30 series. Lobe should be resting against the LEFT side of the stop.
 

Attachments

  • IMG_20200329_203731.jpg
    IMG_20200329_203731.jpg
    219.6 KB · Views: 14

Brianator

Gettin' er done!
Messages
860
Reaction score
18
Location
Barrie, Ontario, Canada
My 30 series is the same as yours (sitting on the left button and functions as it should) but dont forget, the spring (and which way its wound) is what determines it. I've heard the "yellow", stronger spring is wound the opposite way which means it would have to sit on the right side to function properly. Good of you to check for him though. It still needs to be determined what series he actually has, note his button is much different and that should be a big clue as to what the OP has. Where's 'Sid when you need him? He is a wealth of information!
 

anickode

Active member
Messages
2,296
Reaction score
74
Location
S.E. Michigan
My 30 series is the same as yours (sitting on the left button and functions as it should) but dont forget, the spring (and which way its wound) is what determines it. I've heard the "yellow", stronger spring is wound the opposite way which means it would have to sit on the right side to function properly. Good of you to check for him though. It still needs to be determined what series he actually has, where's 'Sid when you need him he is a wealth of information!

The reverse wound springs are for the 40 series and other symmetrical clutches where you have the option (albeit not a very good option) of having the driven mounted outboard as opposed to inboard as it should be.

A 30 series is asymmetrical, and the driver and driven must both be mounted outboard, so there is not a reverse wound spring made for the 30 series. The spring color for the 30 series indicates spring strength.

Spring color for the 40 series indicates wind direction.

As for which side the button should sit on, yes it's slightly different, but the mechanics of it are the same.
 

Brianator

Gettin' er done!
Messages
860
Reaction score
18
Location
Barrie, Ontario, Canada
That's funny, I've thought I've read here of guys using a yellow spring on a 30 and having to wind it the opposite way but I could be mistaken. Either way I just double checked mine, my spring is right hand wound (clockwise) and the cam needed to be turned counter clockwise to tension the spring (making the diameter get smaller) and leaves the cam sitting on the left button same as yours. I know it's working correctly as I've been running it with the cover off to make sure it's working as it should.

*edit* A couple mins of research and based on those buttons it looks like he has a 20 or 40 series (driven), which we know means he has the wrong belt. I can't find a 30 with anything but split buttons.
 

MancoAddict

New member
Messages
13
Reaction score
0
Location
Sycamore, IL
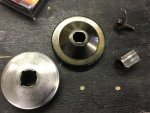
To answer some questions: The pucks did seem to open and close smoothly but see the picture to help determine if the springs appear shot. The flat discs closest to the motor are aligned and the inner and outer parts of the pulleys are not the same bevel angle suggesting asymmetry.

After disassembling the driven pulley, it appeared that the spring was not in any of the three holes.

Before that though, prior to even starting the motor with it assembled and before reaching out to you, the belt would bind badly as I tried to spin it by hand. When I put on the outer cover of the driver clutch to the motor’s shaft, it really pinched on the belt causing that binding I keep mentioning.

Would an adjustment to the driven pulley (like you guys mentioned) help with this binding problem? Also, after seeing the parts in the picture, can you guys definitely tell me which model Comet I have so to get the right belt if this one is incorrect. Does this look like a lost cause because I’m starting to lose my faith :surrender:

Thanks again!!!
 

Attachments

  • 3E0720A2-241D-4457-BA27-C0955206F415.jpg
    3E0720A2-241D-4457-BA27-C0955206F415.jpg
    459.4 KB · Views: 6
  • EE78D240-9DCE-4D28-A655-5F7735F3B0E9.jpg
    EE78D240-9DCE-4D28-A655-5F7735F3B0E9.jpg
    472 KB · Views: 6

MancoAddict

New member
Messages
13
Reaction score
0
Location
Sycamore, IL
After closer inspection, it appears this Comet unit is in VERY poor condition. I don’t want to waste any more of your time. I decided to order a new unit because I was going to need a new belt, springs, buttons etc and those costs almost exceeded the price of new unit. Even after all the new parts, I’m still stuck with a unit I had no confidence in putting my kids behind the wheel.

Thanks again all especially Brianator and Anickode for all your help!!

-Philip
 

Brianator

Gettin' er done!
Messages
860
Reaction score
18
Location
Barrie, Ontario, Canada
Np man that's what we're here for! Yes it does look like the one long spring (on the left) is out of shape but I dont think they were you problem. You mentioned when you tightened down the driver on the crankshaft that it was pinching the belt, thats not supposed to happen! Lol. Good choice to replace it as it does look pretty worn out, you may want to compare the new against the old just to get an idea on what's gone wrong with the old one and prepare for the eventual tune ups/repairs of the new one. They're overall pretty tough and can last a long time when properly cleaned/dry lubed and maintained. Good luck and dont hesitate to seek more help if needed!
 

MancoAddict

New member
Messages
13
Reaction score
0
Location
Sycamore, IL
You are right Brianator. I will definitely figure out what exactly the problem was so to pass on to the community here if nothing else. My own problem solving in the future and maintenance are just as important reasons to figure this out. The new unit arrives today.
 

MancoAddict

New member
Messages
13
Reaction score
0
Location
Sycamore, IL
Guys, I’m still struggling with this...

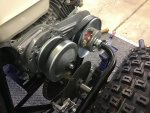
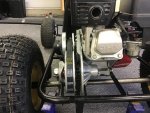
I purchased an off brand torq-a-verter (because money is tight due to this virus) and it will not engage properly. It would barely make it up a mild incline in my back yard. I could get off the cart and run faster than this :censored: thing will accelerate!! The engine has to be floored to get it move and the acceleration again is subpar at best.
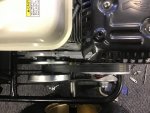
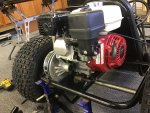
Please see the pics to help if you can. The unit came with no manual no instructions and worse no beer to get me through this consternation. Please don’t hate on me for buying the Chinese made product. I’m trying to put this together for my kids/family on the cheap.

Was there an adjustment out of the box that I was suppose to make or did I need to pre-load the driver spring? Again, I had no manual no instructions and no :cheers2:

Thank you!!
 

Attachments

  • 1C2CBF2C-6123-4D3C-8CC3-0876BE3E64DF.jpg
    1C2CBF2C-6123-4D3C-8CC3-0876BE3E64DF.jpg
    326.4 KB · Views: 8
  • D9D1BA94-FAC1-4A50-8F7D-984B504836D7.jpg
    D9D1BA94-FAC1-4A50-8F7D-984B504836D7.jpg
    414.5 KB · Views: 8
  • 3972D479-17D1-4B64-B8AD-4D4FBEBB1791.jpg
    3972D479-17D1-4B64-B8AD-4D4FBEBB1791.jpg
    350.8 KB · Views: 7
  • 2ACA58A1-47B3-41FA-840B-C710D8A1BA7D.jpg
    2ACA58A1-47B3-41FA-840B-C710D8A1BA7D.jpg
    414.1 KB · Views: 8
Top