Streaker Build: Start to Finish

Status
Not open for further replies.

mckutzy

Well-known member
Messages
8,353
Reaction score
108
Location
bc, canada
That's a cool looking tank... I think I have the exact same one off of my big '53 Briggs.. Ironically it also came off of a cement mixer... I think they're a 8 or 10hp.
 

Kentucky Boy

Member
Messages
611
Reaction score
43
Location
Bowling Green, KY
I'll have to work on putting my video on here. The Briggs ran good and strong... Until the brass overflow tube in my original Keihin carb broke. It was cracked when I got the carb and my repair did not last. So I bought a brand new Mikuni 22mm and slapped her on there. Ran good and strong with no adjustment.
 

Attachments

  • image.jpg
    image.jpg
    101.8 KB · Views: 34

Hellion

Moderator
Messages
8,549
Reaction score
3,641
How's that lawnmower seat working out for you?

It looks low and streamlined enough--it was my initial impression that adding the same to mine or anyone's basic Streaker or other yard kart would raise the rider up a bit higher than the stock seat. I like the low feeling and having the center of gravity as low as possible for cornering.

But like I said, it looks just about right on your kart.
 

Kentucky Boy

Member
Messages
611
Reaction score
43
Location
Bowling Green, KY
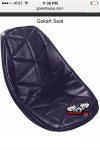
The lawnmower seat was on it when I bought it. It is in perfect condition and is very comfortable. I plan on replacing it eventually with this one. I can't believe it took this long for someone to say something about that seat lol.

Next I have to tear it all back down for final prime and paint and a few more additions.
 

Attachments

  • image.jpg
    image.jpg
    97.2 KB · Views: 11
Last edited by a moderator:

Kentucky Boy

Member
Messages
611
Reaction score
43
Location
Bowling Green, KY
At that point in the build I had intended on using the flathead. After testing and driving the kart for a while I noticed that I kept having an issue with fuel. Long story short, the fuel pump kept getting oil in it from the pulse hose. I had to take the pump apart to clean out the oil. I also noticed that it was burning oil. The head was already coated in black soot. I'm pretty sure the rings had seen better days. I decide to remove the Briggs and go with the Predator. So I mocked it up to see if it would fit. And it did.

I will be keeping the Briggs flathead. It's a cool motor and I think I want to rebuild it, possibly hone or even have it bored out. That will be another project.
 

Attachments

  • image.jpg
    image.jpg
    359.6 KB · Views: 30
Last edited by a moderator:

Kentucky Boy

Member
Messages
611
Reaction score
43
Location
Bowling Green, KY
Yes. And it looks awesome.

And here's a better pic of it all set up. The intake is a very nice piece.

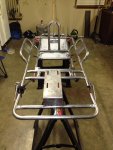
I took everything apart again. I used my angle grinder and a twisted wire wheel and sandpaper to take the frame down to the metal. It had several layers of old paint on it.

I hung the frame up in my garage after I thouroughly sanded everything down. I coated the whole thing in Rusoleum fast dry grey primer.

I sanded the primer to smooth it up real nice then hit the frame with another good coat. After it cured for a couple of days I sanded it down again. The primer coat looked really good at this point so I wiped it all down with a wet rag to clean off all of the dust. I bought an auto body tack cloth to wipe it down with before applying the color coats. Here is a pic of the paint products I am using. I bought the primer at Lowes, the gunmetal metallic at Auto Zone and the clear at Tractor Supply.

I picked a gun metal metallic color for the frame. The paint is in a smaller can so I bought 8 cans. This brand has a good spray nozzle that lays the paint on very nicely. I used a total of 3 coats and had zero runs in the paint. I sanded with a 1500 grit sanding pad in between coats and cleaned the dust off with a wet rag each time. The finished color coat turned out great. I was real happy with the finish. Probably the best painting I've done with a spray can. This is a pic of the final color coat. Next I will lightly sand before applying the clear coat.

And here it is all painted and cleared. I also made some floor mats with some rubber diamond plate. I bought a large roll of the stuff at an auto parts store.

And one more close up of the paint color and finish.

One more with better light. You can see my brake caliper that I polished.
 

Attachments

  • image.jpg
    image.jpg
    135.6 KB · Views: 34
  • image.jpg
    image.jpg
    283.3 KB · Views: 29
  • image.jpg
    image.jpg
    290 KB · Views: 34
  • image.jpg
    image.jpg
    321.8 KB · Views: 28
  • image.jpg
    image.jpg
    377.6 KB · Views: 18
  • image.jpg
    image.jpg
    299.5 KB · Views: 34
  • image.jpg
    image.jpg
    318.1 KB · Views: 34
  • image.jpg
    image.jpg
    262.4 KB · Views: 29
  • image.jpg
    image.jpg
    299.6 KB · Views: 38
Last edited by a moderator:

chancer

ɔ ɥ ɐ u ɔ ǝ ɹ
Messages
9,358
Reaction score
89
Location
COMFORT, TEXAS
Very nice work.
Thanks for the tips.
I could use some help when it comes to "rattle bombing" a Kart frame! lol
 

Kentucky Boy

Member
Messages
611
Reaction score
43
Location
Bowling Green, KY
Now at this point I'm ready for the fun part. Putting it all back together...tomorrow.

Installed my new 36" long 1" to 3/4" stepdown axle. New wheels and tires on. I was able to reuse the original sprocket as it shows no wear. I cleaned it and hit it with the wire wheel on my grinder then clear coated it. New brake disc is on. I am using two piece aluminum locking collars with 1" id to secure all of the components and red Loctite on all the set screws.

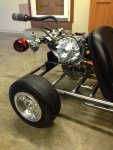
Installed the new front wheels and tires, tie rods and steering wheel. Also reinstalled the custom racing seat that came with it. It's a roller again.
 

Attachments

  • image.jpg
    image.jpg
    339.2 KB · Views: 27
  • image.jpg
    image.jpg
    352.3 KB · Views: 36
Last edited by a moderator:

Kentucky Boy

Member
Messages
611
Reaction score
43
Location
Bowling Green, KY
It's on the ground and I have installed the new oriental motor, complete with billet rod, flywheel and a Robertson Torque Tube exhaust. Now I have to get rid of the stock tank and air box. I also installed a Drainzit hose to aid in easy oil changes. I figured I would change the oil regularly if it wasn't such a mess. I can put the rear on jack stands and direct the end of the hose into my oil bucket without spilling oil all over the frame and base of the engine.

So off it comes. Not using the carb or any of the linkages.

And on goes the new billet intake, 22mm Mikuni and air filter. I have run this Mikuni on the original flathead with great results so I'm hoping for it to like the Predator. No linkages required for the slide type carb so it cleans it all up real nice.

I like that this hemi valve cover is cast aluminum but I didn't need to be reminded that it had overhead valves.

So I sanded the letters off with my grinder then sanded the whole thing down with 220 grit. Sanded more with finer and finer until I got up to 3000 grit. The pic is after 220 grit.

Wet sanded it all down with 3000 grit the used Neverdull on it. Nice and shiny now. This mod should be good for another 3/4 hp.
 

Attachments

  • image.jpg
    image.jpg
    313.8 KB · Views: 23
  • image.jpg
    image.jpg
    293.6 KB · Views: 28
  • image.jpg
    image.jpg
    324.1 KB · Views: 39
  • image.jpg
    image.jpg
    117 KB · Views: 17
  • image.jpg
    image.jpg
    304.2 KB · Views: 29
  • image.jpg
    image.jpg
    139.9 KB · Views: 43
Last edited by a moderator:

mckutzy

Well-known member
Messages
8,353
Reaction score
108
Location
bc, canada
That looks cool.... However your starting to make Fabroman(formerly)Ozfab, run for his money, as he was known for polishing even the fuel bowl on his carbs and such.... Mirror of course........
 

Hellion

Moderator
Messages
8,549
Reaction score
3,641
Wow! This takes the cake. I am however, gratified to see that for someone who has too much time on their hands, you took that time and GAB'ed it up. You were fruitful.

Lord knows what you'd be doing with tons of free time and no outlet...


Kentucky Boy

Member
Messages
611
Reaction score
43
Location
Bowling Green, KY
...

No polished header here. No time for that. But I did wrap it just for you:)
 

Attachments

  • image.jpg
    image.jpg
    355.3 KB · Views: 30
Last edited by a moderator:

chancer

ɔ ɥ ɐ u ɔ ǝ ɹ
Messages
9,358
Reaction score
89
Location
COMFORT, TEXAS
I have worked on this project off and on for the past 6 months with my son. I don't understand what would possess someone I have never met to concoct such a load of feces theory about how much time I have on my hands. In fact, from viewing your profile it appears you've made about 950 or so posts since your registered I'm May of 2016. I am grateful, and I speak for the entire human race, that you have bestowed so much of your infinite wisdom on us in such a short time.

Nice!:funnypost:
I think he missed the fact that this thread is Semi Historical. So it looks as if you did this all in the last couple weeks.
But still someone had to say it!
 

Hellion

Moderator
Messages
8,549
Reaction score
3,641
I have worked on this project off and on for the past 6 months with my son. I don't understand what would possess someone I have never met to concoct such a load of feces theory about how much time I have on my hands. In fact, from viewing your profile it appears you've made about 950 or so posts since your registered I'm May of 2016. I am grateful, and I speak for the entire human race, that you have bestowed so much of your infinite wisdom on us in such a short time.

I'm sorry you missed my humorous intent. :surrender:

You've got a stellar kart here and the finest work I've ever seen undertaken for one. I like how you went back to the frame and gave it what must be a flawless finish after giving attention to each primer and color coat. Just like what they do for show cars and what-not.

I can only aspire to your particular finesse and attention to detail. Magnificent! Thanks for sharing everything and in minute detail.


Kentucky Boy

Member
Messages
611
Reaction score
43
Location
Bowling Green, KY
I had to modify my throttle control rod to accept the Mikuni throttle cable. I sanded the throttle control rod down and left some of the original red paint. Clear coated the rod and installed new 3/8 aluminum stops.

Finished.

My fuel pump installed/rigged.

Just had to put the chain on and the brake pedal/ rod.
 

Attachments

  • image.jpg
    image.jpg
    252.5 KB · Views: 21
  • image.jpg
    image.jpg
    156.2 KB · Views: 30
  • image.jpg
    image.jpg
    345.4 KB · Views: 27
  • image.jpg
    image.jpg
    815.8 KB · Views: 42
Last edited by a moderator:
Status
Not open for further replies.
Top