shifter kart build

Status
Not open for further replies.

Ognib

bingo spelled backwards
Messages
151
Reaction score
0
Location
kc
It's a busy time...a lot of work...got the garden coming along, a bit late this year due to the move.

Doing layout for the frame. Want to keep it as compact as possible, but at 6' 2" I've got to have a bit of room so my chin isn't resting on my knees when driving the thing.

Don't know dimensions on spindles or wheel widths yet, but this is my thoughts on the layout for the front wishbones, side to side to the ball joints.
I like a visually balanced build so I'm doing a lot of just standing back & looking at what I've got.

Hung the head pipes for visuals to aid in the back portion of the frame.

Sprocket & rotor help with visualization back here. I think they are a bit close...I want room for the fuel tank & battery in front of the axle.
The principle of Polar moment of inertia yields a quicker responding machine to steering input when this is taken into consideration.
 

Attachments

  • kart6.JPG
    kart6.JPG
    851.9 KB · Views: 18
  • kart7.JPG
    kart7.JPG
    817.9 KB · Views: 15
  • kart8.JPG
    kart8.JPG
    866.4 KB · Views: 14
  • kart9.JPG
    kart9.JPG
    877 KB · Views: 16

Ognib

bingo spelled backwards
Messages
151
Reaction score
0
Location
kc
Adjustable template for the rear suspension.
I'm going to run ball joints back here as well...allowing for rear toe adjustment.
The way it's laid out now, wheelbase is just a little over 6'.

I'm using Carroll Smith's book "tune to win" as my text on suspension science.
 

Attachments

  • quartersprint34.JPG
    quartersprint34.JPG
    681 KB · Views: 16
  • quartersprint33.JPG
    quartersprint33.JPG
    884.6 KB · Views: 13
  • kart11.JPG
    kart11.JPG
    785.3 KB · Views: 12
  • kart10.JPG
    kart10.JPG
    807.4 KB · Views: 13

Ognib

bingo spelled backwards
Messages
151
Reaction score
0
Location
kc
A little more mock up & juggling around on the back end.

I've been wanting to see what the top end of the engine looks like & today I knocked the cam cover off to take a look.

:wai::wai:

It's absolutely pristine!! The couple of puddles of oil in the low spots are new looking & totally clean. The wear on the lifter cups is non existent.
Just nicely polished. The cam chain is snug with no slop at all.

The bike only had 21K on the clock & I was optimistic when I bought it.
This is beyond what I was hoping for...everything I can see looks brand new.
 

Attachments

  • kart15.JPG
    kart15.JPG
    843.7 KB · Views: 18
  • kart14.JPG
    kart14.JPG
    835.6 KB · Views: 16
  • kart13.JPG
    kart13.JPG
    805.1 KB · Views: 9
  • kart12.JPG
    kart12.JPG
    844 KB · Views: 11

Ognib

bingo spelled backwards
Messages
151
Reaction score
0
Location
kc
That was my reaction as well, when the cam cover first came off.
Transmission moves through the gears crisply & cleanly.

I've been researching possibilities for spindles & hubs.
Looking for a small compact car with rear wheel drive & independent rear suspension.
The Mazda Miata seems to be a likely candidate.
I believe the spindle uprights are in aluminum which would be nice for keeping unsprung weight down.
There is a huge salvage yard not too far away...going to see if they've got one & hopefully go take a look at some parts.

I need these parts & a set of wheels for measurments so I can finalize my frame width & track width dimensions before I bend any tubing.

For a rear differential, a lot of the formula SAE cars built by college engineering students are using the Mazda RX7 style torsen diff. They are available with limited slip or posi, if you prefer & are adaptable to chain drive applications which I need with my drivetrain.
 

Ognib

bingo spelled backwards
Messages
151
Reaction score
0
Location
kc
A lot of research going on.
Price is prohibitive for me to use Miata or other small car parts for my spindles & hubs.
I've found several vids relative to fabbing the uprights with axle stub spindles & matching hubs.
So that's the way I'm going.

I've found the wheels I think I'm going to use.
I've cut some cardboard templates to simulate the wheel & tire heights.
I like a visually balanced build where everything fits & I want to know how they"ll fit before I spend my money!

I've got enough old school hot rodder in me that I still appreciate the looks of big -n- littles on the rubber.
My templates simulate the size of 12" wheel & 16" tall tire on the front with 13 / 19's on the rear.
Wheel widths will be 10" rear & 8" front.

The bike had a 25" tall tire on the rear & the 650 kaws come out of the hole pretty strong.
The shorter 19" tire will give me a deeper final drive ratio so should accelerate fairly well.

I want enough rubber on the thing so that it won't blow the tires off when I'm on the throttle hard.
Been around long enough to know that, regardless of how cool it looks to smoke the tires, ya ain't movin out very quickly when they're spinning.

To be continued...
 

Attachments

  • kart16.JPG
    kart16.JPG
    813 KB · Views: 8
  • kart17.JPG
    kart17.JPG
    789.9 KB · Views: 8

Ognib

bingo spelled backwards
Messages
151
Reaction score
0
Location
kc
Hard parts.

Spindles, bearings & hubs for the front.

Will prototype shape the uprights out of wood for quick shaping & take patterns from that for fabbing in steel.

Also now need rotors with hats & calipers.
 

Attachments

  • kart20.JPG
    kart20.JPG
    733.5 KB · Views: 7
  • kart19.JPG
    kart19.JPG
    751.6 KB · Views: 6
  • kart18.JPG
    kart18.JPG
    725.5 KB · Views: 6

Ognib

bingo spelled backwards
Messages
151
Reaction score
0
Location
kc
Mini Cooper parts.
Didn't have a caliper in stock so still need that & a couple of heim rod ends & then can start on the uprights.
 

Attachments

  • kart21.JPG
    kart21.JPG
    760.7 KB · Views: 4
  • kart22.JPG
    kart22.JPG
    821.3 KB · Views: 4

Ognib

bingo spelled backwards
Messages
151
Reaction score
0
Location
kc
I'm measuring & drawing pictures in my head today.
I've opted to go with a 13" wheel on the front end instead of 12" as previously posted.

I want to build with parts that are available at the local parts store.
I couldn't find a rotor small enough to tuck into a 12" rim & still fit down over my hub.
So 13" it is.

The "2x4" is the beginning of the template for the spindle upright that will attach the assembly to the wishbones via heim rod ends.
It will also contain the caliper mounting tabs as well as the steering arm.

My wheels haven't arrived yet but I know that the back space is 4" from where it seats on the face of the hub.

The distance from that face to the back of the rotor is 1 3/4" which plus an additional 2 1/4" yields 4" as shown by the black line on the block.
This shows me how deeply everything will seat inside the wheel.

The 13" wheel template shows the relation of it all in that respect.
 

Attachments

  • kart26.JPG
    kart26.JPG
    796.5 KB · Views: 7
  • kart25.JPG
    kart25.JPG
    714.1 KB · Views: 6
  • kart24.JPG
    kart24.JPG
    766.3 KB · Views: 7
  • kart23.JPG
    kart23.JPG
    859.6 KB · Views: 7

Ognib

bingo spelled backwards
Messages
151
Reaction score
0
Location
kc
G-day, all.

More parts.

Large rod ends will be ball joints for attaching spindle upright to A-arms & small will be tie rod ends for steering.
Hi misalignment spacers allow for greater articulation of the ball before binding.
Threaded bungs are weld in to the tubing.
I really dig precision work & these things are most impressive in their quality. :cheers2:

The wheels are still on back order, but I've got enough of the front end parts to cut the wood block to the shape of the spindle upright.
I'll develop patterns from that plug for transfer to steel for the build.
 

Attachments

  • kart27.JPG
    kart27.JPG
    755.6 KB · Views: 8
  • kart28.JPG
    kart28.JPG
    699.6 KB · Views: 9
  • kart29.JPG
    kart29.JPG
    749.6 KB · Views: 8
  • kart30.JPG
    kart30.JPG
    792.5 KB · Views: 8

Ognib

bingo spelled backwards
Messages
151
Reaction score
0
Location
kc
Plug representing the shape of the spindle uprights.
 

Attachments

  • kart34.JPG
    kart34.JPG
    800.6 KB · Views: 5
  • kart33.JPG
    kart33.JPG
    759 KB · Views: 5
  • kart32.JPG
    kart32.JPG
    738.5 KB · Views: 5
  • kart31.JPG
    kart31.JPG
    801.5 KB · Views: 6

Ognib

bingo spelled backwards
Messages
151
Reaction score
0
Location
kc
Start fitting these things together.
 

Attachments

  • kart35.JPG
    kart35.JPG
    812.7 KB · Views: 6

Ognib

bingo spelled backwards
Messages
151
Reaction score
0
Location
kc
Got the patterns accurately drawn up for the spindle uprights & proceeding to cut them in .125 mild.
For such a big bulky machine, the ricipro. saw is allowing me pretty good accuracy in staying with the lines.

I want good, sharp, crisp bends on the pieces like would be achieved in a press break.
My home brew bending jig. :cool:
Material stays straight up to the point of the bend.
 

Attachments

  • kart42.JPG
    kart42.JPG
    762.3 KB · Views: 10
  • kart41.JPG
    kart41.JPG
    725.6 KB · Views: 10
  • kart40.JPG
    kart40.JPG
    753.6 KB · Views: 10
  • kart39.JPG
    kart39.JPG
    813.4 KB · Views: 10
  • kart38.JPG
    kart38.JPG
    803.8 KB · Views: 10

Ognib

bingo spelled backwards
Messages
151
Reaction score
0
Location
kc
The wife shredded a tendon in her ankle & had a surgery to repair it week before last.
Between doing my money work & being her nursemaid, haven't had time for much else.

Finally got to the shop today for a while.
Got the first pattern cut & cleaned up...ready to go.

Had been having trouble with my layout lines rubbing off the material.
Found a fine tipped paint pen that puts a hard, bright line down that's easy to see & doesn't go away when I move the saw over it.

Good to be finally cutting some steel & making progress rather than building benches & drawing layout ideas.
 

Attachments

  • kart43.JPG
    kart43.JPG
    779.9 KB · Views: 6
  • kart44.JPG
    kart44.JPG
    811.7 KB · Views: 6
  • kart45.JPG
    kart45.JPG
    781.3 KB · Views: 6

Ognib

bingo spelled backwards
Messages
151
Reaction score
0
Location
kc
Dykem which mfgs the layout dye that I use for my mill work, has steel tipped paint markers.
I was initially looking for them but no one close to me had them in stock.
Didn't want to wait as I was hot to make progress that day.
So went with what the hobby store offered which is nylon tipped, I think.
 

Ognib

bingo spelled backwards
Messages
151
Reaction score
0
Location
kc
I'm hooked on the fabrication process!

In my past, most of my projects were street cars/trucks that also went to the track on weekends.
When I would get one to the point where it was "done" I'd basically loose interest in it because there was nothing interesting left to do to it.
So, I'd find a buyer, collect my money & find another project.

Standing around polishing the chrome is not my idea of a good time.

I'm constantly looking for new ideas...a different/better way to do things.
U-toob is a gold mine of vids by cats who are building things.
The drivel presented on tv as entertainment bores me to tears!!

Found this series recently.
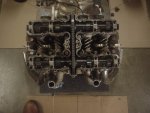
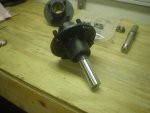
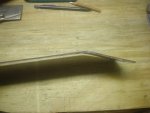
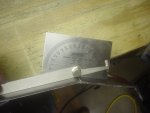
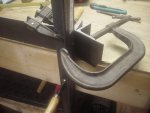
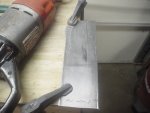
I'm not really into bikes, but this guy is a HARD CORE fabricator & I'm diggin what he's doing.
He's in a very basic shop...no CNC...no CAD programs...just working off of the pictures in his head with old school equipment.

Thought some of you like minded guys might enjoy...

https://www.youtube.com/watch?v=fKOkL4WEUYs

https://www.youtube.com/watch?v=3K0SmnVBb5A
 
Status
Not open for further replies.
Top