Rockwell 440cc and a kenbar streaker?

Thepartsguy

Well-known member
Messages
1,495
Reaction score
1,374
Back in 2023 I had a giant blue buggy with a 400cc Rockwell JLO engine. Big piece of junk never worked out.

Sold that buggy and moved on. NOW it’s 2026 and I’m scrolling marketplace and what do I spot? A cut up scorpion whip snowmobile for $40

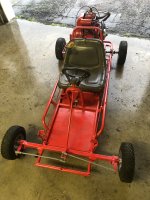
I have a streaker and the Kohler on it now is a shiny piece of crap that lacks power and the kart is becoming less and less fun to ride due to it being unbearably slow. Maybe we can fix that?IMG_6720.jpeg
 

Thepartsguy

Well-known member
Messages
1,495
Reaction score
1,374
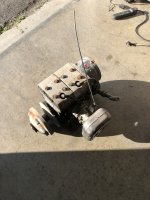
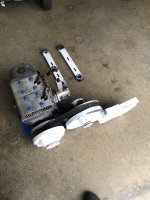
Insert me cutting up the rest of the sled to snag the engine/clutch in the guys driveway and he even let me use his tools!

I did not know what I was buying it could have had a hole blown in the mag side piston it could have been missing parts it was $40 AS IS.

(The sled set for 30+ years and the engine was locked up. Pull cord would not budge) that was the description of the sled I had to work with. I messaged him and said I don’t care about condition I’ll be out whenever works best for him!

The sled was in a trailer 4 miles down the street and 20 minutes after messaging him I was back home get to work on what i just payed $40 for.
IMG_9192.jpeg
 

Thepartsguy

Well-known member
Messages
1,495
Reaction score
1,374
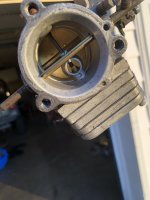
So off with it‘s heads :LOL: Then the wd30A Walbro was unbolted exhaust off and gut the wiring. Pullstart off etc..
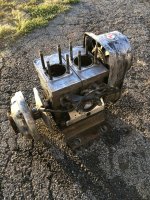
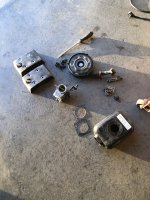
The bores pistons and everything looked amazing so I could not figure out why it was locked? A small piece of wood and a rubber mallet bang on the mag side piston ONCE and it unstuck instantly! ZERO EFFORT.

Now i’m in cleanup mode. All the gunk and grime gets wire brushed and I’m debating silver paint and making the engine look flashy as i don’t want a grease pile of a 440 twin on a bright red gokart.

The kicker? .30 over wiseco’s in both bores and a very very clean WDA-30A Walbro! These stock 440’s make 30-40hp and lightly modified one can push 40-50hp
IMG_9194.jpegIMG_9193.jpegIMG_9195.jpeg
 

Thepartsguy

Well-known member
Messages
1,495
Reaction score
1,374
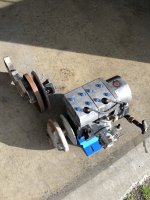
Not gonna go crazy painting after all it cleaned up well.

Next onto the clutch. Clean it up and hit it with a bit of paint.
IMG_9201.jpeg
 

Thepartsguy

Well-known member
Messages
1,495
Reaction score
1,374
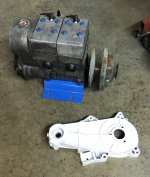
Degreased and painted the secondary clutch housing. The picture sucks but it cleaned up and painted very very nice!

The points on the engine did not need filed and I was told this thing set 30 years! Both plugs have bright blue spark!

I will finish and clean up the actual driver and driven pulley and then I need to mount the engine to anything I can as it has some killer compression.

I can’t actually pull it over reliably until it’s mounted solid to something. But with how clean everything is I’m willing to bet it’s a stout runner.
IMG_9202.jpeg
 

Thepartsguy

Well-known member
Messages
1,495
Reaction score
1,374
I’m so tired of grease and dirt that’s why I made a point that the only time I will deal with it anymore is to clean it off so I can have a non greasy part.


I have to do a general clean up of the driver/driven still and then mount the engine to something so I can hear it run.

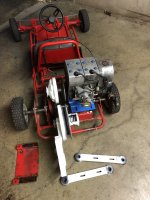
After that there is nothing left. I have to yank the kart out of the back of the garage and start mounting the engine. Once it is mounted I’ll need plate steel to mount the driven.

Once the engine is mounted to the kart I’ll have to cut up the stock snowmobile exhaust and make a lot manifold or hunt marketplace for a stinger style expansion chamber.

Mounting the engine will be easy. The driven could be tough and the exhaust could be tough.
IMG_9203.jpegIMG_9205.jpeg
 

Hellion

Murderator
Messages
9,186
Reaction score
4,157


I think Mustie refurbed one of those engines so I have a tidbit of familiarity with it.
 

Thepartsguy

Well-known member
Messages
1,495
Reaction score
1,374
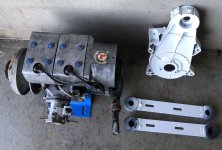
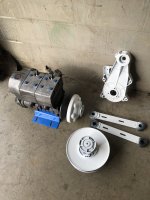
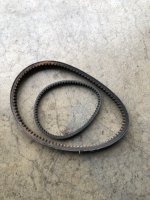
The driven/driver got a full corse sand job and now the belt doesn’t have the job of beating all the rust and shining the sheaves up. Everything is done until the engine is mounted on the kart.

I want to get plate steel before I even pull the Kohler off the gokart. Once I have plate steel to work with I will mount the 440cc and then work on mounting the driven pulley and hooking up the standard 420 chain.

After the engine/driven are mounted with the chain hooked up I will have to make a log manifold that doesn’t stick directly into my back.


Now that everything isn’t a grease pit I can at least work with it and not end up a filthy wreck.

Going on day three of owning this engine or day two? Lost track. But I want to also work kind of quickly. I have seen a lot of snowmobile swapped karts and they are all rusty grease pits.

I would like to have a clean simple setup so that’s what I’m shooting for. Although I’m no perfectionist.
IMG_9209.jpeg
 

Thepartsguy

Well-known member
Messages
1,495
Reaction score
1,374
I really hope this site on the backend is refreshing itself and the admin/mod isn’t babysitting it having to refresh it 20+ times a day. IMG_9212.jpeg
 

Thepartsguy

Well-known member
Messages
1,495
Reaction score
1,374
What have I gotten myself into??

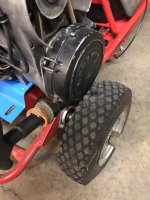
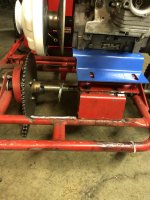
About that plate steel I need a lot of it. First I will make my engine mount that raises the engine up quite a bit.

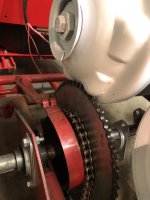
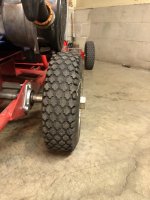
that will get it off the sprocket and above the tire. And phase one will be complete.

Phase two is how I’m going to run my extension that the plate steel holding the driven housing will mount to. I’m thinking make a box extension. It will not need to be as long of a box extension as it first seems based off pictures.


Two bolts are directly behind the driven pulley and the other two bolts are about half way down the housing. It sets over a bit farther then I would like it but past esthetics I‘ll have 40hp the trades we make for power.
IMG_9213.jpegIMG_9214.jpegIMG_9215.jpeg
 

Thepartsguy

Well-known member
Messages
1,495
Reaction score
1,374
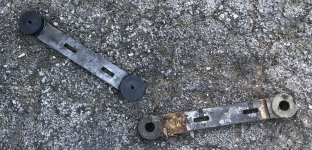
Even the mounts I had on it for the Kohler are to short and not wide enough.

I am making one big mount from the front to back bar that will raise it just above the tire and it will already clear the sprocket by a mile. that’s easy.

The box extension is going to be some engineering without a degree.
IMG_9217.jpegIMG_9218.jpeg
 

Thepartsguy

Well-known member
Messages
1,495
Reaction score
1,374
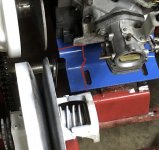
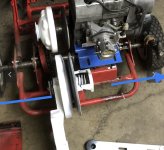
I have to shorten the engine mounts and with the driven being so low when the driven actually opens it may spread far enough to hit the engine mount.

post #13 picture one. look at the driven and how far the slides allow it to open. Now just because those slides are that long doesn’t automatically mean it will open far enough to hit the engine mount. I have this dreaded gift were I can eyeball mechanical before I even build It.. I see things 😶

The engine mount does not have to be one solid plate. it can be a riser mounted on the left of the frame and a riser on the right of the frame. Same height spaced apart were I need them.

Then I may be able to low belly the left side engine mount to give me some extra room to clear the spreading driven.

Wish me luck tomorrow as when I wake up I have A LOT of work to do and when that works done it’s still gonna be reallllll close.
 

Thepartsguy

Well-known member
Messages
1,495
Reaction score
1,374
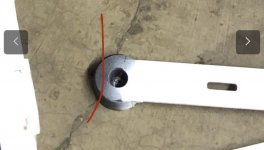
I hate trying to explain my thoughts sorry I probably sound half crazy by low belly the left engine mount I mean everything to the left of the read line goes away with the help of a grinder.

The only problem with that is the rubber mount sticks out farther then the middle bolt. so that means I may have to grind down the edge of the rubber using discretion not to go to far but far enough that the driven doesn’t open and hit it.

Last but not least I disassemble the driver and use a collar to help give me that last little bit I need. The collar stopping the driven from opening the last little bit to stop the sheave from hitting the rubber.
IMG_9221.jpegIMG_9220.jpeg
 

Thepartsguy

Well-known member
Messages
1,495
Reaction score
1,374
Also the back of the frame gets cut off and I’ll plug the frame for the extension and that way I can rosette weld the plug and weld the pipe all the way around to make a solid box extension. Just late night crazy thoughts on how to make this work without it being a pile of junk when done. IMG_9222.jpeg
 
Top