Reviving the Doodle Bug :devil2:

Status
Not open for further replies.

2SlickNick

American Minibikes @ FB
Messages
2,758
Reaction score
30
Location
Mesa, AZ.
Springer Seat

A couple pics of how I am mounting the springer seat.
I will trim off access material later.
It looks like a nice fit, I can wait to sit my azz on it:cool:


Edit: just sat on it:wai: Springs are a little stiff, but I think once they break in it will get better. Does still feel better than stock.
 

Attachments

  • IMG_2848[1].jpg
    IMG_2848[1].jpg
    269.5 KB · Views: 6
  • IMG_2849[1].jpg
    IMG_2849[1].jpg
    303.7 KB · Views: 6
  • IMG_2850[1].jpg
    IMG_2850[1].jpg
    308.5 KB · Views: 6
  • IMG_2851[1].jpg
    IMG_2851[1].jpg
    297.5 KB · Views: 6

2SlickNick

American Minibikes @ FB
Messages
2,758
Reaction score
30
Location
Mesa, AZ.
Gas Tank Location

:idea2:I think the best spot for the gas tank will be under the seat.
Not sure when I will start that, but that is where it will go.
 

Attachments

  • IMG_2854[1].jpg
    IMG_2854[1].jpg
    346.4 KB · Views: 8
  • IMG_2856[1].jpg
    IMG_2856[1].jpg
    344.9 KB · Views: 9

2SlickNick

American Minibikes @ FB
Messages
2,758
Reaction score
30
Location
Mesa, AZ.
Thanks Eric.
I was going to sell it and buy a new one, but I figured - what the hay... I'll just keep improving it.
 

2SlickNick

American Minibikes @ FB
Messages
2,758
Reaction score
30
Location
Mesa, AZ.
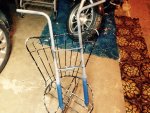
Working on making a cradle for the stock DB tank
 

Attachments

  • IMG_2861[1].jpg
    IMG_2861[1].jpg
    316.5 KB · Views: 3
  • IMG_2860[1].jpg
    IMG_2860[1].jpg
    287.2 KB · Views: 5
  • IMG_2859[1].jpg
    IMG_2859[1].jpg
    275.4 KB · Views: 6
  • IMG_2857[1].jpg
    IMG_2857[1].jpg
    319.1 KB · Views: 4

2SlickNick

American Minibikes @ FB
Messages
2,758
Reaction score
30
Location
Mesa, AZ.
The space is tight and I want to be able to swap out tanks if needed. To allow me to do that I will put the cradle on a hinge system. That way once I bolt the tank to the cradle, I can then fold the tank in place under the seat and bolt it and secure it to the frame.

I would only use the hinge system to swap out tanks. I would still fill the tank by lifting the seat.
 

Attachments

  • IMG_2862[1].jpg
    IMG_2862[1].jpg
    206.4 KB · Views: 3
  • IMG_2864[1].jpg
    IMG_2864[1].jpg
    172.9 KB · Views: 4

2SlickNick

American Minibikes @ FB
Messages
2,758
Reaction score
30
Location
Mesa, AZ.
Well my always changing mind, did it again:eek: I decided to not put the tank under the seat. The crappy gas tank should not be a permanent fixture to this project.:2guns:

I decided to keep going with the tank cradle and just adapt it to use with any HF 212 engine. So here is what I came up with...
I used a 1.25" angled steel, drilled to holes 4" apart, cut to make a bend tabs out, and just weld that to the tank cradle.

It leaves plenty of room to keep fuel lines off hot engine and for a gravity flowing fuel. Once clean and tighten it down it should look pretty nice.
 

Attachments

  • IMG_2882[1].jpg
    IMG_2882[1].jpg
    288 KB · Views: 8
  • IMG_2881[1].jpg
    IMG_2881[1].jpg
    278 KB · Views: 9
  • IMG_2880[1].jpg
    IMG_2880[1].jpg
    241.5 KB · Views: 6
  • IMG_2879[1].jpg
    IMG_2879[1].jpg
    302.1 KB · Views: 6

2SlickNick

American Minibikes @ FB
Messages
2,758
Reaction score
30
Location
Mesa, AZ.
Shocks arrived in the mail today :)

I ended up cutting 3" inches off the DB forks and 7" off the new shocks.
DB tube is 7/8" OD and the shocks are 7/8" ID. I just used a flap disc to smooth the DB forks and slid the shocks on.

I did some of my worse welds ever, got mad and laid crappy welds on crappy welds. I think the wire feeder was jamming...
One day I will get a nice gas mig.

Needless to say I spent alot of time using the flap disc and still need make it looks a little better. Also I did not notice the handle bars were just a little out of plumb. Next time I will check before I weld. I will take a BFH or press and bend those straight.

Even though I haven't driven with the shocks one - I can tell they are going to help out tremendously with the ride. I can bottom them out with all my body wait and pushing down on them. Not too stiff and not too soft. There are about 3-4" absorption.
 

Attachments

  • IMG_2889[1].jpg
    IMG_2889[1].jpg
    267.4 KB · Views: 13
  • IMG_2890[1].jpg
    IMG_2890[1].jpg
    368.5 KB · Views: 21
  • IMG_2888[1].jpg
    IMG_2888[1].jpg
    353.3 KB · Views: 17
  • IMG_2887[1].jpg
    IMG_2887[1].jpg
    271.2 KB · Views: 17
  • IMG_2885[1].jpg
    IMG_2885[1].jpg
    379.1 KB · Views: 15

kevbo22

Member
Messages
347
Reaction score
0
Location
Colorado
Nice, came out pretty good :thumbsup: Im still debating if I want to go this route. But those are quality units and you would recommend them now that you have them?
 

2SlickNick

American Minibikes @ FB
Messages
2,758
Reaction score
30
Location
Mesa, AZ.
Thanks. In a few months:auto:

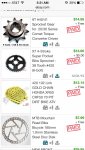
I still need new hydraulic brakes $50( I put the old ones on my daughter's mini), sprocket $39 ( AGK is the only one who sells a #35 to fit this X7 pocket bike rim), disc brake $7 ( the 6 bolt pattern is the same as a mountain bike), rear tire $30, and some hardware.
 

2SlickNick

American Minibikes @ FB
Messages
2,758
Reaction score
30
Location
Mesa, AZ.
Well I went ahead and taped up the shiny parts and primed the forks. That way I don't have to worry about rust or anything over the winter. When the weather gets warmer I will paint everything. Until then I will prime and wet sand as needed.
 

Attachments

  • image.jpg
    image.jpg
    429.9 KB · Views: 5

2SlickNick

American Minibikes @ FB
Messages
2,758
Reaction score
30
Location
Mesa, AZ.
I have been pretty busy and haven't had any time to work on the Baja Doodle Devil. But I did order some parts to get the pocket bike rear wheel going. I ordered a 130/50-8 street tire not pictured and i ordered 8t and 9t JS sprockets. I will use 9t for solo riding and 8t for pulling sidecar.

I also converted from #35 chain to #420.

All I have left to do is prep, prime and paint frame. Then add hydraulic shocks. And it should be good to go...
 

Attachments

  • image.jpg
    image.jpg
    177.5 KB · Views: 3

2SlickNick

American Minibikes @ FB
Messages
2,758
Reaction score
30
Location
Mesa, AZ.
Getting closer

Primed and ready for paint ( maybe over the weekend, since it should be 54*F ). Some parts arrived and I sure do like the gold chain:cool:
Just waiting on JS sprocket and tire now.

I still need a rear hydraulic brake and see if I can add front brake.
 

Attachments

  • IMG_2953[1].jpg
    IMG_2953[1].jpg
    286.4 KB · Views: 7
  • IMG_2954[1].jpg
    IMG_2954[1].jpg
    366.2 KB · Views: 9
  • IMG_2951[1].jpg
    IMG_2951[1].jpg
    275.5 KB · Views: 16
Status
Not open for further replies.
Top