Newbie needs help with cart ID and parts.

Status
Not open for further replies.

Whitetrashrocker

Inmate #952016
Messages
4,934
Reaction score
4,239
Location
Southern New Mexico
Internals look good.
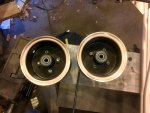
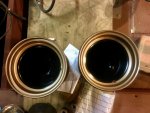
The torque converter looks like it's all there. Take them both apart, polish the belt surfaces on the sheaves. Lube them properly and good to go there. How are the rubber buttons on the driveN unit?

The sprockets look like range targets. With that amount of wear it will eat a new chain in no time.

Can you use them till you find another setup? Sure. Just buy cheap chain and keep replacing it.

Nice find though. My Dingos were in about the same shape. A few weeks if prettying up stuff and your good to go.
 

Slimmpd

New member
Messages
82
Reaction score
0
Location
Calera Alabama
Haven't taken the unit apart yet. Spent the morning putting new front spendels, not carter but these allow more can't at the bottom of the wheel/tire so it looks meaner. Seemed to line up well. Also polishing all the rust and grime off the new axel. The old owner hit a tree hard enough to bend the original axel behind the hub, rims is still straight but the axel castle nut was broken and wielded back together. Seems a lick that hard would have caused more damage but nothing else broken or out of shape. Maybe he thought it was worse than it is, idk.

---------- Post added at 02:28 PM ---------- Previous post was at 02:26 PM ----------

What are you doing for sprockets?
 

Slimmpd

New member
Messages
82
Reaction score
0
Location
Calera Alabama
I do have access to a press. I'll keep the bent one and try to get it straight. The guy thru in another carter? axle, he had. Ever tried one of those blank sprockets where you have to drill the mounting holes. The mount holes on my big one are 3 1/8 c-t-c. I just started looking but haven't found one yet.
 

Hellion

Murderator
Messages
8,976
Reaction score
3,980
Actually, the big sprocket has plenty of life left in it, just clean it up some and start fresh--I'm a firm believer in cleaning everything up during each maintenance cycle, so you can see problems before they start (fresh oil leaks versus old ones, etc.).

The small sprocket looks decent too. Everything you photographed has honest wear-and-tear on it and no real signs of neglect or abuse.

The Torq-A-Verter looks complete and serviceable once wire-wheeled and cleaned of the rust. Replace any worn parts or "buttons" and you're good to go.

The inside of the engine looks good. You can have a really grungy, dirty looking engine on the outside but once opened up, they are typically bright and shiny and exhibit acceptable wear on the inside. I would check all your bearing surfaces like the crankpin journal on the crankshaft and the two outer journals (and the plain or roller bearings on the PTO and magneto side of the block) for deep scoring or scratches. I doubt you will find any.

I'd just clean it all up and go.
 

Slimmpd

New member
Messages
82
Reaction score
0
Location
Calera Alabama
Any body make an adapter or a different hub that would with this 1 inch axel that would let me run a different sprocket. Something other than a sprocket that is 3 1/4 c-t-c mounting holes. Is there something out there that's easy or would I have to get new hub, and a new rim too?
 

Hellion

Murderator
Messages
8,976
Reaction score
3,980
Any body make an adapter or a different hub that would with this 1 inch axel that would let me run a different sprocket. Something other than a sprocket that is 3 1/4 c-t-c mounting holes. Is there something out there that's easy or would I have to get new hub, and a new rim too?

If your axle is keyed, there are sprockets available that will fit the axle diameter alone. I don't understand what your final drive looks like. Do you indeed have an integrated sprocket/hub/wheel assembly?


I think once everything is tidied up, you can reassemble your kart and go.

As I said before, your sprockets are fine. They do not exhibit the features of severely worn sprockets at this time. Look up worn sprocket photos on the interwebz if you have your doubts.
 

Slimmpd

New member
Messages
82
Reaction score
0
Location
Calera Alabama
No neither sprocket is attached to the wheel. I've been looking at some of the go kart supply places online. The sprocket I have is a 4 bolt with 3 1/4 inch center to center bolt holes. I haven't been able to find a sprocket that matches the one I have. Different hole pattern or bolt hole spacing. Found several to fit the axel but they won't fit the the hub I have, unless I'm missing something. Just wondering if there was an adapter or something that would allow me to fit a sprocket with a different hole size/spacing and still use my hub/rim. I did find 1 that comes not drilled, same size and tooth count. Worst case I could get that one and use my old one as a pattern on my drill press. . Getting late I hope I'm making sense.
 

Slimmpd

New member
Messages
82
Reaction score
0
Location
Calera Alabama
Coming together nicely

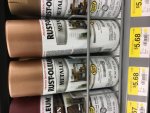
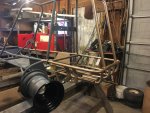
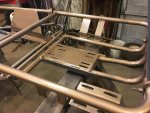
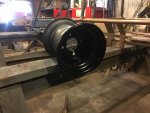
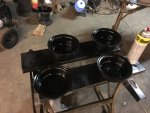
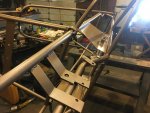
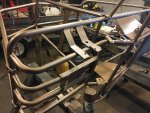
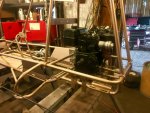
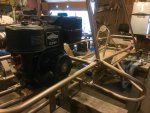
Rims stripped, primed and painted. Same for the frame and all the hardware. L-head Briggs 8hp back from the shop tuned and running right. Comet 40 stripped, cleaned and put back together. Rose Gold Metallic and satin black for a Smokey and the Bandit theme. The old Briggs will idle down to about 7 or 800rpms. It's got a thump like a Harley missing a plug.
Santa is ahead of the game this year.
 

Attachments

  • IMG_1760.jpg
    IMG_1760.jpg
    358.2 KB · Views: 5
  • IMG_1761.jpg
    IMG_1761.jpg
    356.1 KB · Views: 5
  • IMG_1762.jpg
    IMG_1762.jpg
    321.1 KB · Views: 6
  • IMG_1763.jpg
    IMG_1763.jpg
    270.4 KB · Views: 5
  • IMG_1764.jpg
    IMG_1764.jpg
    250.8 KB · Views: 4

Slimmpd

New member
Messages
82
Reaction score
0
Location
Calera Alabama
More
 

Attachments

  • IMG_1767.jpg
    IMG_1767.jpg
    290 KB · Views: 5
  • IMG_1769.jpg
    IMG_1769.jpg
    312.5 KB · Views: 4
  • IMG_1768.jpg
    IMG_1768.jpg
    320.7 KB · Views: 4
  • IMG_1766.jpg
    IMG_1766.jpg
    341.8 KB · Views: 3
  • IMG_1765.jpg
    IMG_1765.jpg
    216 KB · Views: 4

Hellion

Murderator
Messages
8,976
Reaction score
3,980
Nice color choice; metallics are very nice but get short shrift around here it seems.
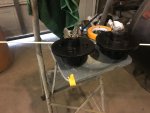
That's the best use of a paper plate outside of holding picnic food...

Is this your build thread or just a random posting? :rolleyes: :D
 

Slimmpd

New member
Messages
82
Reaction score
0
Location
Calera Alabama
It's the Carter, I didn't even think about starting an official build thread. Just glad I'm almost thru with it so i can sort out the Murray. Should have just painted and re powered that on. Thought I'd do a complete go thru just to make it right. New bearings, all surface rust, everything. Big mistake, I'm learning. Back axel would roll but all attachments are/were rust welded together. Had to destroy one rim, it was bent anyway and have been heating,soaking and beating everyday trying to at least the other rim, brake disk. Caliper was toast, fell all to pieces when I put a wrench on it. Lots of hiding places on that kart when rust can form. Had to invent ways to get to it. Really should have invested in a live axel kit and 4 bolt rims. Still may if things don't change.

---------- Post added at 09:48 PM ---------- Previous post was at 09:41 PM ----------

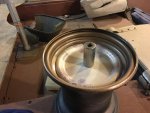
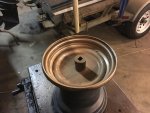
On the paint, Rose Gold Metallic. Turned out less rose so it worked out pretty good. Krylon max grey primer maybe made a difference in how the color turned out. I'll post pics of the rims tomorrow. Walmart 6 inch paper plates for the 8 inch rims and a smaller one for the front. Weighted down by a big socket. Sealed up good, made a nice clean paint line. Krylon clear enamel, to help seal it up.
 

Slimmpd

New member
Messages
82
Reaction score
0
Location
Calera Alabama
Ozfab
Sorry if I'm not posting something right, still learning my way around the site. Feel free to put it where it's supposed to go.
Little more progress:
 

Slimmpd

New member
Messages
82
Reaction score
0
Location
Calera Alabama
Few more

Works no on the axel and waiting in the cnc shop converter.
 

Attachments

  • IMG_1772.jpg
    IMG_1772.jpg
    378 KB · Views: 3
  • IMG_1773.jpg
    IMG_1773.jpg
    291.1 KB · Views: 3
  • IMG_1774.jpg
    IMG_1774.jpg
    319.4 KB · Views: 3
  • IMG_1775.jpg
    IMG_1775.jpg
    262.2 KB · Views: 3
  • IMG_1777.jpg
    IMG_1777.jpg
    327.9 KB · Views: 3
Status
Not open for further replies.
Top