Newbie needs help with cart ID and parts.

Status
Not open for further replies.

Slimmpd

New member
Messages
82
Reaction score
0
Location
Calera Alabama
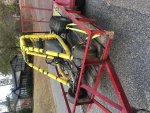
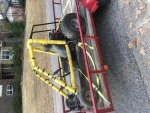
Yard sale find. Guy said it was a carter, didn't say how old. Model number on the Briggs 8hp magnetron puts it at 08/1992 for the motor.
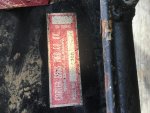
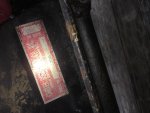
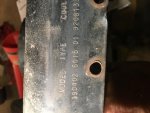
The frame tag is hard to read but the last four I believe is 1708.
Never owned a kart before but couldn't pass this up for $40. Rear axel is bent said he got a tree, came with replacement axel bearings, rear hubs, new frt hubs, several drive belts. Has a comet drive pully but don't know what model can only read comet on it. Frame is pretty heavy duty and straight and is what I think is adult sized. It will be a stretch for my 11yo to operate and he's a big kid. I've tried to pull up info on carters but no luck not being able to read the whole model number off the plate/sticker.
I'm committed to fixing this thing up and letting the kids have at it. I'm gonna need a new sprocket and chain. Don't know how to judge the drive pulley or tq converter. Changed oil and plug in it today, fooled with the carb and she fired right up. Ran good and didn't smoke. Had a metal squealing sound that sounded like it was coming from the recoil starter cover?. I pulled the cord out of the handle earlier and had to take the cover off to fix that. So maybe didn't put it together right. Dropped the tear axel and got the hubs off. Will try to get the new one shined up and put back together tomorrow.
This thing seems solid but I don't know anything about them.
Are parts pretty generic or am I really gonna need the cart model to get it sorted out right?
My first post. I uploaded several photos, I hope I did it right if not I'll try again.
Any help would be appreciated.
Thanks
 

Attachments

  • IMG_1586.jpg
    IMG_1586.jpg
    686.8 KB · Views: 19
  • IMG_1588.jpg
    IMG_1588.jpg
    649.1 KB · Views: 13
  • IMG_1589.jpg
    IMG_1589.jpg
    438.8 KB · Views: 10
  • IMG_1590.jpg
    IMG_1590.jpg
    291 KB · Views: 7
  • IMG_1592.jpg
    IMG_1592.jpg
    380.6 KB · Views: 6
Slimmpd

New member
Messages
82
Reaction score
0
Location
Calera Alabama
Also the guy said this kart would run close to 40mph with him on it and he weighed about 160. Don't know if that's true or if it will help ID it, just throwing it out there.
 

Hellion

Murderator
Messages
8,944
Reaction score
3,950

Slimmpd

New member
Messages
82
Reaction score
0
Location
Calera Alabama
Man thanks. That's a lot more than I've been able to find. I don't know why the photos loaded like that. They were straight when I hit the button.
Is this a good kart or just so-so?
 

Hellion

Murderator
Messages
8,944
Reaction score
3,950
They're good and Made In USA. Can't beat that! However, that yellow foam padding is an eyesore and should be removed post-haste! :ack2: :D

The forum software only recognizes photos in landscape orientation which is the way you're supposed to take pics with a smart phone. Or something like that.
 

Slimmpd

New member
Messages
82
Reaction score
0
Location
Calera Alabama
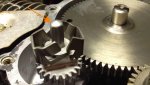
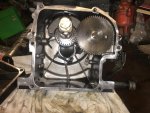
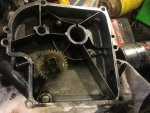
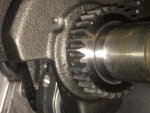
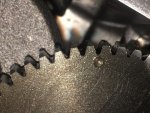
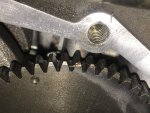
Gonna fix the padding, plan in the works. Now for another issue. Got it started, idled smooth. Shut it off and decided to tackle an oil leak at the cc gasket. Real careful not to ding the aluminum and as the cc gave away, I had the motor leaning back on the shield to keep the mess down. Appearently the oil wasn't changed much as there was a layer of sludge about 1/4 thick at the bottom of the case. Good news was that all gears looked good and only a little, I mean very little metal shaving were found in the sludge. Started to carefully clean all that out and found where Briggs hide their spare parts.
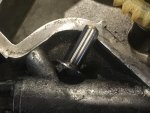
Don't know what it is yet and forgot to take a photo but it's a tube with an inside I'd of about a 1/4 of an inch. Approximately 1 and a 1/4 long. Flaired on one end and rounded but closed on the other. I'm looking on a parts diagram trying to identify the part but no luck yet.
As before it's a Briggs 190402. The diagram I'm looking at, the part likes like a valve tappet but the part I found is not solid but hollow from the flair to the round bottom end.
Any ideas.
I'll take some photos tomorrow and post if no one can figure it out. I'm not an engine guy so this has me stumped.
 

Hellion

Murderator
Messages
8,944
Reaction score
3,950
Pictures will always help--we're like doctors trying to diagnose from thousands of miles away on the written word alone, if there's no pics.

My first impression is that it's something or some part of the governor. Is the governor intact? It sounds like the central "boss" that nests inside the governor gear.

I wouldn't be too concerned about the sludge on the bottom of the crankcase. These engines don't have full pressure lubrication--it's just a slinger/dipper so all the gunk, particles, dirt that gets past the air filter collects on the bottom instead of getting trapped in an oil filter.

Always a good idea to change the oil when it's hot so that stuff has a chance to drain out. These engines should be tilted 45° or so when draining the oil as well.
 

Hellion

Murderator
Messages
8,944
Reaction score
3,950
This is not the same engine, but the part with the arrow is what I'm thinking it is. It's hollow and flared on the bottom.

The rounded end is what acts upon the governor arm (looks like a paddle) that protrudes into the crankcase and on the other end is connected to the carburetor by levers and pushrods (or wires).
 

Attachments

  • Governor.jpg
    Governor.jpg
    52.8 KB · Views: 8

Slimmpd

New member
Messages
82
Reaction score
0
Location
Calera Alabama
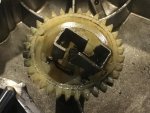
That's it. The plastic gear that stays on the cc that has the metal (jaws)? Does not have anything in the middle of it. That little tube looks just like what I found. What does it do?
 

Hellion

Murderator
Messages
8,944
Reaction score
3,950
What is the cc exactly?

EDIT: crankcase, right? That's actually called the sump cover (the removable cover that the governor is mounted to).

The metal jaws on either side of the metal peg in my photo above are centrifugal weights that fling out with an increase in RPMs. They then force the central peg upward where it pushes upon the paddle-shaped lever. This lever is then what slows the engine back down because it closes the throttle butterfly, via the wire pushrod previously mentioned.

It's a relatively complicated setup. You can remove it all though, and have your throttle connected directly to the butterfly (throttle plate) on the carb. The engine will not over-rev though because valve float will occur at around 5,000 revs, give or take. The engine will not be able to overcome valve float on its own--so there's your safety margin. ;)

On an intact engine, the governor keeps the engine at 3600 RPM which is sort of the industry standard for power equipment.

But we wanna go faster, right? Unlock the engine's true potential!
 

Slimmpd

New member
Messages
82
Reaction score
0
Location
Calera Alabama
Gotcha. I was worried it was something bad. It won't let me upload the PDF I found but it's from a Briggs manual and doesn't show that part. I understand where it goes now. The metal jaws are splayed open, I guess when I reinsert that piece they will close and hold it in place. If not reassembly is gonna be tough. When I removed the "sump" to clean the old gasket off and do a light polish, I tried to place the sump cover back on the case to keep out dust, whatever, until the new gaskets get here, it doesn't seem to want to go back on. Is it sopposed to be real tight or am I doing something wrong. I got it up square but it wouldn't go, then I tapped on it real easy with a rubber mallet. Still doesn't want to go back together. Nothing appears misaligned.
 

Hellion

Murderator
Messages
8,944
Reaction score
3,950
Gotcha. I was worried it was something bad. It won't let me upload the PDF I found but it's from a Briggs manual and doesn't show that part. I understand where it goes now. The metal jaws are splayed open, I guess when I reinsert that piece they will close and hold it in place. If not reassembly is gonna be tough. When I removed the "sump" to clean the old gasket off and do a light polish, I tried to place the sump cover back on the case to keep out dust, whatever, until the new gaskets get here, it doesn't seem to want to go back on. Is it sopposed to be real tight or am I doing something wrong. I got it up square but it wouldn't go, then I tapped on it real easy with a rubber mallet. Still doesn't want to go back together. Nothing appears misaligned.

Is the governor arm still intact? The paddle on the end of the arm, that is attached to the block might be what keeps the metal peg on the governor in place. I'm just going off memory here.

This could have been something bad though, since part of the governor was on the bottom of the engine. I don't know what happened to put it there. The metal jaws may also be slotted to hold the rim of the metal peg.

Sometimes the sump covers are tricky to install--I know exactly what you're talking about. It has to go on perfectly "square", no canting to one side or the other or it will bind. There's no issue with tapping it on lightly with a rubber mallet around the edges, in a circular motion.

It is also tricky to fit the sump cover over the PTO shaft. So take care there when you do it to preserve the oil seal in the sump cover. Otherwise it can get damaged and you'll leak oil there too...
 
Last edited:

Slimmpd

New member
Messages
82
Reaction score
0
Location
Calera Alabama
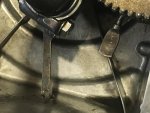
The arm is still there. Don't know if it's bent or what, I don't have anything to go by. There has to be a way to lock that part into the jaws, if not it will be just plain luck getting it to go back together since the sump cover fits so tight, I'm gonna have to bump or tap in in place. If nothing holds onto it I don't see it staying in place. I'm going to get back to it after I drop the kids off this morning. I'll take the phone and take photos of whatever I bump into.
Many thanks for your help on this.
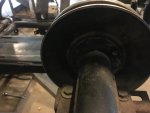
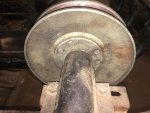
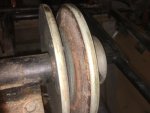
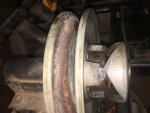
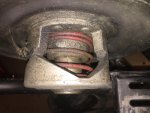
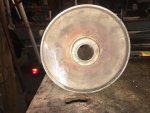
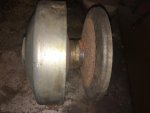
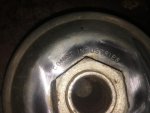
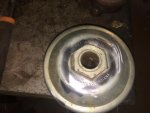
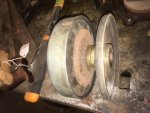
You might want to start thinking on comet 40 series spring replacement or rebuild or if it's just better to put in a whole new Unit. Drive and driven has some corrosion on both parts, not sure how bad, bad is. I'll take pics, Haven't got that far yet, just picked up the kart Sat and only started the motor for a minute and then started replacing old parts with new that came with the deal, new rear brakes, front spindles, rear axel and bearings.
Going to need to figure a way to add more adjustments to the seat for the shorter kids or make the pedals longer. Frame looks good, guy tried to thread between two trees at speed, left rear hit hard enough to bend the axel behind the left rear hub. Hub still appears to be square. Other than a few dings on the frame wings in front of the rear tires and a ding on the front bumper all of which o think I can straighten, the frame is good. No rust or corrosion. No mounting holes or slots bent or wallowed out. No busted or cracked wields that I've found.
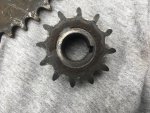
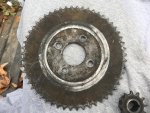
The kart runs 22's on the back, both sprockets look to be original, 12-54, for a 40 chain. Been playing with the gear calculator. The calculator says 51mph for that combo.
Kind of hard to believe that with only 8hp but the adult I got it from said it would run close to 40mph with him on it. He was about 160/170, if he's telling the truth there's no telling what it will do with a 110 pound kid driving it. May have to change the tooth count.
Again thanks for the help, I'm sure I'll be posting more questions/problems.
 

Slimmpd

New member
Messages
82
Reaction score
0
Location
Calera Alabama
Looks like everything's is there.
 

Attachments

  • IMG_1612.jpg
    IMG_1612.jpg
    356.4 KB · Views: 3
  • IMG_1611.jpg
    IMG_1611.jpg
    317.8 KB · Views: 3
  • IMG_1610.jpg
    IMG_1610.jpg
    284.9 KB · Views: 4
  • IMG_1609.jpg
    IMG_1609.jpg
    280.5 KB · Views: 4
  • IMG_1608.jpg
    IMG_1608.jpg
    259.2 KB · Views: 5

Slimmpd

New member
Messages
82
Reaction score
0
Location
Calera Alabama
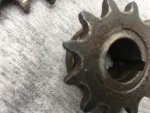
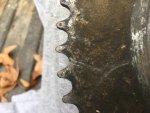
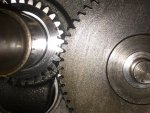
Keep and use these or chunk them?
 

Attachments

  • IMG_1605.jpg
    IMG_1605.jpg
    266.6 KB · Views: 2
  • IMG_1604.jpg
    IMG_1604.jpg
    543.9 KB · Views: 4
  • IMG_1603.jpg
    IMG_1603.jpg
    230 KB · Views: 5
  • IMG_1602.jpg
    IMG_1602.jpg
    558 KB · Views: 6
Slimmpd

New member
Messages
82
Reaction score
0
Location
Calera Alabama
Here's what I'm dealing with on the drive system. I know this isn't what you want but I think I can clean them up pretty good. Might be rough on the belts but I got 3 new ones with the kart.
 

Attachments

  • IMG_1617.jpg
    IMG_1617.jpg
    216 KB · Views: 2
  • IMG_1618.jpg
    IMG_1618.jpg
    319.1 KB · Views: 2
  • IMG_1619.jpg
    IMG_1619.jpg
    207.4 KB · Views: 3
  • IMG_1620.jpg
    IMG_1620.jpg
    259.5 KB · Views: 2
  • IMG_1621.jpg
    IMG_1621.jpg
    343.1 KB · Views: 2

Slimmpd

New member
Messages
82
Reaction score
0
Location
Calera Alabama
More
 

Attachments

  • IMG_1626.jpg
    IMG_1626.jpg
    328.9 KB · Views: 0
  • IMG_1625.jpg
    IMG_1625.jpg
    341.6 KB · Views: 1
  • IMG_1624.jpg
    IMG_1624.jpg
    209.2 KB · Views: 1
  • IMG_1623.jpg
    IMG_1623.jpg
    304.3 KB · Views: 1
  • IMG_1622.jpg
    IMG_1622.jpg
    263.1 KB · Views: 1

Slimmpd

New member
Messages
82
Reaction score
0
Location
Calera Alabama
These look fine so that's good.
 

Attachments

  • IMG_1613.jpg
    IMG_1613.jpg
    252.1 KB · Views: 2
  • IMG_1614.jpg
    IMG_1614.jpg
    475.6 KB · Views: 2
  • IMG_1615.jpg
    IMG_1615.jpg
    371.4 KB · Views: 2
  • IMG_1616.jpg
    IMG_1616.jpg
    398.2 KB · Views: 1

Texan

Senor Member
Messages
461
Reaction score
11
Location
Deep In The Heart of Texas
Keep and use these or chunk them?

I would keep the big sprocket for sure. I am also in the process of rebuilding a Carter Brothers kart. You will have trouble finding replacement parts (as did I) because they are out of business and the bolt pattern on their wheels, hubs, brake drum and drive sprocket are unique. I had to replace a rear hub on mine, but couldn't find one, so had to modify the wheels to accept a similar hub.
 
Status
Not open for further replies.
Top