bob58o
SuckSqueezeBangBlow
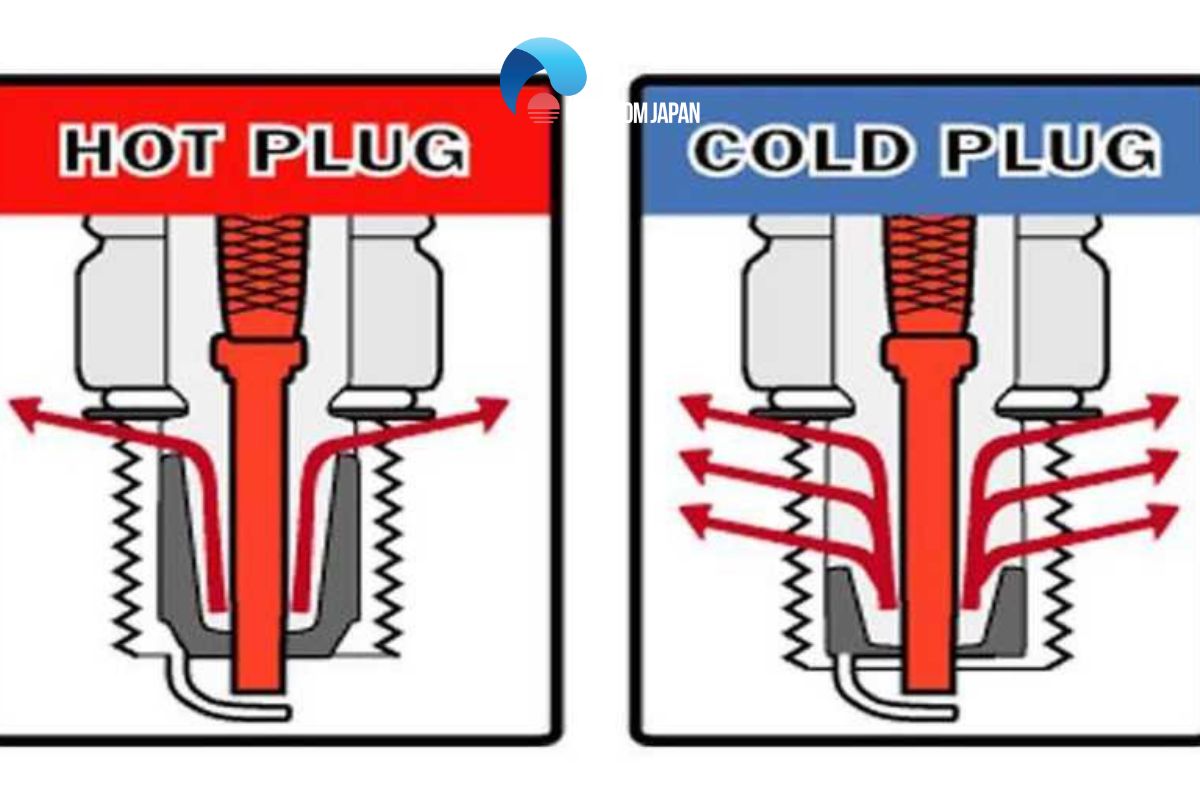
Why are you using heat range 9 plug? It’s a cold plug. 3 ranges colder than stock. Get a BP6ES, plug and see if it still fouls out.
It's definitely not falling on its face!!!!@BrownStainRacing I did some testing with the same jetting size and I don’t have numbers for amount of time to get from idle to WOT but I do have some qualitative information.
Based by adjusting the idle/air for highest idle, I get the highest idle rpm at 1.8 - 2 turns out, going from 2k at a little bit past 2 turns out to 2.5k at 1.8 turns before going back down in idle rpm.
Loosening the screw gets the engine sounding almost like it’s chocking out(this is at around 2.5 turns). I checked the plug after running it for not even a minute and it was completely fouled up, carbon buildup.
So unless I’m doing something wrong, it likes being leaner
RPM engagement of ~ 3000
*** One thing I realize is that there is a high possibility that the stock t/c on the go kart is a Chinese off brand***
I attached a video of WOT, turning max rpm of 5800, hopefully works
IMG_4798.MOV
drive.google.com
His build is a lil more then stock.Why are you using heat range 9 plug? It’s a cold plug. 3 ranges colder than stock. Get a BP6ES, plug and see if it still fouls out.
I'm not saying DONT try it, it's jus a plug change, test run, and readingWhy are you using heat range 9 plug? It’s a cold plug. 3 ranges colder than stock. Get a BP6ES, plug and see if it still fouls out.


 carfromjapan.com
OMB carb is keihin and got number 64YAM023.It's definitely not falling on its face!!!!
There's still something going on with the low side.
Try a .035" main jet.
Look on the main body of that carb for a brand.
ARC only makes "made in Japan" or "RuXin" carbs into SA bored carbs, unless they changed.
I'm hoping OMW didn't do a switch a-roo on you or accidentally sent you the wrong carb.
I trust nobody.
Look at the stock carb too.
It's making the power, you can hear how fast it's moving the t/c into high and pulling the rpm up fast.
Most will drop rpm when it goes into high and never recover.
Set it where you think it's best with a .035" main jet, you got a good ear, tach and temp gauge to help.
Install a new plug and run it hard to get temp in the engine, temp is part of the tune. That PVL flywheel keeps it cool, maybe too cool.
Get another plug reading, watch for a max temp, and we can move on from there.
Good job!!
Keihin is Japan, so that's good. Theres no telling what that other 1 is,OMB carb is keihin and got number 64YAM023.
My old carb was yinba.
I put in the .035, left everything else alone. I did a couple tests idle to WOT at operating temp and it still seems to like 1.8 - 2 turns out, not leaving any rubber behind. Tested in 1/8 increments from 2.25 to 1.75 turns. Also the idle rpm is still higher at ~2
then put in plug, no difference. I didn’t change the air/fuel tho kept it at little under 2
Top rpm was 5800, then drops to 5k before topping out at 5200
My brother wanted to hop in as well(80lb) so that would ~235lb combined, and the kart had a crazy jolt from idle to WOT, almost like it was pulling even harder! Maybe it’s something as simple as more gear reduction
Temp was ~235f cruising around at higher speeds, ran a couple doughnuts and it hit 265f
PCV system is holding up, it does have a very small oil accumulation on one of the threads, the one where I made the additional hole and doesn’t have many threads to grab onto.
The driven side of my t/c has a nut that keeps getting loose, I impact driver it to tighten it, but got loose twice so far. Thinking of just loctiting it.
Got around 40-45 mins of driving on that new plug, didn’t change nothing besides riding it in
. .  .
. 


Get both. After you get em lapped to seat you can see which ones gonna work best, probably the longer one, who knows. Ive used both for builds.Alright my exhaust valve length measures as 2.45” and intake as 2.52” jus for when I need it
Racing Cams and Parts | Ducar Exhaust Valve | CL-1125 | DynoCams
The CL-1125 Exhaust Valve is a Ducar OEM clone part for 196cc OHV clone engines. | CL-1125www.dynocams.com
Racing Cams and Parts | Stainless Steel Exhaust Valve | CL-1126 | DynoCams
Explore a World of Parts: Find the Components You Need for Your Projects. From Mechanical to Electronic, Discover a Vast Selection of High-Quality Parts to Fuel Your Creativity. | CL-1126www.dynocams.com
First one 2.445” other is 2.448 inches long.
Im also getting 2 new rocker studs, the other one was slightly bent as well.
2 new valve springs
New 14cc head form Omb
Piston rings (already have a good spare piston)
-0.04” pushrods, chromoly ones were just 3 bucks
should I get thinner and thicker lash caps in case I need to change anything around?


I already got the old ones, should I put them in the “for later” bag?Get retainers too. 2 exhaust, so you can lock em in.
I've used worse, you can clean that up with a scotch pad.While I’m back in the engine do these con rod bearings look good to you? Don’t want anything seizing at 5k
Retainers are like everything else. Different thicknesses will call for different spring shims.I already got the old ones, should I put them in the “for later” bag?


Don't open up the runner, jus knock the sharp edges off where the gasket sets.I went ahead and just blending the port to bowl transition on my new 14cc head. On the short turns and next to the valve guide, and then the bowl to valve as well. Didn’t take too much out. What sort of bit should I use to “smooth” out the intake? on a different older thread I saw @bob58o using 80 grit on the intake. Third pic is a sanding bit I have lying around. How do y’all go about porting?
jeez....it jus a "turd motor".
