Help needed and updates
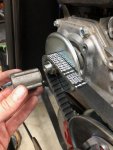
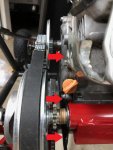
Hello all, I could use some help. I'm putting the new clutches back on and I'm concerned with some spacing issues. How much additional drive shaft should you have to mount the clover hub (and outer sheave assembly) once the inner sheave of the driver clutch is on?
I put the two spacers on against the motor, then mounted the inner sheave and have about 5/16 left, which I cannot fathom is enough shaft for the clover and outer sheave. Manual calls for 2 x .250 spacers on the inside, and the original ones that I put back on measure 3/8, which is obviously incorrect. However, assuming I correct them, it still doesn't give me much more to work with.
Obviously I can reduce the spacers a bit on the drive shaft, then reduce comparably on the jackshaft, then have to move the sprocket on the axle, but I don't have too much space before I have clearance issues against the motor.
Thanks for your help.
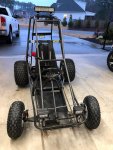
 Engine Mounted 1.jpg397 KB · Views: 23
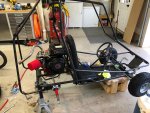
 Engine Mounted 2.jpg390.8 KB · Views: 20
 Engine Mounted 3.jpg358.1 KB · Views: 27