Manco Dingo Refurb Project

Status
Not open for further replies.

t1704

Member
Messages
61
Reaction score
0
Location
North Carolina
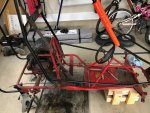
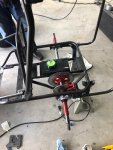
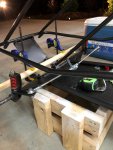
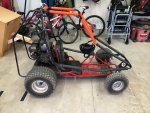
Hello all! I bought this kart for my 11 yeard old son about two months ago and then joined this forum to figure out what kind it was and to get better educated on it's particulars.

My goal initially was to give it a basic tune up to ensure it was safe and reliable, but I have learned so much from many of you along the way that I finally decided it would be a fun project for me and my son to tear it down and rebuild. I'll be honest, this is becoming somewhat of an obsession....and starting to get expensive.....but what the heck, I'm having fun and the memories my son will have are priceless.

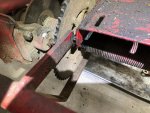
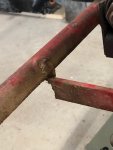
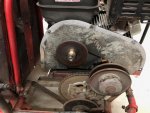
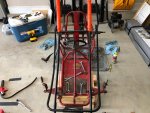
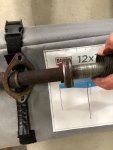
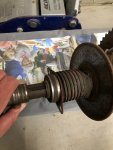
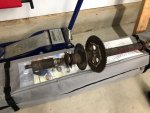
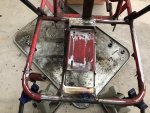
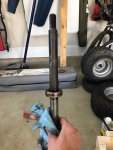
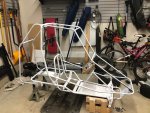
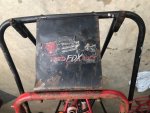
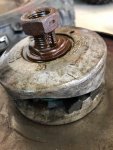
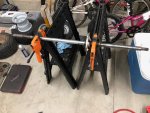
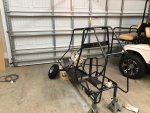
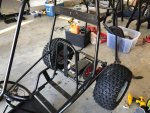
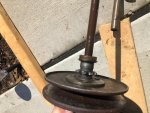
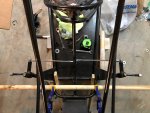
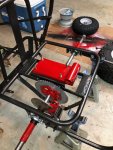
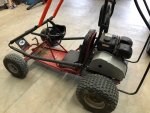
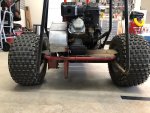
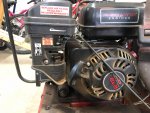
Here's a few pictures of what we started with - I'll keep you all updated as we go and look forward to your help and advice along the way.

Travis
 

Attachments

  • file.jpg
    file.jpg
    390.6 KB · Views: 28
  • file2.jpg
    file2.jpg
    307.4 KB · Views: 22
  • file3.jpg
    file3.jpg
    345.2 KB · Views: 22
  • file5.jpg
    file5.jpg
    371 KB · Views: 17

mckutzy

Well-known member
Messages
8,353
Reaction score
31
Location
bc, canada
A carb clean, brake check, drive train check( disassemble/reassemble clutch or TC for lubrication)... A good start..
 

t1704

Member
Messages
61
Reaction score
0
Location
North Carolina
Update

Hey everyone, we're close to having the kart completely torn down and I thought I would provide some updates and pictures.

* Front spindle springs were shot (and the wrong springs) - new ones ordered
* Ordered new front wheels and tires (I could have gotten away with just tires and bearings, but it wasn't much more for new wheels as well
* New throttle cable and pedal springs ordered
* 30 series is in rough shape. New clutches and belt ordered, will refurbish the original later and either keep for a backup or sell
* Rear tires were different, both 18", but different brand tires and one was clearly stock and the other was recently replaced, which I believe is what was making it pull so hard to the left. New matching tire and new live axle wheel ordered
* Speaking of rear wheels, the original one was seized on - 2 days of intermittant PB Blaster followed by a 2x4 and sledge hammer did the trick
* Carburator (I think) was seeping as this thing smells like gas big time and has an apparent leak that I cannot completely trace anywhere other than carb gaskets/seals. I could have started with new gaskets and o-ring, but went ahead and bought a new carb as it wasn't much more money - I'm sure I'll find it when I get into the motor
* Intake, exhaust and new jet ordered (obviously not completely necessary, but I couldn't help myself)
* Biggest surprise so far happened last night when we found two broken welds on the motor mount which were previously covered by the stock engine compartment floor cover/mat

I think that's it for now. Priority for the next few days will be to fix welds, remove axle, prep for paint, paint and find ancillary means to replenish bank account :)

Travis
 

Attachments

  • Broken Mount Weld 2.jpg
    Broken Mount Weld 2.jpg
    366 KB · Views: 14
  • Broken Mount Weld.jpg
    Broken Mount Weld.jpg
    198.2 KB · Views: 10
  • TAV before.jpg
    TAV before.jpg
    341.6 KB · Views: 23
  • Front top view no wheels.jpg
    Front top view no wheels.jpg
    363.4 KB · Views: 12
  • 3 wheels.jpg
    3 wheels.jpg
    418.3 KB · Views: 16

t1704

Member
Messages
61
Reaction score
0
Location
North Carolina
Update - help needed

Hey all,

So I got the motor mount welded up. Went ahead and added some additional tubing for strength, replaced the seat bracket straps with some heavier guage metal and stitched several other areas so this thing should be stout.

Next I starting tearing into the axle to inspect everything and while the bearings turn, it's obvious they're old so no sense in not replacing at this point. This is where I am a bit perplexed...

This is a keyed live axle, but the keyway does not extend the entire length of the axle. One bearing appears to be correct with the set screw (closest to sprocket), but the bearing on the other side appears to be just pressed on as there is not any keyway in that particular part of the axle. I checked the manual and part number then went to Google and the part number returns a hex axle..., which i don't think is correct? Also, this axle is 39.5", which i assume is too long and explains why the prior owner had two lugs on each wheel.

So, although this axle did work, i hate to put it back on with old bearings. I'll spend some time searching the forum later, but if you can help, what am I missing here?
 

Attachments

  • file1.jpg
    file1.jpg
    365 KB · Views: 12
  • file3.jpg
    file3.jpg
    227 KB · Views: 12
  • file2.jpg
    file2.jpg
    332.3 KB · Views: 18
  • file-1.jpg
    file-1.jpg
    418.1 KB · Views: 11

mckutzy

Well-known member
Messages
8,353
Reaction score
31
Location
bc, canada
It doesn't matter if there is a keyway or not.. There is no engagement with the axle on these type of bearings, nor need to... It's all good... Clean up the axle before you remove the old bearing...
And don't forget to put the hanger plates(the inside ones that is..) on before the bearing aswell..
 

t1704

Member
Messages
61
Reaction score
0
Location
North Carolina
Bearing help

Okay, is this bearing supposed to just slide off? Any tips other than copious amounts of PB blaster and patience? I can't get this thing to budge.
 

Attachments

  • axle bearing.jpg
    axle bearing.jpg
    254.4 KB · Views: 17

Pilot4Christ

New member
Messages
16
Reaction score
0
Location
Papua New Guinea (PNG), but from California
I’ve cut many a bearing off with an angle grinder or die grinder. Just go super slow and don’t go through the inner bearing race. Cut parallel to the axle. When you’re close, use a metal chisel to hit it in the cut and it’ll break and slide off.

By the way, nice Dingo! I really like those. It’ll be a lot of fun when you’re done.
 

mckutzy

Well-known member
Messages
8,353
Reaction score
31
Location
bc, canada
Can cut it off... But then you'll run into the same crap hanging you up on if you don't clean it well anyways....
The end your trying to get over is rusty, it needs some real polishing like the other side of the bearing where it's smooth and slightly worn... Clean up the plowed up material in front of the bearing and get some scotchbrite pads to bring that all up to a good relatively clean smooth finish.

Get a piece of pipe that fits the shaft, attempt to move the bearing towards the center, to break free the bearing.. Then polish that area. Try using that pipe kinda like a slide hammer but the opposite side to remove it from the shaft(don't forget to polish it first).. Use a wood block on the threaded end as to not mar that up..
 

KartFab

Active member
Messages
3,381
Reaction score
9
Location
Dallas, TX
wire wheel on an angle grinderr or bench grinder will get ridd of that rust on the axle pretty good. If there are any bumps on the metal afterwards, just file em down.
 

t1704

Member
Messages
61
Reaction score
0
Location
North Carolina
Progress

In the process of stripping and priming. As I was grinding through old paint on the front the what looks to be original Red Fox sticker appeared. Need to finish tearing the axle apart, then will finish priming and start painting.

Hope to make some good progress this week.
 

Attachments

  • file-1.jpg
    file-1.jpg
    392.6 KB · Views: 18
  • file-2.jpg
    file-2.jpg
    353.5 KB · Views: 15

t1704

Member
Messages
61
Reaction score
0
Location
North Carolina
Progress update

I'm sure many of you were up late wondering if I got that ignorant bearing off..... :) I did in fact and appreciate the help and recommendations.

So, got the first coat of paint on the frame and I'm currently working on the axle to get all of the old rust and crap off of it - making progress, but still have some elbow grease to apply. Then, plan to paint sprocket hub, break caliper and start reassembly of axle once new bearings arrive.

My current PITA is the driven unit, which, like everything else so far appears to be seized on. 2 days of PB blaster now and I will continue to add force, but don't want to damage so any recommendations are appreciated. I'll keep you posted on further progress, albeit rather slow as I don't have much time during the week days.
 

Attachments

  • Driven.jpg
    Driven.jpg
    324.4 KB · Views: 14
  • Cleaning axle.jpg
    Cleaning axle.jpg
    340.1 KB · Views: 18
  • First coat of paint.jpg
    First coat of paint.jpg
    342.3 KB · Views: 16

KartFab

Active member
Messages
3,381
Reaction score
9
Location
Dallas, TX
I'm sure many of you were up late wondering if I got that ignorant bearing off..... :) I did in fact and appreciate the help and recommendations.

So, got the first coat of paint on the frame and I'm currently working on the axle to get all of the old rust and crap off of it - making progress, but still have some elbow grease to apply. Then, plan to paint sprocket hub, break caliper and start reassembly of axle once new bearings arrive.

My current PITA is the driven unit, which, like everything else so far appears to be seized on. 2 days of PB blaster now and I will continue to add force, but don't want to damage so any recommendations are appreciated. I'll keep you posted on further progress, albeit rather slow as I don't have much time during the week days.

you dont need to take the driven off unless you are going to replace it. You can use snap ring pliers to remove the cam and then clean the driven unit. If you still need to remove the driven unit, go to a hardware store and buy some 3/4" tubing that is 1/16" wall and slide it over the jackshaft and pound the driven out. Sometimes you can work the key loose by putting a nail in the keyway and hammering it out first.
 

t1704

Member
Messages
61
Reaction score
0
Location
North Carolina
Thank you Sir. Yes, I do want to remove and replace without damaging the JS bearings and sprocket. Thanks for the advise.
 

t1704

Member
Messages
61
Reaction score
0
Location
North Carolina
Progress update

Not moving super fast, but still making progress. Back axle is stripped, cleaned and reassembled with new bearings. Still can't get the driven unit off the jackshaft despite all of the tools, jigs, torches, etc. At this point, I've ordered a new one along with a sprocket, some bearings and hardware before I throw that one through a window.

Plan to get the front end back together while waiting on new jackshaft and parts, then move to the motor.

Will keep you all posted.
 

Attachments

  • file1.jpg
    file1.jpg
    434.8 KB · Views: 21
  • file-1.jpg
    file-1.jpg
    342.2 KB · Views: 24
  • file-2.jpg
    file-2.jpg
    450.9 KB · Views: 23

mckutzy

Well-known member
Messages
8,353
Reaction score
31
Location
bc, canada
Need to use heat... Use a torch on the hub portions of the driven... Keep it moving...
Are there springs present??? Can't tell from pics...
If so, you might want to get a new set... Also might want to take out the buttons aswell before heating...
 

t1704

Member
Messages
61
Reaction score
0
Location
North Carolina
Need to use heat... Use a torch on the hub portions of the driven... Keep it moving...
Are there springs present??? Can't tell from pics...
If so, you might want to get a new set... Also might want to take out the buttons aswell before heating...


Yes, spring and buttons are there. Snap ring is completely rusted on so can’t get the cam off. I used a torch then had it rigged so I could smack the shaft out/through with mini sledge. All of this after about 4 days of PB blaster. Decided to just order a new one at this point given that I already had a new driven clutch.


Sent from my iPhone using Tapatalk
 

t1704

Member
Messages
61
Reaction score
0
Location
North Carolina
Progress update

More parts arrived and I'm getting the front end back together. This is the only way I can think of to roughly align the front spindles. I figured if I can get it close, I can use 2x4's or something else to put the finishing touches on once the front tires are back on. Certainly open to advice if there's an easier way. While my focus is on aligning the axle spindles to ensure I have a slight toe in, it does appear as if the kingpin on the left side angles back toward the back of the kart more than the one on the right side - curious if this will present a problem?

I will also start reassebling the jackshaft, bearings, sprocket, etc., tomorrow. The manual calls for various width spacers, but I could only find one of the 3 originals. Can I just make up the others with washers totalling the same gap needed? Thanks for any help on this or any other observations or recomendations.
 

Attachments

  • file2.jpg
    file2.jpg
    332.3 KB · Views: 15
  • file-1.jpg
    file-1.jpg
    361.8 KB · Views: 19
  • file1.jpg
    file1.jpg
    299.9 KB · Views: 16
Status
Not open for further replies.
Top