OzFab
Well-known member
More to the point, I've become the monster...
Ever since I set up my metal polisher I can't find enough things to polish. Now, don't get me wrong, there's a list but, essentially, I got it to do my wheels but, I also polished the wheel hubs, the sprocket & brake disc hubs, the ait filter adaptor, I even started on the axle... I CAN'T STOP!


After completing the column panel for the AusEx the other day I thought "it has a few marks & scratches, I better polish them out".
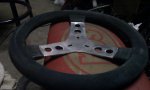
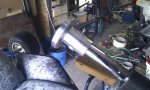
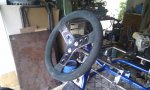
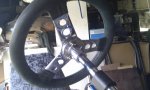
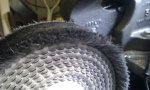
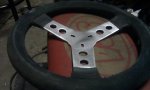
As I was fitting it I looked at the shiny, chrome plated steering shaft & up to the steering wheel adaptor & thought "that looks too dull, it needs polishing..." to make matters worse, it was rough cast so, before I polished it, I put it in the lathe to dress it... Then, when I put it back on the steering wheel looked out of place so I started sanding it (have you ever tried to remove the finish off one of those suckers? I have no idea what it is but, IT'S ON THERE!)
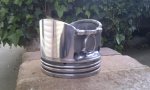
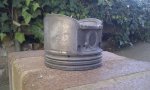
Now, a short story long: At the beginning of my working life, I was working as an apprentice mechanic in a Rolls-Royce service centre. One day while cleaning, I noticed a lone piston under one of the mechanics bench so, I asked "what's this?"
Him: It's a piston
Me: No kidding but, what's it from
Him: A 350 Chev
followed by banter about why a 350 Chev piston is under his bench in a Rolls-Royce service centre & he's a Ford nut...
Me: Can I have it?
Him: What for?
Me: I think it'll make a cool ashtray
Him: Yeah sure, let's go turn up a gudgeon plug...
As the rings were also intact, I used the thin lock rings in the oil ring groove to fill the open gap in said oil ring groove.
I was happy with it but, it always annoyed me how dull & grey it was. numerous attempts to polish it went unrewarded...
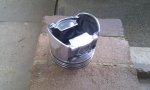
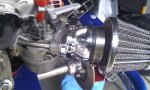
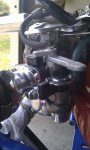
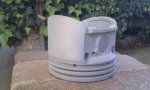
Fast forward 25 years &, again, I thought "I'm gonna try polishing it again but, this time, I'm gonna sandblast it first."
Well, 2 hours later, it was blasted & polished but, by then it was too dark to take a pic of the finished product
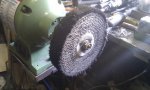
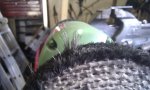
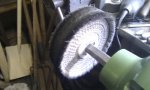
I do, however, have before & post blast pics for you to enjoy for now plus a bonus pic of the steering wheel mid sanding...
Ever since I set up my metal polisher I can't find enough things to polish. Now, don't get me wrong, there's a list but, essentially, I got it to do my wheels but, I also polished the wheel hubs, the sprocket & brake disc hubs, the ait filter adaptor, I even started on the axle... I CAN'T STOP!
After completing the column panel for the AusEx the other day I thought "it has a few marks & scratches, I better polish them out".
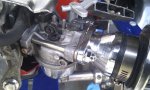
As I was fitting it I looked at the shiny, chrome plated steering shaft & up to the steering wheel adaptor & thought "that looks too dull, it needs polishing..." to make matters worse, it was rough cast so, before I polished it, I put it in the lathe to dress it... Then, when I put it back on the steering wheel looked out of place so I started sanding it (have you ever tried to remove the finish off one of those suckers? I have no idea what it is but, IT'S ON THERE!)
Now, a short story long: At the beginning of my working life, I was working as an apprentice mechanic in a Rolls-Royce service centre. One day while cleaning, I noticed a lone piston under one of the mechanics bench so, I asked "what's this?"
Him: It's a piston
Me: No kidding but, what's it from
Him: A 350 Chev
followed by banter about why a 350 Chev piston is under his bench in a Rolls-Royce service centre & he's a Ford nut...
Me: Can I have it?
Him: What for?
Me: I think it'll make a cool ashtray
Him: Yeah sure, let's go turn up a gudgeon plug...
As the rings were also intact, I used the thin lock rings in the oil ring groove to fill the open gap in said oil ring groove.
I was happy with it but, it always annoyed me how dull & grey it was. numerous attempts to polish it went unrewarded...
Fast forward 25 years &, again, I thought "I'm gonna try polishing it again but, this time, I'm gonna sandblast it first."
Well, 2 hours later, it was blasted & polished but, by then it was too dark to take a pic of the finished product
I do, however, have before & post blast pics for you to enjoy for now plus a bonus pic of the steering wheel mid sanding...
Attachments
-
 IMAG0157.jpg81.2 KB · Views: 25
 -
 IMAG0158.jpg66.7 KB · Views: 28
 -
 IMAG0162.jpg48.5 KB · Views: 23