What a coincidence....I'm getting some mowers ready for sale....but they're pick-up only...so let me know before you leave the house, Tony....
That should give you a 30 hour head start
What a coincidence....I'm getting some mowers ready for sale....but they're pick-up only...so let me know before you leave the house, Tony....
What a coincidence....I'm getting some mowers ready for sale....but they're pick-up only...so let me know before you leave the house, Tony....
How fast do they clean the roads down there. Here in Ca you can see the same debris on the side of the road for several days. I would go back and look.


![IMAG0434[1].jpg](/community/data/attachments/52/52445-e78949ad9fa769605cc2bd1df96e88e2.jpg)
![IMAG0431[1].jpg](/community/data/attachments/52/52444-df5bee83958f713516861915ed5a8b7c.jpg)
![IMAG0437[1].jpg](/community/data/attachments/52/52936-813918ad57dd14b5b33c25c96eaba999.jpg)
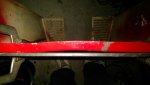
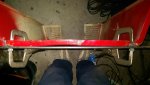
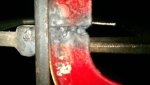
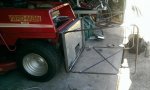
![IMAG0436[1].jpg](/community/data/attachments/52/52937-3a52015d24a1babc837ec6d29a2ca06e.jpg) Now next time you enter the Build off you wont have to pay a shop to bend your frame for you.
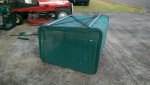
Now next time you enter the Build off you wont have to pay a shop to bend your frame for you.Nice! We need an update on that riding mower of yoursUpdate: Mower done & gone, buyer was extremely happy...
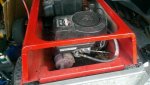
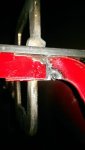
Tube Bender: I went to pull a bend & the welds broke on the guide; a quick grind & reweld & I was able to produce the framework for my riding mower catcher...
 I'm sure they'll show up...


Oops, sorry my badWhaddaya mean, I just gave you one


 Lucky I had a piece of cloth left over big enough to sew in a patch...


...
Pic 4 is #2 compression ring inside the bore...
New rings are on their way...
![IMAG0688[1].jpg](/community/data/attachments/56/56981-2fbe67d39caa726012fe396855b3348b.jpg)
![IMAG0689[1].jpg](/community/data/attachments/56/56982-2f3c77cc611d11fb7fb48c529500dca5.jpg)
![IMAG0690[1].jpg](/community/data/attachments/56/56983-2f867294e28220ae39a9c394d09b5cb4.jpg)
![IMAG0691[1].jpg](/community/data/attachments/56/56984-7880ebcce76690c81c42b81823603a02.jpg)
![IMAG0692[1].jpg](/community/data/attachments/56/56985-b408909262a3a9efbc5d3d1c99700da6.jpg)
; one tool (parting blade) did the lot in a lottle over an hour...