Inheirited an ole Manco 2-seater... any do/don'ts?

Status
Not open for further replies.

Half-breeder

"Edit" button removed
Messages
1,686
Reaction score
9
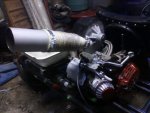
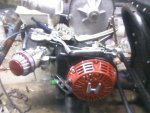
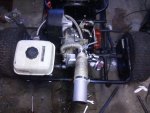
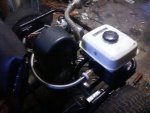
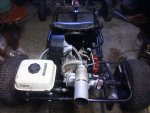
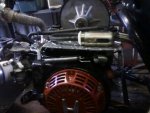
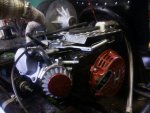
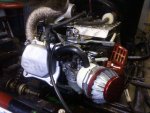
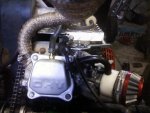
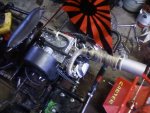
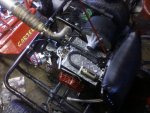
Details details details... no... not FULLY done... but getting there...
 

Attachments

  • 0122141700.jpg
    0122141700.jpg
    71.1 KB · Views: 18
  • 0122141658.jpg
    0122141658.jpg
    75.6 KB · Views: 18
  • 0122141700b.jpg
    0122141700b.jpg
    80.3 KB · Views: 17
  • 0122141658a.jpg
    0122141658a.jpg
    68.8 KB · Views: 16
  • 0122141659.jpg
    0122141659.jpg
    77.2 KB · Views: 22

Half-breeder

"Edit" button removed
Messages
1,686
Reaction score
9
Got new tires in the mail today...along w/ a fuel pump. The new tires resemble a street(car)tire... but their still considered turf saver, the corners of the tire are rounded. Looking for a Goodyear or hoosier template to plasti-dip the lettering on( yea yea yea... copy right infringement and all... sue me!)...
New tires for Lo-T...
 

Half-breeder

"Edit" button removed
Messages
1,686
Reaction score
9
... TC/CVT working right... motor working right... no fuel leakages... new tires... ice/snow on the road and below freezing(not as much 'slush')... have live axle... WILL ride! :thumbsup:
Lo-T playin in the snow
 

Half-breeder

"Edit" button removed
Messages
1,686
Reaction score
9
Where is the best place to mount the pulse fitting on my Honda gx200. Ive seen placement in the block, in the case cover, in the governor arm hole, and in the valve cover... Any suggestions? I got the round pulse pump w/ 3 lines.
 

OzFab

Well-known member
Messages
15,615
Reaction score
70
Location
Warwick Qld, Australia
Yep, they're all good...

Don't create a new hole if you have one available but, you governor is still intact & you have a barb on the filter adaptor, correct?
 

Half-breeder

"Edit" button removed
Messages
1,686
Reaction score
9
Well... from what I have been reading(past few hrs)... the governor arm hole(after removing governor) that is left over can be used... but possibly, some oil will get in the line. Im NOT drilling a hole into my block unless it's the ONLY way... but I know(now), it's not after reading this link.

I have decided to go w/ the valve cover route...
 

machinist@large

Active member
Messages
2,865
Reaction score
32
Location
West Michigan, 49331
I have decided to go w/ the valve cover route...

Do you have enough space inside the cover for a small "T" or 90* elbow fitting? That would turn the inlet direction 90* from the most likely direction of slug oil. Not sure if it all would fit, but that's the first idea that comes to mind.

Another idea would be to use a gravity feed screen type fuel filter (a clear bodied one) as an oil trap; air can move thru much smaller openings that motor oil, and it might give you a quick and dirty safety while you monitor your setup.
 

firemanjim

Just kartin' around....
Messages
5,247
Reaction score
87
Location
Houston Texas
Tihm, I put a nipple on the adapter for the line to the valve cover. Put a t and hook the pump to that too. If it's not enough suction, (should be no problem) just put a filter on the valve cover and use the nipple for the pump....
 

Half-breeder

"Edit" button removed
Messages
1,686
Reaction score
9
Wish i had known that was what i could do Jim... But none the less. I drilled n tapped the valve cover. Not much oil gets slung round in there, compared to the block/case, and what lil bit that 'may' make its way in the fitting, will drop back down cause I drilled lil holes(4), in the side of the inlets threaded area, which will cause any oil that makes it to the main opening to drop back down instead of being sucked up inside.

With this pump ill be able to move my tank to the other side of the motor, n equal out the appearance n area of items on my rearend(everything is on the left of the motor... Tank, TC/CVT, JShaft, axle gear, brake).
 

Half-breeder

"Edit" button removed
Messages
1,686
Reaction score
9
And here it is... made a deck to put the pump/filter on... only thing left is placing the tank...
 

Attachments

  • 0201141615a.jpg
    0201141615a.jpg
    76.9 KB · Views: 21
  • 0201141616a.jpg
    0201141616a.jpg
    79.2 KB · Views: 21
  • 0201141618.jpg
    0201141618.jpg
    85.9 KB · Views: 20
  • 0201141618a.jpg
    0201141618a.jpg
    78.5 KB · Views: 20
  • 0201141619.jpg
    0201141619.jpg
    99.7 KB · Views: 21
  • 0201141615.jpg
    0201141615.jpg
    93.1 KB · Views: 22

Half-breeder

"Edit" button removed
Messages
1,686
Reaction score
9
... 2-3 weeks no driving(on this kart)...
 

Attachments

  • IMG950956.jpg
    IMG950956.jpg
    94.6 KB · Views: 19
  • 0205141704a.jpg
    0205141704a.jpg
    96.1 KB · Views: 124

Half-breeder

"Edit" button removed
Messages
1,686
Reaction score
9
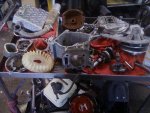
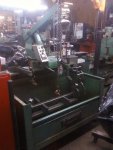
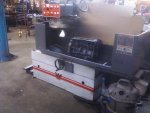
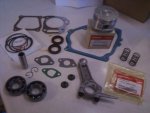
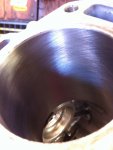
Got parts last week(pic #1)... had to wait till the bore/hone machines(pic #5) were available, n had to finagle a mount to hold the case/block on the level(no pic of mount). After the bore/hone was done(today) time to reassemble.:thumbsup:

I only had an hour to work on it... got the piston/rings/conrod/crank/bearings/seals/pistons/head/springs(using the factory ones... till i getta Billet conrod/flywheel) installed/torqued to specs... gonna finish the rest in the mornin...:thumbsup:

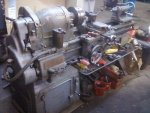
Took pics of the machines used to get this motor/parts into the fashion they are/gonna be, in.

bored +.020 and only shaved/milled -.020 off the head. I FINALLY finished my muffler(insulated resonator w/ thick end cap). I examined the governor gear, that was left in the case... someone had poured(what appears to be an epoxy) onto the lil arms that variate the rpms, on the gear itself(thus bypassing the governor(no pic... it was in pieces when I got through w/ it), n cut the inner part of the arm off(inside) to continue using it as a throttle pivoting arm. Removed the oil sensor n plugged the hole(for the wire)... more to come tomorrow....
 

Attachments

  • 0221141346.jpg
    0221141346.jpg
    70 KB · Views: 12
  • 0221141349.jpg
    0221141349.jpg
    60.7 KB · Views: 10
  • 0221141345.jpg
    0221141345.jpg
    87.8 KB · Views: 14
  • 0221141345a.jpg
    0221141345a.jpg
    71.4 KB · Views: 12
  • 0220141719.jpg
    0220141719.jpg
    55.7 KB · Views: 9
  • IMG950958.jpg
    IMG950958.jpg
    80.7 KB · Views: 12
  • IMG950956.jpg
    IMG950956.jpg
    94.6 KB · Views: 51
  • IMG950993.jpg
    IMG950993.jpg
    71.6 KB · Views: 16
  • 0220141709.jpg
    0220141709.jpg
    44.3 KB · Views: 122

Half-breeder

"Edit" button removed
Messages
1,686
Reaction score
9
NICE! :thumbsup:

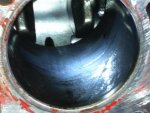
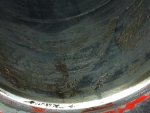
crosshatch looks great, how much did you have to remove, if I may ask?

'sid

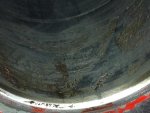
Bored +.020 and honed right at .0020(I think). I cant take credit for the crosshatching(I shake too much...) machine did everything...the machine wasnt 'designed' to do cylinders at an angle... the 'hardest' part was setting up the level on the base... used ALOTTA clamps!:thumbsup:
 

Half-breeder

"Edit" button removed
Messages
1,686
Reaction score
9
Well, got it all back together(visually looks same... just newer lookin)... After fuel got to the bowl... she fired right up! The insert/end cap I put on the muffler quieted things down at idle... and gives it more trumpeting reverb at WOT. Speaking of WOT... I aint done it yet... too afraid! I hit my old top speed and rpm... and it keeps climbing... powerfully!!! Gonna do a speedometer test here soon... but can guarentee Im faster now! I redesigned my seat to protect me if the belt on the TC should snap n oil flinage from the chain. If its clear enough tomorrow I take pics/vid.

Anyone know where to get a #41 chain 12T sprocket for a TAV2(the narrow ones w/ the built in 1/4 key)? 3/4" shaft... I think.
 

Half-breeder

"Edit" button removed
Messages
1,686
Reaction score
9
This one?
http://www.bmikarts.com/TAV-Replacement-Sprocket-C-Type_p_1421.html

Oh, don't do WOT or any full load just yet,
you need to break the engine in,
for the piston rings and cylinder wall to get to know each other ;)

'sid

Thats the one.. Ty.

Did that yesturday... 2 gals 93 octain fuel... 5.5-6 hrs n 3 adjustments to the carb... oil changed(synthetic 10w40)... retorqued all outerr bolts... mounted on kart today. I still aint pushed 'hard', but did notice the front wheel lifted up alil upon take off(probly will do a wheely if/when I key lock the other wheel n getta bigger chain#/sprockets)... (scarey:stir:).

The #35 chain gear pops upon takeoff(gonna need a bigger chain#).
 
Status
Not open for further replies.
Top